How to Diagnose and Resolve Common Memory Issues on a Dell Laptop
Summary: The following article provides information about what memory issues can be seen on your Dell Laptop. Learn how to troubleshoot and resolve them on your laptop.
Instructions
Table of Contents:
How to Troubleshoot Memory Issues Dell Laptop
Duration: 00:03:13 (hh:mm:ss)
When available, closed caption (subtitles) language settings can be chosen using the CC icon on this video player.
Troubleshoot Laptop Memory
This article provides information about memory problems on your Dell laptop and how to troubleshoot and resolve them. Troubleshooting memory breaks down into three sections:
- Diagnostics
- Hardware
- Software
The common types of memory errors are:
Startup issues with memory error codesSystem does not startup due to memory failureSystem is running slow due to memory issue


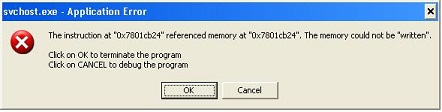
The laptop is running slow, stops responding, or is unresponsive, and reports STOP errors
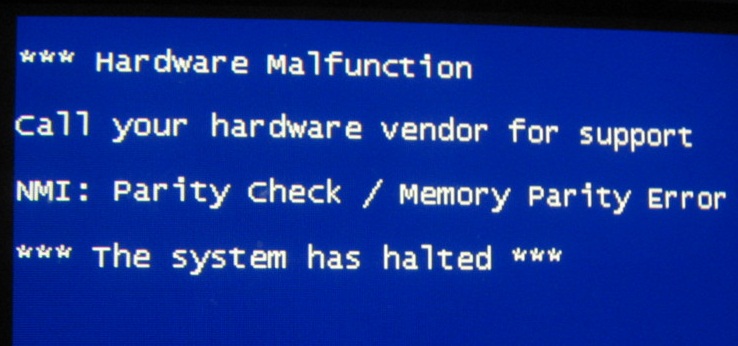
On-screen error messaging about memory stops, overruns, size, or read issues

Issues installing software or Operating Systems (operating system)
This article is a General Overview that can go into a bit more detail on the specific troubleshooting recommended for a particular fault.
Diagnostics
If you have a desktop move to the following guide:
- Dell Knowledgebase Article: How to Diagnose and Resolve Common Memory Issues on a Dell Desktop
-
Check if the enhanced Pre-Boot System Assessment (ePSA) Diagnostics can run.
With the laptop turned off, hold down the Fn key and the power button simultaneously. Alternatively, tap rapidly at the F12 key as the laptop boots and select Diagnostics from the memory that appears. A Diagnostic Boot Selected message should appear in the top right-hand side corner of the screen.
Note:- When online, you can run a memory-specific diagnostic, browse to the Online Memory Diagnostics page.
Note:
- The test starts automatically.
- You may be prompted to install or update the SupportAssist program, if so, follow the prompts.
- The test may take 10 to 15 minutes depending on the hardware in your laptop.
- You can also run diagnostics from our support site:
- "Quick test": This test of your hardware may take 10 to 15 minutes depending on the hardware in your laptop
- "Full Test": This is an in-depth test. This may take 40 minutes or more depending on the hardware in your laptop
- Custom Component Test - Select one or more specific hardware tests that you want to run
To run a specific test, perform the following steps:
- Browse to the "Dell Support" website.
- You are given three options to identify your laptop.
Either:
- Touch or click the listing for your laptop under THIS PC.
Note: When there is no listing for your laptop under THIS PC, you can touch or click Download and Install SupportAssist. It automatically identifies your laptop for you. Follow the prompts to download and install SupportAssist.
- Enter the Service Tag, Dell Product ID, or Model, and then touch or click the Search button, and select your laptop from the list.
- Touch or click Browse all products: You must select the type of device you have, the brand name, and then the product model.
Note: For more information, see Dell Knowledge Base Article: How to Find the Product Model of your Dell Computer
- Touch or click the listing for your laptop under THIS PC.
- Touch or click the DIAGNOSTICS tab.
- Under Custom Component Test, touch or click Select individual components.
- Touch or click to check the box next to one or more components you want to test.
- Touch or click the Run Your Test, and follow the prompts.
- When online, you can run a memory-specific diagnostic, browse to the Online Memory Diagnostics page.
-
The laptop runs through about 15 to 20 minutes worth of hardware self-checks. When these complete it asks if you want to run the further memory tests which can take over 30 minutes. Run the further memory tests if the ePSAs pass.
-
If all tests pass, then you want to go to the software troubleshooting.
-
If they fail, then take a note of the error code and go to the next step.
-
-
If you have an error code, then you want to check the guide below. It tells you if you can run the newer advanced diagnostics on your laptop. These diagnostics identify the fault to a small outline dual in-line memory module (SoDIMM) or slot in your laptop.
-
If the diagnostics are possible and you have updated to them on your laptop. Contact your support with the results of the diagnostics to take this further.
-
If the diagnostics are not possible for your laptop or you are unable to update to them. You want to go to the hardware troubleshooting.
Note: You can submit the Service Tag, ePSA error and validation code at the SupportAssist enhanced Pre-Boot System Assessment Check page, to learn how to proceed. -
Troubleshoot Hardware
The concept behind troubleshooting hardware memory is simple. It comes down to part substitution and access to known good working parts.
All laptops with removable memory have access to the memory through the base of the unit. Either the bottom panel comes off or there is a removable hatch cover. You can find the specific methods for your laptop in the Service Manuals and User Guides for your Dell Laptop.
-
If you are experiencing a No Power-On Self-Test (POST) situation, the first step is to remove the memory altogether from the laptop. Does the fault change?
-
If yes then go to Step 2.
-
If it does not, then you want to follow the No POST Guide below.
-
-
-
Yes, then swap the known good memory with the memory from this unit and see where the fault goes. Contact your support representative and take this further with them.
-
No, go to the next step.
-
-
Most laptops currently ship with one or two memory modules. Most typically it is two because most memory is designed to work better in matched pairs. Regardless of how many modules you have, the next step is the same. Take one SoDIMM and test it in either memory socket. Note the results and do the same thing with the second SoDIMM if you have one. Does the issue change depending on which SoDIMM or which socket is in use?
-
Yes, if the fault follows a SoDIMM or stays with a particular slot on the motherboard, then you have identified the fault. The good news is that you can run the machine with reduced memory until you have got in touch with your support to report the fault.
-
No. Is the fault the same, regardless of which SoDIMM or which slot the memory is fitted to? Then either the fault is not with the memory or both the memory and the slots are faulty. This is why Dell Technologies suggest carrying out step 2. Contact support to take this further.
-
Troubleshoot Software
Software troubleshooting steps for memory issues are brief and mostly deal with virtual memory instead of physical memory.
-
You can run further memory diagnostics in windows. There are several well-known tests to pick from such as Memtest. However, the results from the ePSA diagnostics are best. Especially as the ePSAs incorporate the Memtest diagnostics in its tests. If you get an error from third-party diagnostics, it would require checking that they are compatible. Dell Technologies would also need the key to the third-party error codes. You would be better to skip this and move to the next step.
-
To rule out a virtual memory fault, you can check a couple of quick things on your laptop. The first is to confirm that windows is handling your virtual memory? Go to the control panel and performance in the hardware window and check your settings. Reset it if needed. Confirm which partition the virtual memory is being allocated from? The laptop assigns space on your Hard Drive to swap memory from your physical memory. The information is at the same place that you confirm that the laptop is handling the memory. Check that partition and ensure that at least 6 GB to 10 GB is free on that partition. Most paging files are only 2 GB to 4 GB, but if the laptop is handling this it can change the size as needed. Once you have set this, test the laptop to see if the fault returns. If it does go to the next step.
- Virtual Memory:
-
If your laptop lacks the random access memory (RAM) required to run a program or operation, Windows uses virtual memory to compensate
Virtual memory combines your physical RAM with temporary space on your hard disk. When RAM runs low, virtual memory moves data from RAM to a space called a paging file. Moving data to and from the paging file frees up RAM to complete its work.
The more RAM your laptop has, the faster your programs and applications run. If a lack of RAM is slowing your laptop, you might be tempted to increase virtual memory to compensate. However, your laptop can read data from RAM more quickly than from a hard disk, so adding RAM is a better solution.
-
You can monitor the memory usage through Task Manager and event log exceptions. This would let you track if there was a particular program, process, or device that coincided with the errors. Alternatively is your memory usage high? If you can get into the windows environment to monitor these, then it cuts down on the number of issues you must check. There is a link below to a jump page with how-to guides on these methods for each of the different operating system's.
-
If Task Manager shows high memory usage, you may need more memory as not enough is installed to do all the work you want to do on your laptop. This means replacing the original memory SoDIMM with a larger-capacity SoDIMM that you have purchased. More info can be found in:
-
If Task manager shows that the issue is with the operating system, a program or with a process. You can use a free third-party malware checker. If the problem continues, then restore or reinstall your version of the operating system to resolve the issue.
-