Article Number: 000200388
My Dellアプリケーションをダウンロードしてインストールする方法
Summary: この記事では、Windows向けMy Dellアプリケーションをダウンロードしてインストールする方法について説明します。
Article Content
Instructions
対象製品:
- My Dell
My Dellは、主要なDellアプリケーションと機能を1つのユーザー インターフェイス(UI)に一元化することで、コンピューター エクスペリエンスを向上させます。
システム要件:
- オペレーティングシステム:
- Windows 10 v17134.0以降
- プラットフォーム:
- Inspiron
- Gシリーズ
- XPS
- Vostro
Warning: My Dellアプリケーションをインストールする前に、Dell Power Managerをアンインストールする必要があります。
My Dellをインストールするには、次の手順を実行します。
- [Install](インストール)をクリックします。

図1: (英語のみ)[Install]をクリック
注:コンピュータがインストールに対応していない場合、インストールボタンは表示されません。
- インストールしたら、[Open]をクリックします。

図2:(英語のみ)[Open]をクリック
- データ共有に同意する場合は[Yes]、同意しない場合は[No Thanks]をクリックします。
![[Help Improve My Dell]画面](https://supportkb.dell.com/img/ka06P000000cJSHQA2/ka06P000000cJSHQA2_ja_3.jpeg)
図3:(英語のみ)[Help Improve My Dell]画面
- My Dellアプリケーションのチュートリアルを視聴するか、または[Skip]をクリックします。
![[Congrats on your new Dell]画面](https://supportkb.dell.com/img/ka06P000000cJSHQA2/ka06P000000cJSHQA2_ja_4.jpeg)
図4:(英語のみ)[Skip]をクリック
- [Register]UIで、次のいずれかを実行します。
- 登録情報を入力し、[ALL DONE]をクリックします。
- [REMIND ME LATER]をクリックします。
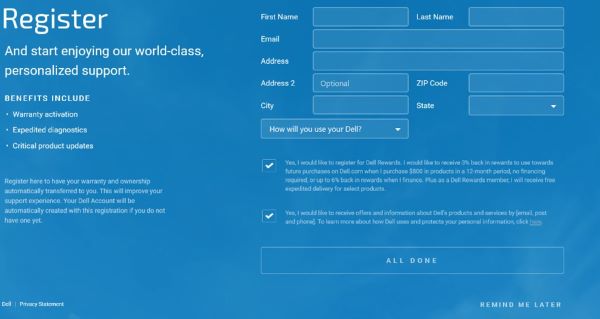
図5:(英語のみ)[Register]画面
- [UPDATE]をクリックして、最新の製品機能を有効にします。
![[Update Available]画面](https://supportkb.dell.com/img/ka06P000000cJSHQA2/ka06P000000cJSHQA2_ja_6.jpeg)
図6:(英語のみ)[UPDATE]をクリック
注:My Dellのユーザー存在検知機能を有効にする方法については、「My Dell 2.0ユーザー プレゼンス検出」を参照してください。
Additional Information
推奨記事
ここでは、このトピックに関連した役立つ可能性のある推奨記事をいくつか紹介します。
Article Properties
Last Published Date
27 Nov 2023
Version
8
Article Type
How To