文書番号: 000141980
Getting started with the Dell Venue 7 and Venue 8 tablets
文書の内容
現象
Table of Contents:
This article provides information on how to get started on your Dell Venue 7 and Venue 8 tablets.
1: Getting Started With the Dell Venue 7 and Venue 8 Tablets
To turn on the Dell Venue 7 or Venue 8 tablet, just press and release the power button found on the top right of the device. The tablet is designed to be used vertically with the webcam window at the top. After pressing the power button, wait several seconds for the "Intel Inside" logo to appear. It will take a few seconds longer for the Dell logo to appear and shortly after that, you will reach the Android operating system desktop.
Screenshots appear here in English. On your tablet, they will appear in the language you select.
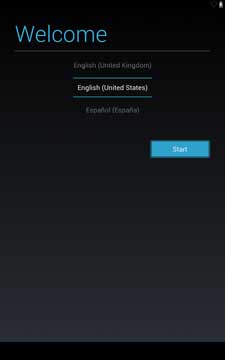
- Start on the Welcome screen where you will be asked to choose your language.
- If you have a Venue 7, you will be prompted to insert your microSIM card at this time. The microSIM card and microSD card can be inserted by opening the card slot cover on the right side of the tablet. If you have a Venue 8, skip to step 3.

- Choose the wireless network you wish to use from the list shown on the screen. If the network is secure, you will need to enter your network password using the virtual keyboard.
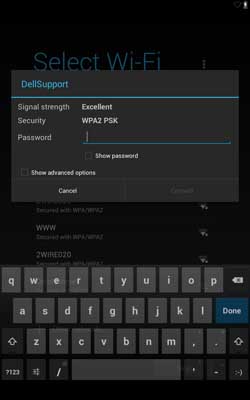
If you do not have a wireless network available, you will be asked to enter a user name but will not be able to download and install any apps at this time.
- You will now be prompted to log into your Google account or to set one up if you do not have one. A Google account will allow you to use Gmail, the Play Store, Play Music, Play Books, Google+ and other features. Here are some important things to know about your Google account:
- The user name on your Google account will be the same as your Gmail address.
- A Google account is needed to access the Play Store, Play Music, Play Books, Google+ and other features.
- If you already have a Google account, you should use that account to set up your tablet during your initial setup.
- If you don't have a Google account, you can set up your email account during initial set up, or if you already clicked 'Skip' during setup, then you can go into the device Settings to set up an account, or click on any Google app icon.
- If you have multiple Gmail accounts, you can switch between them in the Gmail app at any time.
- Using the icon for "Mail" (as opposed to Gmail), you can set up other email accounts on your device. You will need to know the account settings and may need to coordinate with the IT managers for the mail server.
Find out more here about what features are available with a Google account.
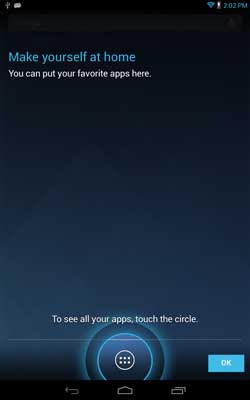
- Your tablet is now ready to use.
If you require further assistance or wish to give us feedback, please engage our technical team on Twitter.
文書のプロパティ
影響を受ける製品
Venue 3730, Venue 3736, Venue 3830
最後に公開された日付
10 4月 2021
バージョン
3
文書の種類
Solution