Article Number: 000149636
How Do I Configure the LUNs on My Dell | EMC® 4700 Array? - Training Information - 179267
Article Content
Symptoms
| Article Summary: | This article provides information on "How Do I Configure the LUNs on My Dell | EMC® 4700 Array?". |
Table of Contents:
- Create a RAID group in Navisphere
- Bind LUNs
- Assign LUNs to hosts by creating storage groups
| Issue 1. | Create a RAID group in Navisphere |
- In the Navisphere Storage tab, right-click the array and select Create RAID Group.
- Under Disk Selection: click to select the Manual radio button and then click the Select button. (Figure 1)
The Disk Selection window appears.
Figure 1 - Manual Radio Button - Using the Select From: drop-down menu (Figure 2), click to select the enclosure you would like to use.
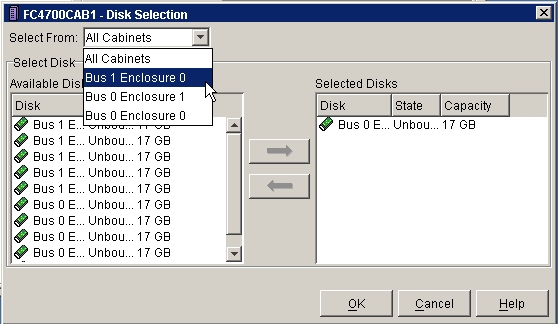
Figure 2 -Select Enclosure - Click to highlight the disks you would like to use in the RAID group and click the picture of the right arrow button to move them to the Selected Disks pane (Figure 3).
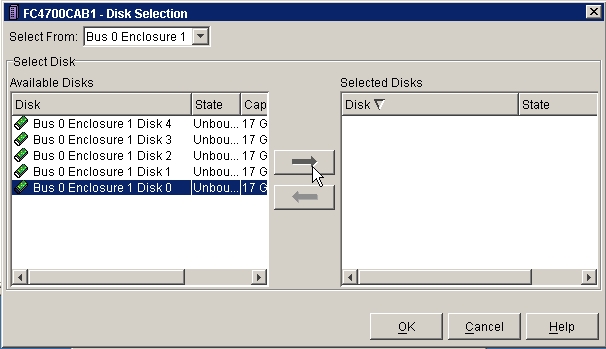
Figure 3 - Disk Selection - Click the OK button.
The Create RAID Group window appears. - Click the Apply button. (Figure 4
The Confirm: Create RAID Group window appears.
Figure 4 - Create RAID Group - Click Yes to initiate the create RAID group operation.
The Success: Create RAID Group window appears. - Click OK.
The Create RAID Group window appears. (Figure 5)
Figure 5 - Create RAID Group - Return to step 2 to create additional RAID groups or click Cancel to exit.
| Issue 2. | Bind LUNs |
- In the Navisphere Storage tab, right-click the array and select Bind LUN (Figure 1).
The Bind LUN window will open.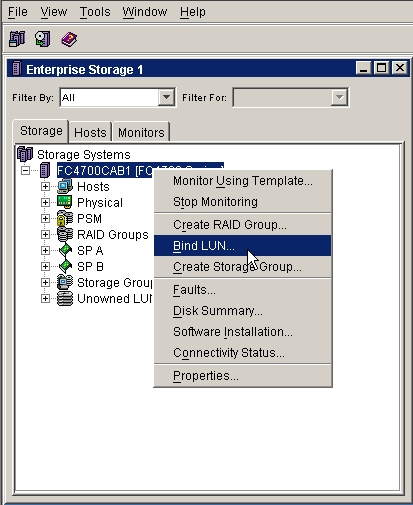
Figure 1 - Navisphere Storage Tab - Use the RAID Type: drop down box to select the RAID type of the LUN.
- Use the RAID Group for new LUN: drop down box to select the RAID group to bind (Figure 2).

Figure 2 - Select Raid group - Make any necessary changes to the LUN properties (Figure 3) and click Apply.
The Confirm: Bind LUN dialog box will open.
Figure 3 - LUN properties - Click the YES button to bind the LUN.
The Message: Bind Lun window will open, reporting the bind operation was initiated successfully. - Click the OK button.
The Bind Lun Window will reopen. - Return to step 6 to bind additional LUNs or click Cancel to exit.
| Issue 3. | Assign LUNs to hosts by creating storage groups |
- In the Navisphere Storage tab, right-click storage array on the Storage tab (Figure 1) and select Create Storage Groups.
The Create Storage Group window opens.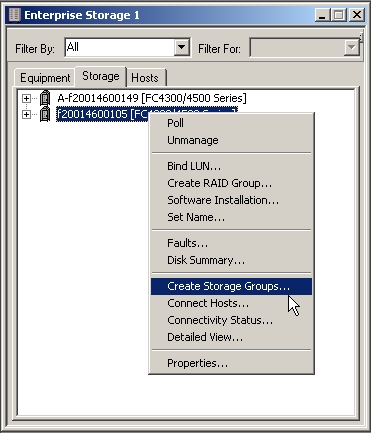
Figure 1 - Navisphere Storage Tab - Type the name of the storage group in the Storage Group box.
- To add a LUN to the storage group, highlight a LUN, and use the right arrow button to move it to the Selected LUNs pane. (Figure 2)

Figure 2 - Assign a LUN to the Storage Group - Repeat step 3 to assign additional LUNs.
- Click the Connect Hosts button.
The Connect Hosts to Storage window opens.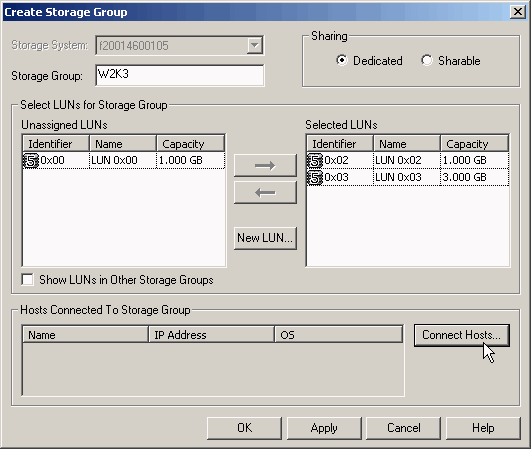
Figure 3 - Connect Hosts - To assign a storage group to a host, highlight a host in the Available Hosts pane and use the down arrow button to move the host to the Hosts to be Connected pane. (Figure 4)
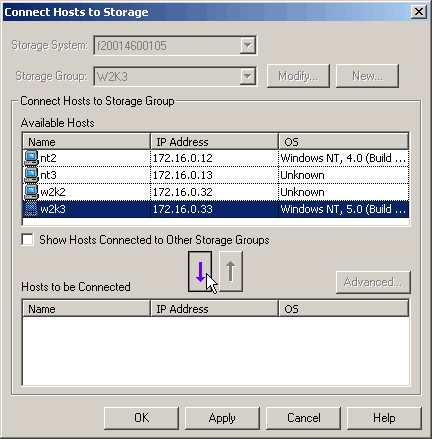
Figure 4 - Connect Hosts - Click the OK button.
- Click the Apply button and then the OK button.
The Create Storage Group Warning dialog box opens. - Click the YES button. (Figure 5)
The Create Storage Group confirmation dialog box opens.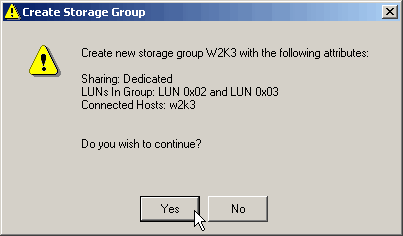
Figure 5 - Create Storage Group Warning - Click the OK button. (Figure 6)
The Storage Group is now created and assigned to a host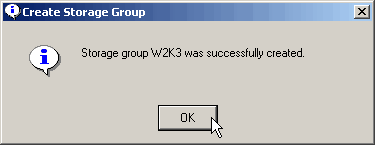
Figure 6 - Create Storage Group Confirmation
Article Properties
Last Published Date
21 Feb 2021
Version
3
Article Type
Solution