How to Install Ubuntu and Windows 8 Through Windows 11 as a Dual Boot on your Dell Computer
Summary: This article takes you through installing Ubuntu as a dual boot on a Dell computer with a Windows 8 through Windows 11 operating system.
This article applies to
This article does not apply to
This article is not tied to any specific product.
Not all product versions are identified in this article.
Instructions
Table of Contents:
- You want to Dual Boot your computer with Ubuntu and a Windows OS?
- Things to know and check before you start an install
- Windows must be the First Boot on the Hard Drive
- Setting up the Install Partitions
- Installing Ubuntu as the Second Operating System
- Configuring the Boot Order
You want to Dual Boot your computer with Ubuntu and a Windows operating system?
This guide takes you through how to set up your computer to dual-boot Ubuntu and Windows.
NOTE: If you install an operating system other than the operating system running on your computer, then you do so at your own risk. Dell cannot certify that the hardware is compatible and we cannot support the computer in that configuration. This article is provided as information for those customers who want to dual-boot, but it is carried out at your own risk.
Where Windows is already installed on your computer, or you install windows first before installing Ubuntu.
It is recommended that a Windows operating system should be installed first. Windows does not include Non-Microsoft operating systems in its boot-menu. Installing windows can also affect any information already on your Hard Drive.
This article deals with recent Windows Operating Systems. (Such as Windows 8, Windows 8.1, Windows 10, and Windows 11.)
Have you checked that your computer type is one of those Canonical certified for Ubuntu?
-
If not, then go to the Canonical site
and confirm that Canonical and Dell supports your model for Ubuntu.
-
If you have and it is supported on this list, then carry on.
NOTE: If your computer did not ship with Ubuntu, and you have an issue that requires Technical Support Assistance to resolve. You may be asked to return the computer to the condition it shipped from Dell and advise if the issue continues at that point. If it does not, then there would be limited support possible at that point. This guide talks about Windows 8 through to Windows 11 alongside any version of Ubuntu since Ubuntu 16.04 was released.
Things to know and check before you start an install
There are three things that you must consider before you start an Ubuntu Install:
- To check the type of hardware that you are trying to install to?
- To check the type of BIOS settings that you need for your install?
- To check what version of Ubuntu that you are looking to install?
What type of Hardware are you installing to and does it change how you go about your install?
The type or format of your storage media can affect how you would go about installing Ubuntu on your computer. You can install on one of the new M2 cards. You can install on a standard Serial ATA (SATA) hard disk drive. You can install on the same SATA hard disk drives set in an Intel Matrix RAID configuration. Check that the computers hardware allows you to make the install you need.
NOTE: USB 2.0 and older removable media devices are not supported on computers using the new Intel SkyLake Processors. The Chipsets for the CPUs no longer support the USB 2.0 Hub.
What BIOS settings do you need for your Unified Extensible Firmware Interface (UEFI) install?
NOTE: Be Aware the latest generation of Dell computers has dropped Legacy support from their BIOS.
The difference between Legacy and UEFI BIOS setups can be the difference between an install succeeding or failing. Follow the information below:
Press the F2 key on start up to enter the BIOS. Ensure that the BIOS is set to UEFI, and disable the Legacy option ROMS and disable the secure boot.
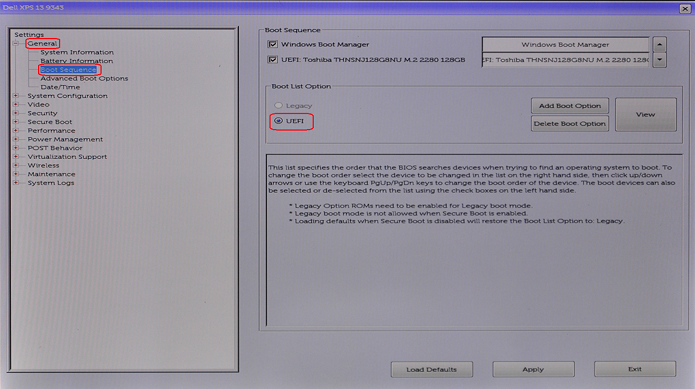
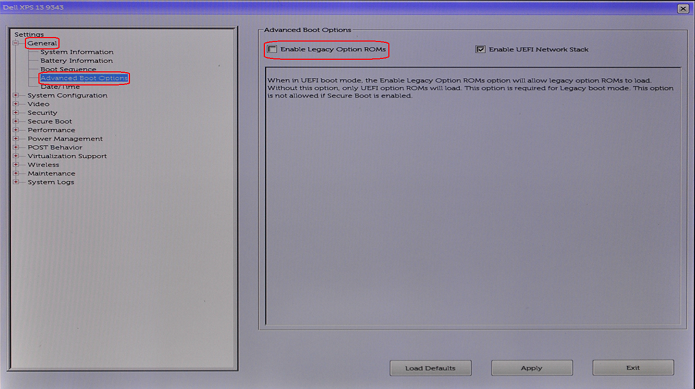
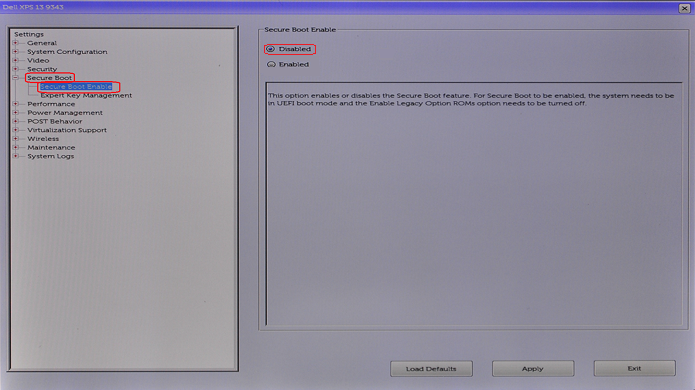
NOTE: Not every Dell BIOS has the same appearance and the page names may change depending on the model type. However, these general instructions work on any Dell BIOS that supports an Ubuntu install.
Which version of Ubuntu are you looking to install?
Ubuntu as with any other operating system is constantly looking to improve and better its usage and performance. What is different with Ubuntu is that you have the option of two updates at any time:
- The first is the most recent Long-Term Support (LTS) release.
-
This update is available every two years and Canonical supports it with updates for five years. It is considered a tested and stable build.
- The second is the most recent Normal release.
-
This update is available every 6 months and Canonical supports updates for 9 months. These normal releases are considered to be cutting-edge but can have issues because of this. Testers and developers use this type of build.
If you are looking instead to upgrade to a new version of Ubuntu, then check out the article that is linked below:
NOTE: There have been reports that certain Windows setups using the Rapid Storage Technology (RST) driver can cause issues during the install. You can find out more from Canonical on the following link:
Windows must be the First Boot on the Hard Drive
Windows must be installed first.
Where Windows is not already installed, use one of these guides on the link below. It shows the correct install guide for the Operating System that you are using:
NOTE: Remember: While setting up your boot partition in the Windows Setup, partition the Hard Drive to leave space for the Ubuntu install later on. This saves you a lot of time and effort later on. Remember whenever you work on your operating system it is best practice to have a recent backup, in case something goes wrong.
Windows is already installed.
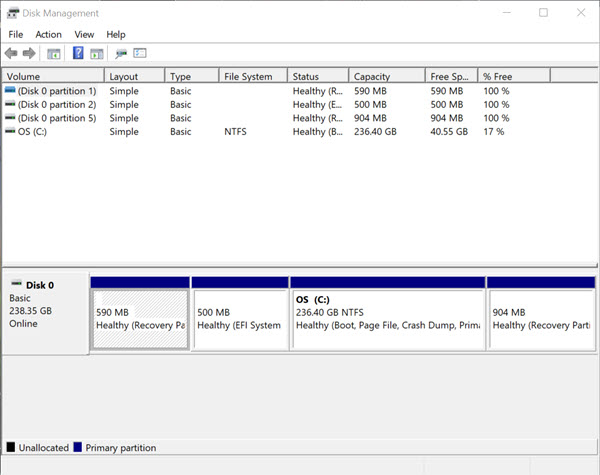
Most computers come with a version of Windows that is already installed and it takes up the whole hard drive. The Windows partition must be shrunk. This frees space for the Ubuntu partition.
Setting up the Install Partitions
-
It is best to do this step from within the windows operating system.
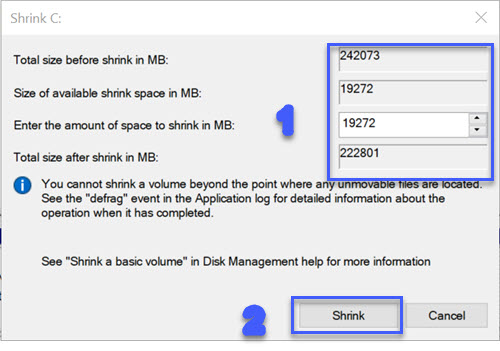
Windows 11, and Windows 10
Use Disk Management:
-
Open the Disk Management with administrator rights.
-
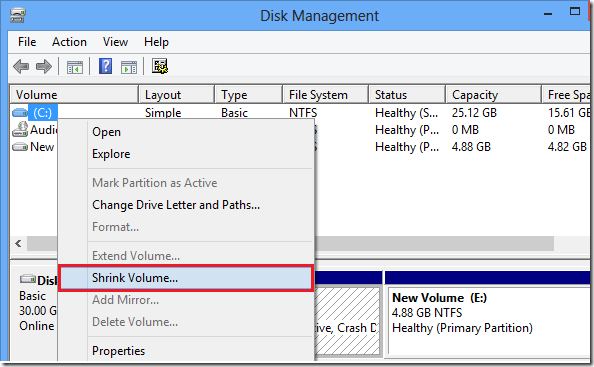
Select the Volume (partition) you want to shrink and click Action from the task bar.
-
Select all tasks and then Shrink Volume from the action menu.
-
Select the correct amounts for your computer and click Shrink.
Windows 8.1 and Windows 8
Use Disk Management:
-
Press the Win+X keys at the Home Screen.
-
Select Disk Management on the menu that appears.
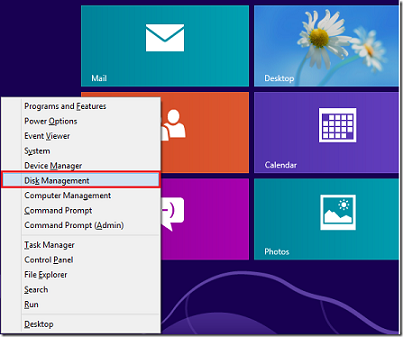
-
You right-click the partition and select Shrink Volume and follow the instructions on-screen.
NOTE: Do not create a partition for Linux here. The Ubuntu Install deals with this.
NOTE: If you have resized the windows boot partition and cannot boot windows, then you can use the Windows Recovery tools to fix it. See here for guides on this.
-
Once you have sufficient Unallocated Space on the Hard Drive, then it is straightforward to install Ubuntu as the second operating system. You want to boot from your Ubuntu DVD or USB drive.
-
Ensure you are logged in as an Administrator and check if Fast Startup is disabled. (This can affect whether GRUB can pick up your Windows installation at a later stage.)
-
Open the Control Panel. (The windows key + X is a shortcut on all recent versions.)
-
Open the Power Options.
-
Select Choose what the power button does.
-
Select Change settings that are currently unavailable.
-
Ensure that the box marked Turn on Fast Startup (Recommended) is disabled.
-
Installing Ubuntu as the Second Operating System
Follow the steps indicated below to install Ubuntu on your Dell computer and configure the BIOS to use grubx64.efi (Required for normal operation):
-
Have you got a copy of the latest DVD or USB installation media from Canonical? These include the latest updates and fixes for this operating system. (You may want to use a third-party application like Rufus
NOTE: Dell does not recommend or support applications like Rufus. Third-party applications are used at your own risk.
-
Tap rapidly on the F12 key at the Dell splash screen on startup. It brings up and Boot Once menu. Using the Cursor or Arrow Keys, select your method of boot and press the ENTER key.
-
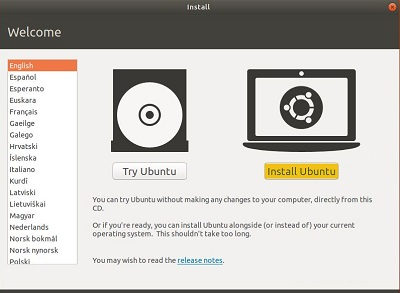
When the setup boots, choose the Try Ubuntu option. This option checks that your hardware is seen OK by Ubuntu.
-
When you are ready to proceed, click the Install Ubuntu button. The install wizard appears and prompts you through some choices.
-
Select your install language and click Continue.
-
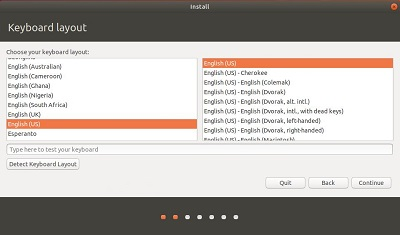
The Keyboard layout window appears. Select the correct keyboard layout for your computer and click Continue.
-
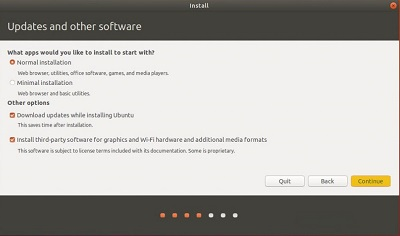
The Preparing to install Ubuntu window appears. Choose the applicable options and click Continue.
-
If you do not have a wired connection plugged in, the install takes you through setting up a wireless Wi-Fi connection.
-
The Installation Type window appears. Several options are available.
-
If you want to Dual Boot install Ubuntu alongside other Operating Systems, read the guide below before you select the Install Ubuntu alongside Option. Go to step 14.
-
If you want to install Ubuntu over your entire hard drive, click Erase Disk and Install Ubuntu. Then select the Hard Drive that you want to install Ubuntu onto. You want to read the guide below for more information.
-
Installing Ubuntu on your Dell Computer
NOTE: As stated this erases all data and computers that are on the disk.
-
-
If you want to manually set-up the various partitions on the Hard Drive, read the guide below before you select the Something Else option.
-
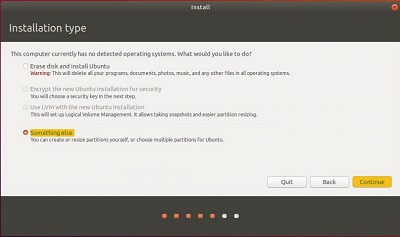
-
During installation you are asked How do you want to partition the disk?
-
In the setup, choose to install the operating system to either:
-
The largest available free space
-
Down as Resize IDE1 control, partition #1 (hda1) and use freed space
-
Choose the size of the new partition as a percentage of the Hard Drive and click Forward.
-
Go on with the Install.
-
-
Select a partition that you have already created for Ubuntu.
-
Marked down as Manually edit partition table.
-
Select the partition that you want from the list that is provided and press Enter.
-
Click Size then ENTER and Yes and ENTER again.
-
Choose the size in Gigabytes and press ENTER.
-
-
-
You can create further partitions if you use the guide below.
NOTE: You require at least 20 GB for your Ubuntu install Partition.
-
Select Finish partitioning and write changes to disk.
-
Click Install Now. From this point, you cannot cancel the installation.
-
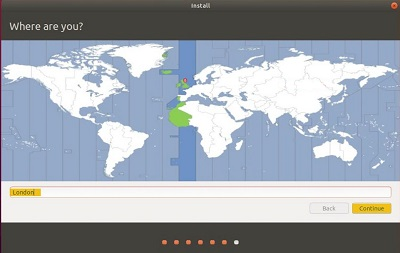
You must set up a few configuration settings. The Where are you? Window appears next.
-
Select the location closest to where you are on the map or enter it into the text box and click Continue.
NOTE: If you are unsure what your layout is, you can now select the Detect Keyboard Layout button for help.
-
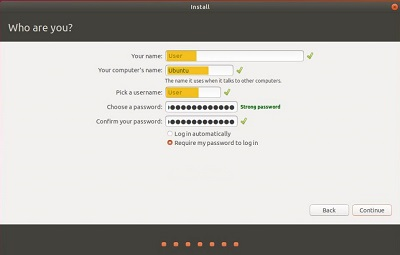
The Who are you? Window appears. This is where you enter your information.
-
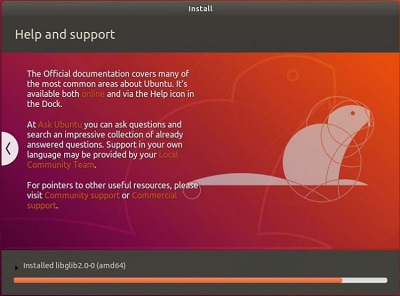
While the operating system installs, the screen scrolls through different screenshots. They give you further information about the Ubuntu revision you are installing on your computer.
-
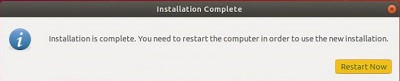
When the install wizard finishes, you get the Installation is complete message window up. Click Restart Now to restart your computer.
The computer reboots into the GRUB menu and sits for 10 seconds while you choose which Operating System you want to boot with. (For example: Any Ubuntu version since Ubuntu 16.04, or Windows 8 through to Windows 11.)
Ubuntu is set as the default operating system to boot to. That means if you press the Enter key or wait out the 10 seconds, it boots straight to Ubuntu.
Once Ubuntu finishes loading, login in with the username and password you set. Since version 16.04, Ubuntu automatically provides NT File System (NTFS) support. That means you can access information and files from the Windows partitions by clicking the Windows Volume.
If you want to change to the windows installation, reboot the computer and choose the windows partition from the GRUB menu.
You can go to the guide below for some initial setup information:
NOTE: If you have completed the installation and there are any issues, the easiest and quickest resolution is to run the install again.
Additional Information
NOTE:
Canonical provides additional software support through the following methods:
Canonical provides additional software support through the following methods:
Dell provides Technical Support: Contact Us
 Out of warranty? That is not a problem. Browse to the Dell.com/support website and enter your Dell Service Tag and view our offers.
NOTE: Offers are only available for US, Canada, UK, France, Germany, and China personal computer customers. Server and Storage users are not applicable.
Affected Products
Inspiron, Latitude, Vostro, XPS, Fixed WorkstationsArticle Properties
Article Number: 000131253
Article Type: How To
Last Modified: 22 Jul 2025
Version: 20
Find answers to your questions from other Dell users
Support Services
Check if your device is covered by Support Services.