Capture Dell Trusted Device Telemetry with Microsoft Intune
Summary: Need to configure Microsoft Intune for Dell Trusted Device? Our clear guide helps you set up quickly for enhanced security and control.
This article applies to
This article does not apply to
This article is not tied to any specific product.
Not all product versions are identified in this article.
Instructions
Affected Products:
- Dell Trusted Device
Affected Versions:
- v3.8 and Later
Affected Platforms
- OptiPlex
- Latitudes
- Precision Workstations
- XPS
Note: Prerequisite: The process below references scripts that are available for download from the Dell Trusted Device support page. Download Trusted Device Agent Scripts from the Dell Trusted Device Drivers & Downloads page before continuing.
Create the custom script
- Log in to your organizations Microsoft Intune portal
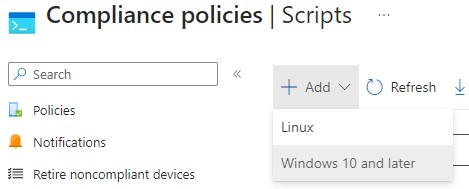
and go to Endpoint Security > Device Compliance > Scripts > Add > Windows 10 and later.
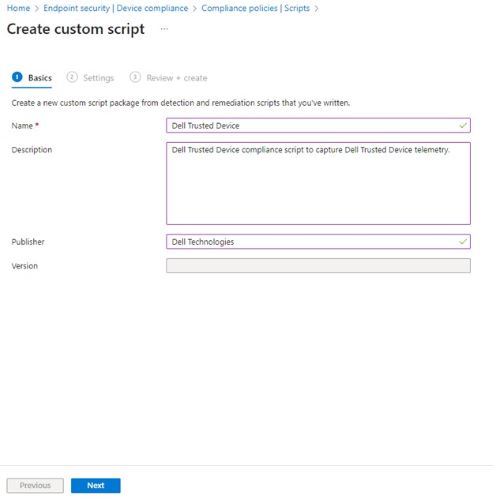
- Provide a Name for the custom script and click next.
- Locate the Trusted Device Agent Script downloaded from the prerequisite steps in this article and extract the .zip file. Right-click the
Get-TrustedDeviceResults.ps1file and Open with Notepad.
 Note: Alternatively, you can use the keyboard shortcut Ctrl + A to select all the text in the script.
 - In Notepad click Edit and then, click Select all.
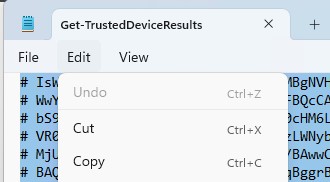 Note: Alternatively, you can use the keyboard shortcut Ctrl + C to copy all the highlighted text.
 - Back in the Microsoft Intune console window Right-click in the Detection Script area and select Paste.

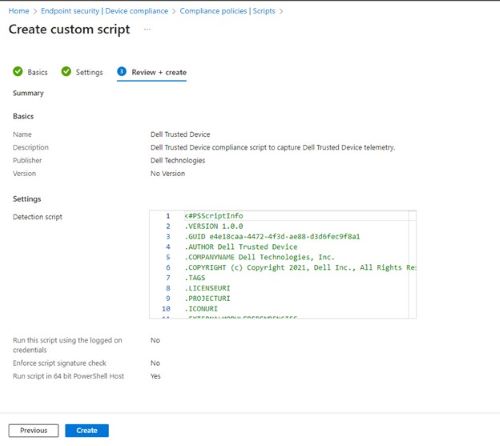
- Set Run this script using the logged on credentials to No.

- Set Enforce script signature check to No.

- Set Run script in 64-bit PowerShell Host to Yes.

- At the bottom of the page, Click Next.

- On the Review + create screen review your configuration and click Create.
Create the Compliance Policy
- Log in to your organizations Microsoft Intune portal
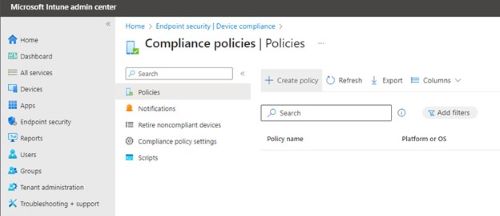
- In the Create a policy tab, select Platform Windows 10 and later and Profile type Windows 10/11 compliance policy. Then click create.

- Provide the Windows 10/11 compliance policy name and click Next.
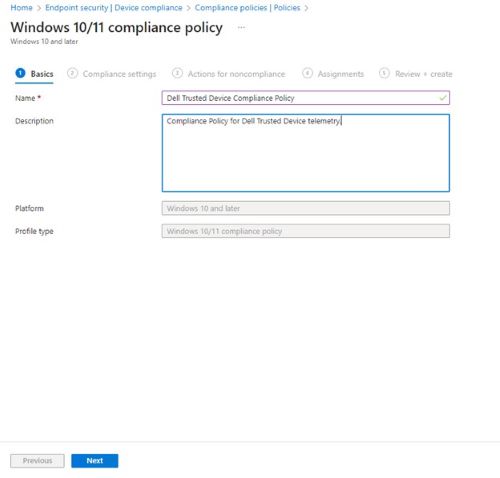 Note: Optionally, you can provide an expanded description for the policy.
 - On the Compliance settings screen, click Custom Compliance to expand the settings.
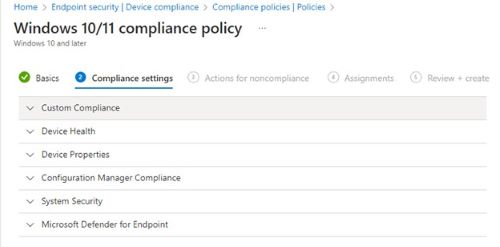
- Set Custom compliance to Require.

- For Select your discovery script, click to select and search for the script previously created the custom script (step 2) and then click Select.
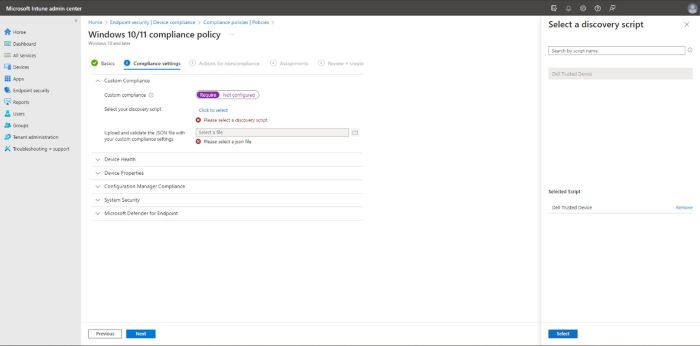
- For Upload and validate the JSON file with your custom compliance settings, click the Folder icon to launch file explorer and browse to where you extracted the prerequisite files. In the File Explorer, select the
TrustedDeviceComplianceRules.jsonfile and click Open.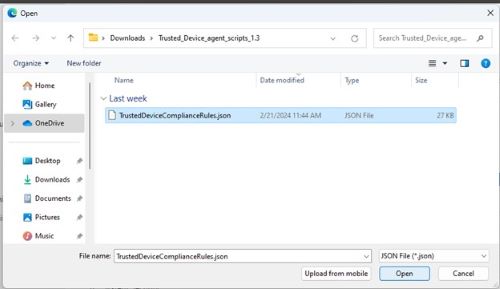
- Review the compliance settings and then click Next.
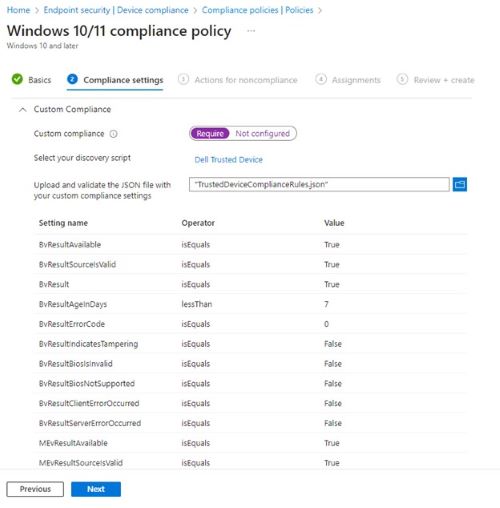
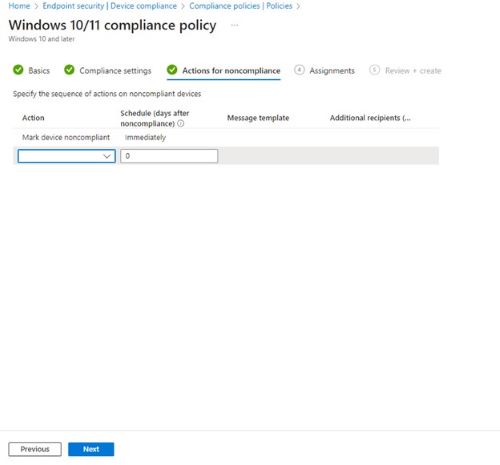
- On Actions for noncompliance set any additional noncompliance sequences you would like to happen and then click Next.
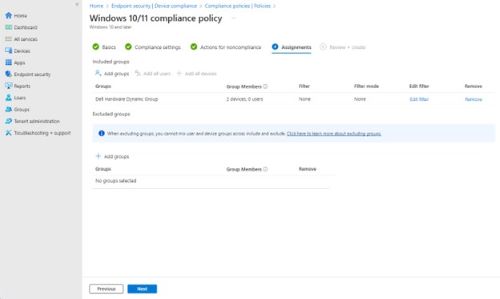
- On Assignments click Add Groups and on the Select groups to include tab locate your custom group for Dell devices and click the checkbox next to them. Then click select.
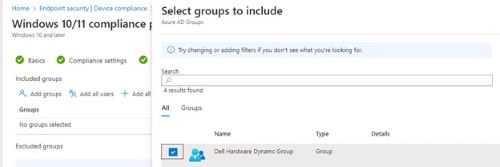 Note: If you do not have a group already created you can reference, Create a group to manage users
 - On the Windows 10/11 compliance policy page, confirm that your group was added and click Next.
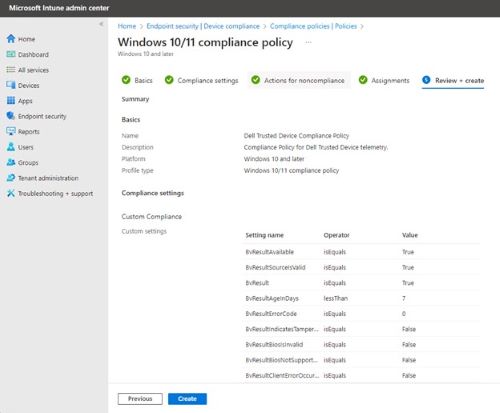
- On the Review + create page review the configuration and click Create.
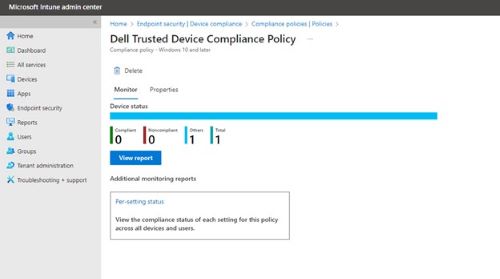
- The compliance policy configuration is now complete, Intune starts collecting data based on the script and compliance values. To see compliance status, you can return to Endpoint Security > Device compliance > Compliance Polices > Compliancy Policy Name created in Step 3 and click View Report.
Affected Products
OptiPlex, XPS, Latitude, XPS, Workstations, Dell Trusted DeviceArticle Properties
Article Number: 000222830
Article Type: How To
Last Modified: 15 يوليو 2026
Version: 4
Find answers to your questions from other Dell users
Support Services
Check if your device is covered by Support Services.