How to Replace a hard drive (HDD or SSD) in Nutanix on an XC or XC Core node
Summary: xc, nutanix, hard drive, hdd, sdd, replace, remove, add
Instructions
This document describes how to replace a physical hard drive (HDD or SSD) on an XC or XC Core node.
Note : NVMe (PCIE SSDs) follow a different procedure. 1) Identify the hard drive in question - Prism should show the disk as Red, Alerts should have the disk information, or it can be obtained from the ~/data/logs/hades.out log file.
Prism -> Hardware -> Diagram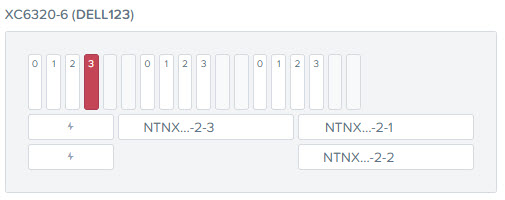
(Picture shows an offline disk in slot 3 for the first node in a XC6300 chassis. Only 3 nodes are populated in the chassis)
 Caution: If the drive has not completely failed, you must wait for data migration to complete. Select the disk for removal. Select Remove Disk. Wait for data migration to complete. In the hardware diagram view, verify that the disk is marked red and is unmounted. If you physically remove a disk before data migration is complete, the data is not correctly replicated to the replacement drive.
2) Once the drive has been identified, physically remove it from the server : For more instructions on how to physically remove a hard drive, please refer to the server's Service Manual located at http://www.dell.com/XCSeriesManuals
3) After removing the failed disk insert the replacement disk into the same slot.
4) Wait 1-2 minutes and look at the Tasks page in Prism to see if it automatically detects the drive. If it does, it will automatically add the drive without any additional intervention.
5) If the drive is not automatically added back into the cluster, navigate back to the Hardware -> Diagram page, click on the drive in question and then click on Repartition and Add (middle-right portion of the screen).
6) Verify drive has been added successfully to the cluster : The drive slot should turn back to white, you can click on the drive, and it will say that it is Online.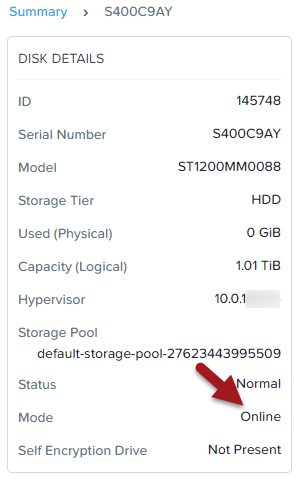
Additional Steps for Hyper-V 2012 R2 Clusters :
7) Verify Data Reseliency has a GREEN OK on the main page in Prism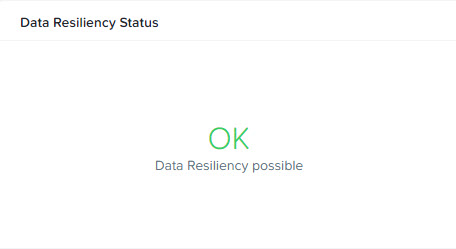
8) Ensure all cluster services are UP
b)
$ cluster status | grep -v UP
$ cvm_shutdown -P now
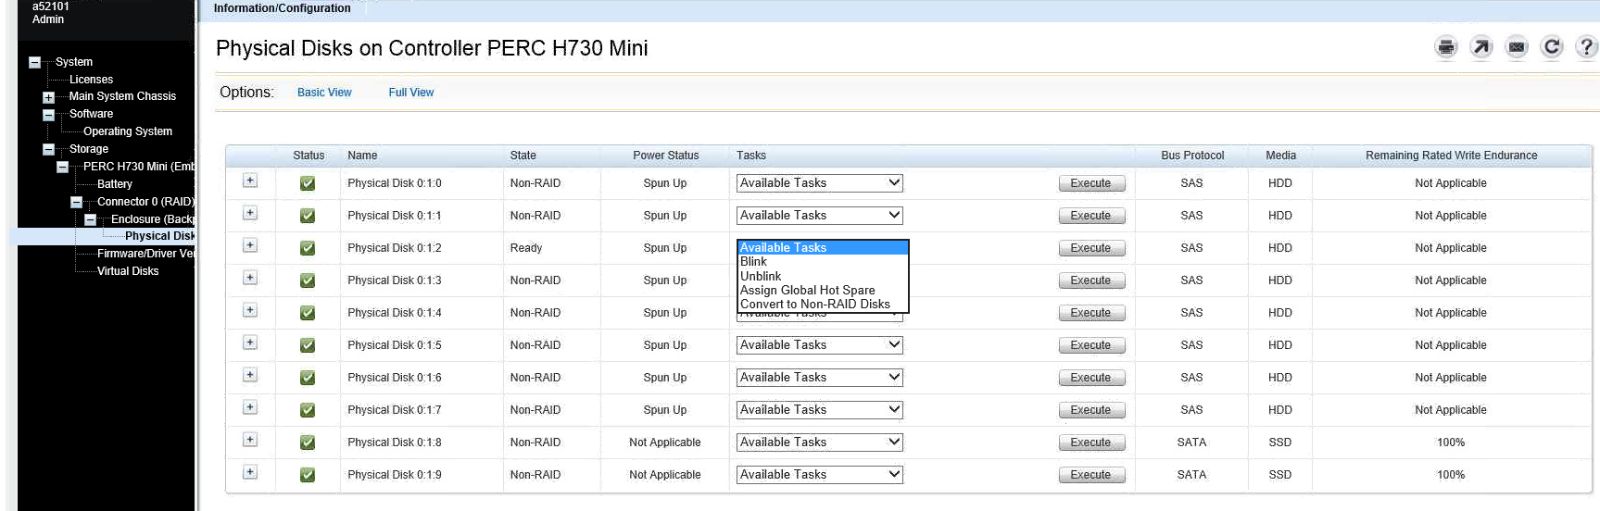
10) If the server has a PERC H730, verify the disk is set to "Non-RAID" in the iDRAC :
11) Power the CVM back on via Hyper-V Manager
12) Go back to Step #5 to verify disk is back into the cluster
13) Open Disk Manager in Windows on the node in question
14) Verify that the replacement disk is initialized, if not, initialize the disk
15) Mark the disk as offline -- do not attempt to format the disk with a partition
16) Repeat steps #7 - 9
17) Power the CVM back on via Hyper-V Manager