PowerEdge: Assign and Unassign Hot Spare in System Setup in the PERC Controller
Summary: This article provides the information of how to assign or unassign a global dedicated hot spare for a hard drive.
This article applies to
This article does not apply to
This article is not tied to any specific product.
Not all product versions are identified in this article.
Instructions
This article provides the information of how to assign or unassign a global dedicated hot spare for a hard drive.
- A dedicated hot spare is assigned to only one virtual disk on the controller.
- A Global hot spare is assigned to all virtual disks on the controller.
- See the Dell PowerEdge RAID Controller manual for more information.
Table of Contents
- Going to Dell PERC configuration utility
- Assign a global hot spare
- Assign a dedicated hot spare
- Unassign a hot spare
Going to the Dell PERC configuration utility
Perform the following steps to boot to the Human Interface Infrastructure (HII) configuration utility:
- Turn on the system.
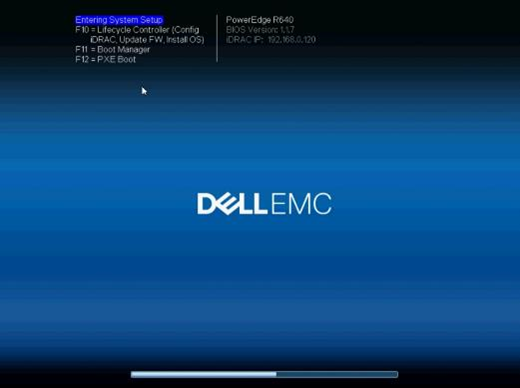
- When the system starts up, press F2 to enter System Setup.
- Click Device Settings, all RAID controllers in the system list in the Device Settings screen.
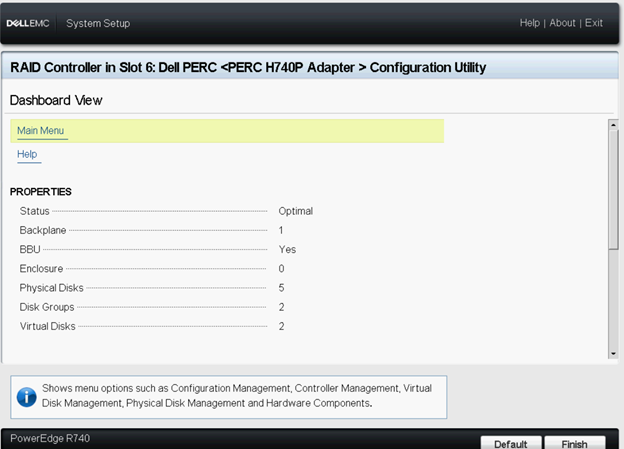
To access the main menu for the controller, use the arrow keys or the mouse.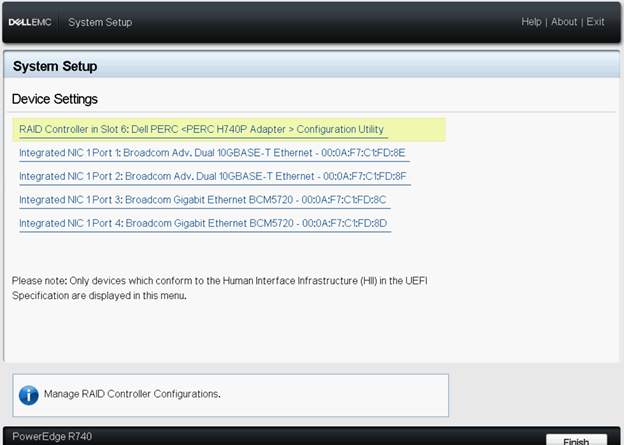 |
|
Note: For more information in all the options, click Help that is available on the upper right corner of the browser screen. Help information for individual option menus can also be viewed by scrolling down on each option.
Assign a global hot spare
To assign a global hot spare from the HII Configuration Utility, perform the following steps:
Note: The utility allows only disks of the same disk technology and of equal or greater size to be selected as dedicated hot spare.
- Enter the Dell PERC Configuration Utility. See Going to Dell PERC configuration utility.
- Click Main Menu > Physical Disk Management. The list of hard drives is displayed.
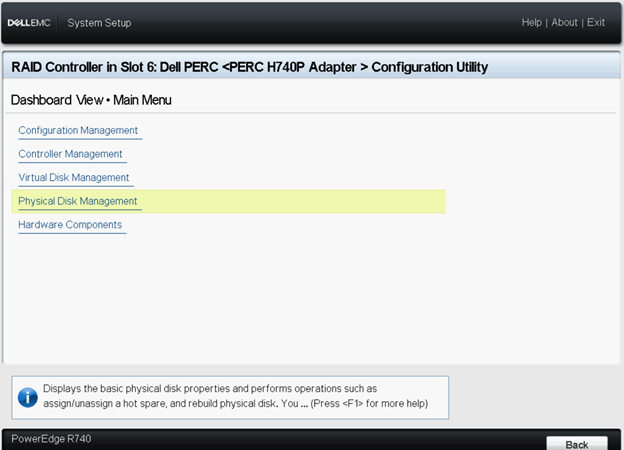
- Select the hard drive.
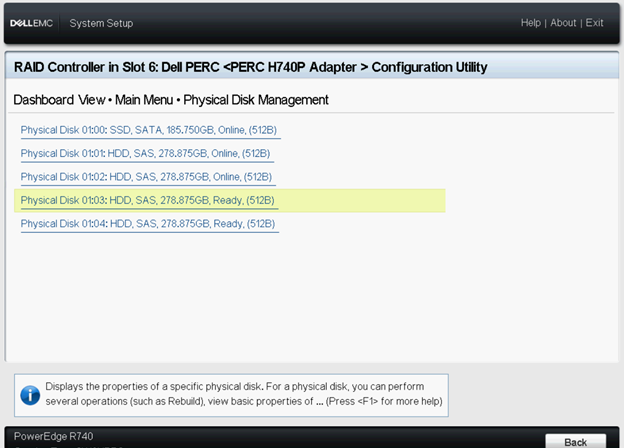
- From the Operations drop-down menu, select Assign Global Hot Spare.
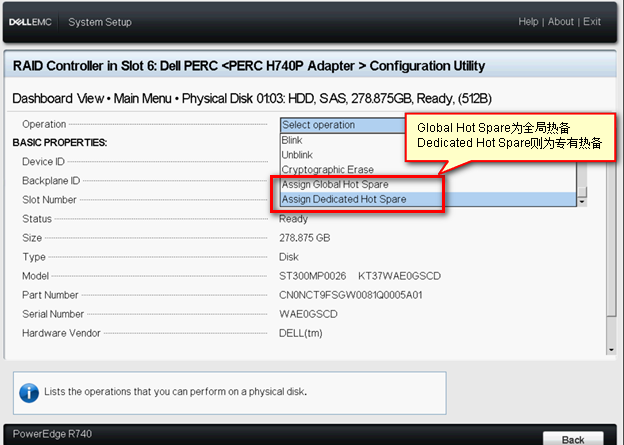
- Click Go. A screen is displayed asking if you are sure that you want to perform the operation.
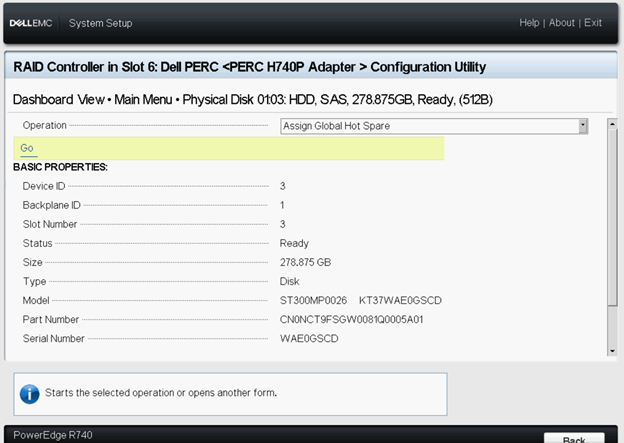
- Select the Confirm option.
- Click Yes. The global hot spare disk is created successfully.
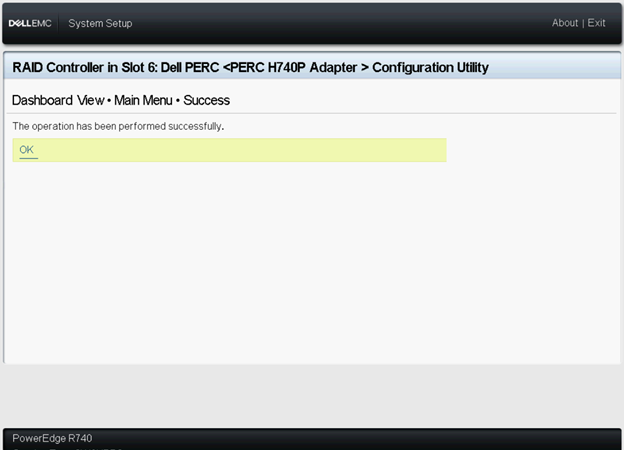
- You can check the status of the hard drive.
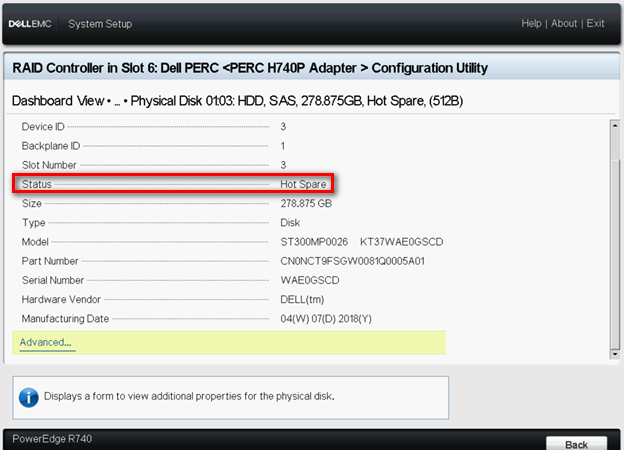
Assigning dedicated hot spare
To assign a dedicated hot spare from the HII Configuration Utility, perform the following steps:
Note: The utility allows only disks of the same disk technology and of equal or greater size to be selected as dedicated hot spare.
- Enter the Dell PERC Configuration Utility. See Going to Dell PERC configuration utility.
- Click Main Menu > Physical Disk Management. The list of hard drives is displayed.
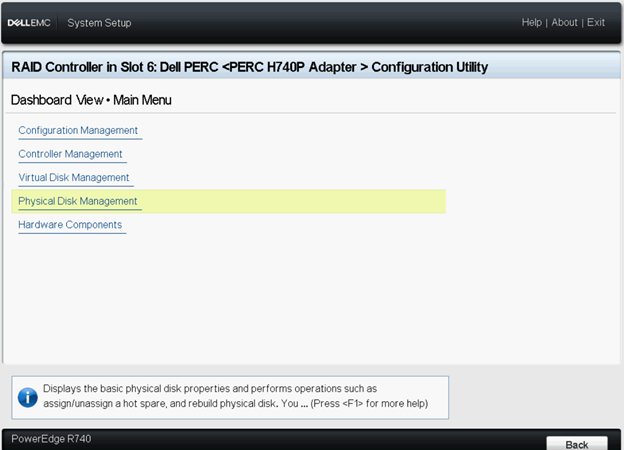
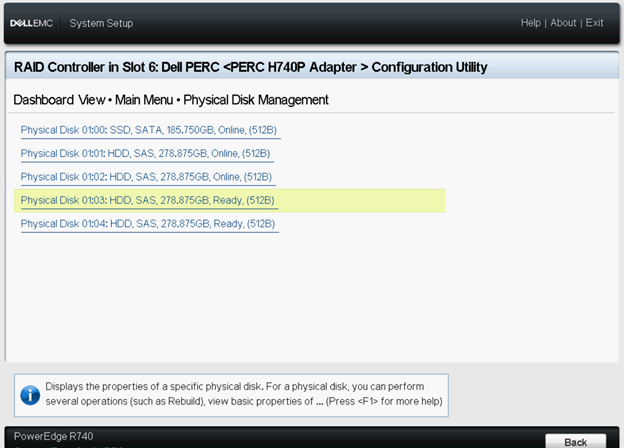
- Select the hard drive.
- From the Operations drop-down menu, select Assign Dedicated Hot Spare.
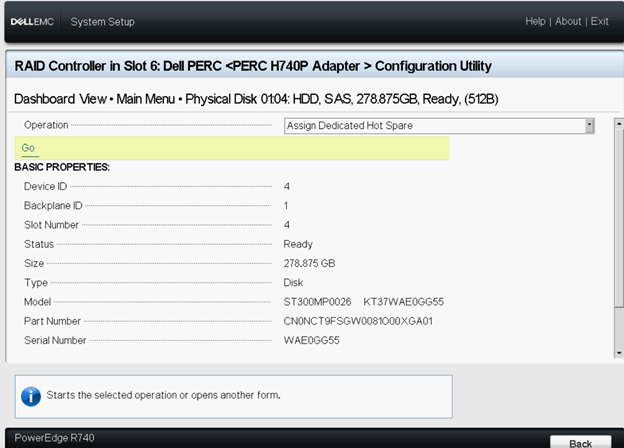
- Click Go. Select the associate virtual to the dedicated hot spare.
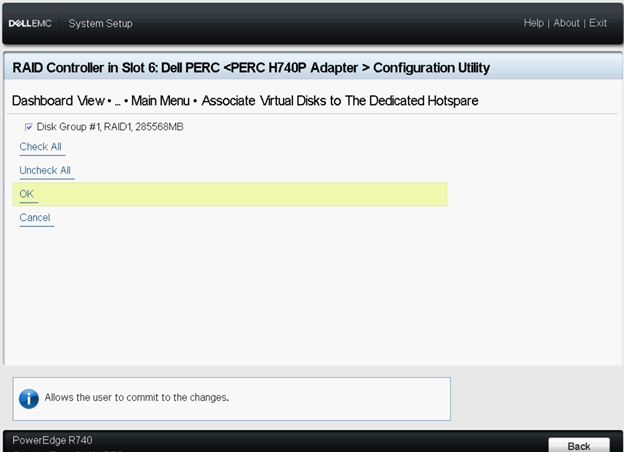
- Select the Confirm option.
- Click Yes. The dedicated hot spare disk is created successfully.
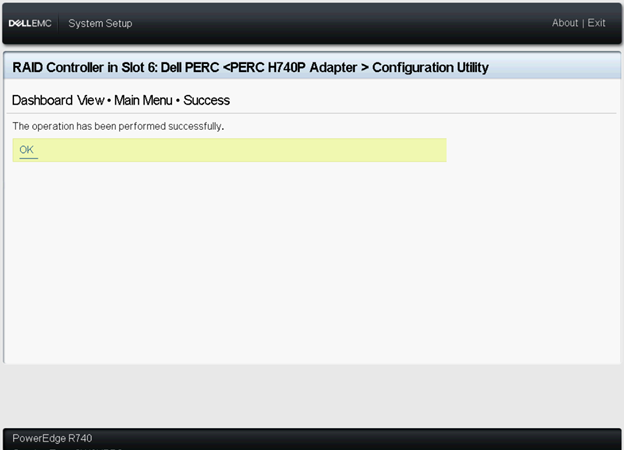
- You can check the status of the hard drive.
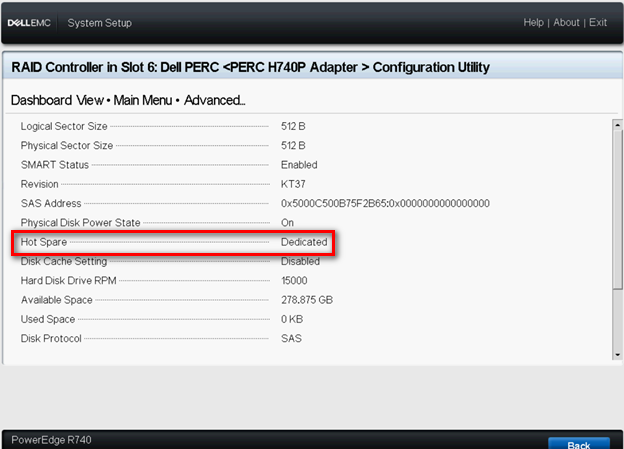
Unassign a hot spare
To unassign a hot spare from the HII Configuration Utility, perform the following steps:
- Enter the Dell PERC Configuration Utility. See Going to Dell PERC configuration utility.
- Click Main Menu > Physical Disk Management, and the list of hard drives is displayed.
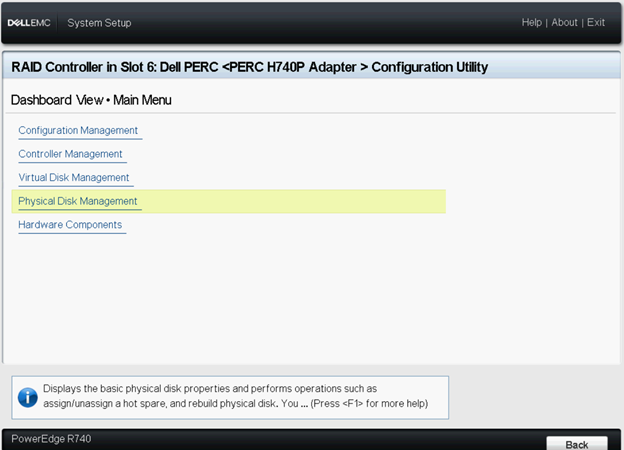
- Select the hot spare you want to unassign.
- From the Operations drop-down menu, select Unassign Hot Spare.
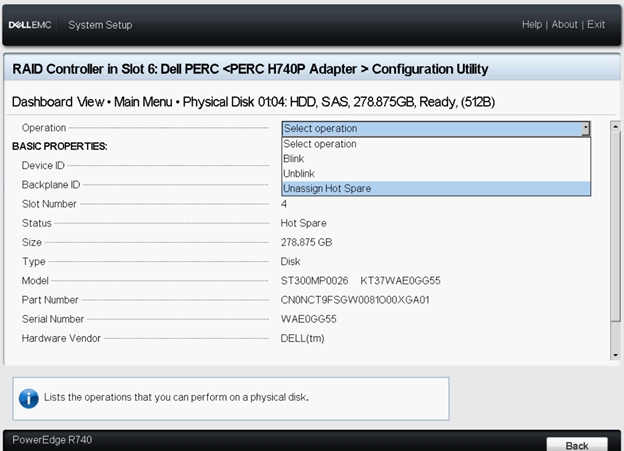
- Select the Confirm option.
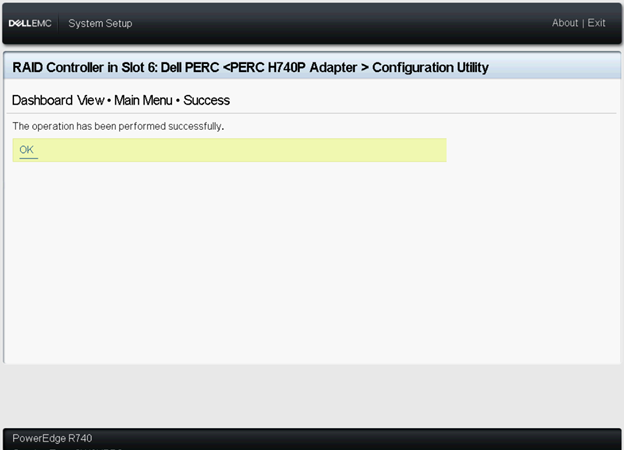
- Click Yes. The hot spare disk is unassigned successfully.
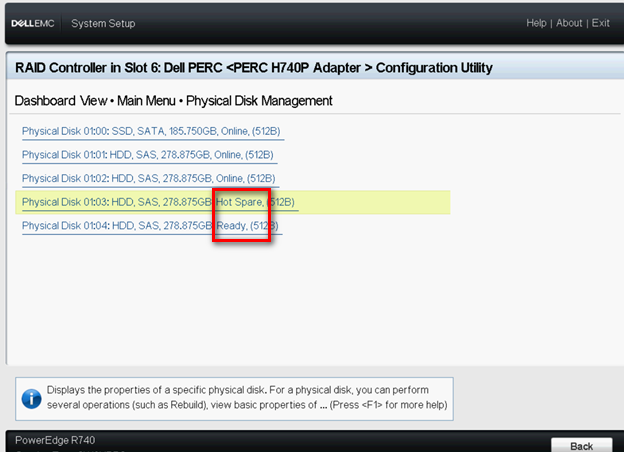
- You can check the status of the hard drive.
Note: Try to use hard drives of the same capacity in a specific virtual disk. If you use hard drives with different capacities in a virtual disk, all hard drives in the virtual disk are treated as if they have the capacity of the smallest hard drive.
Additional Information
How To Configure Hot Spare Drive On It PowerEdge Server.
Duration: 00:03:13 (hh:mm:ss)
When available, closed caption (subtitles) language settings can be chosen using the CC icon on this video player.
Affected Products
PowerEdge RAID Controller H345, PowerEdge RAID Controller H350 Adapter SAS, PowerEdge RAID Controller H355 Front SAS, PowerEdge RAID Controller H355 Adapter SAS, PowerEdge RAID Controller H365i Adapter, PowerEdge RAID Controller H365i Front DC-MHS
, PowerEdge RAID Controller H745, PowerEdge RAID Controller H745P MX, PowerEdge RAID Controller H750 Adapter SAS, PowerEdge RAID Controller H740P, PowerEdge RAID Controller H840
...
Products
PowerEdge RAID Controller H755 Adapter, PowerEdge RAID Controller H755 MX Adapter, PowerEdge RAID Controller H755N Front NVMe, PowerEdge RAID Controller H755 Front SASArticle Properties
Article Number: 000177797
Article Type: How To
Last Modified: 06 فبراير 2026
Version: 14
Find answers to your questions from other Dell users
Support Services
Check if your device is covered by Support Services.