DELL APEX Cloud Platform for Red Hat OpenShift: Change Cluster DNS Settings
Summary: Refer to this document to update the DNS settings in an OpenShift cluster.
Instructions
Prerequisites
- You must access the cluster as a user with the cluster-admin role.
- You must have a Red Hat Customer Portal account.
- A version of the OpenShift CLI (OC) tool that is the same as the OCP version.
- A laptop or the jump server to install the OC tool.
- Go to Red Hat OpenShift Container Platform Product Software
.
- Log in with your Portal account.
- Select appropriate OC version according to the OCP version.
- Scroll down and click Download Now based on your client operating system.
- Go to Red Hat OpenShift Container Platform Product Software
- Kubernetes NMState Operator 4.16.0 must be installed.
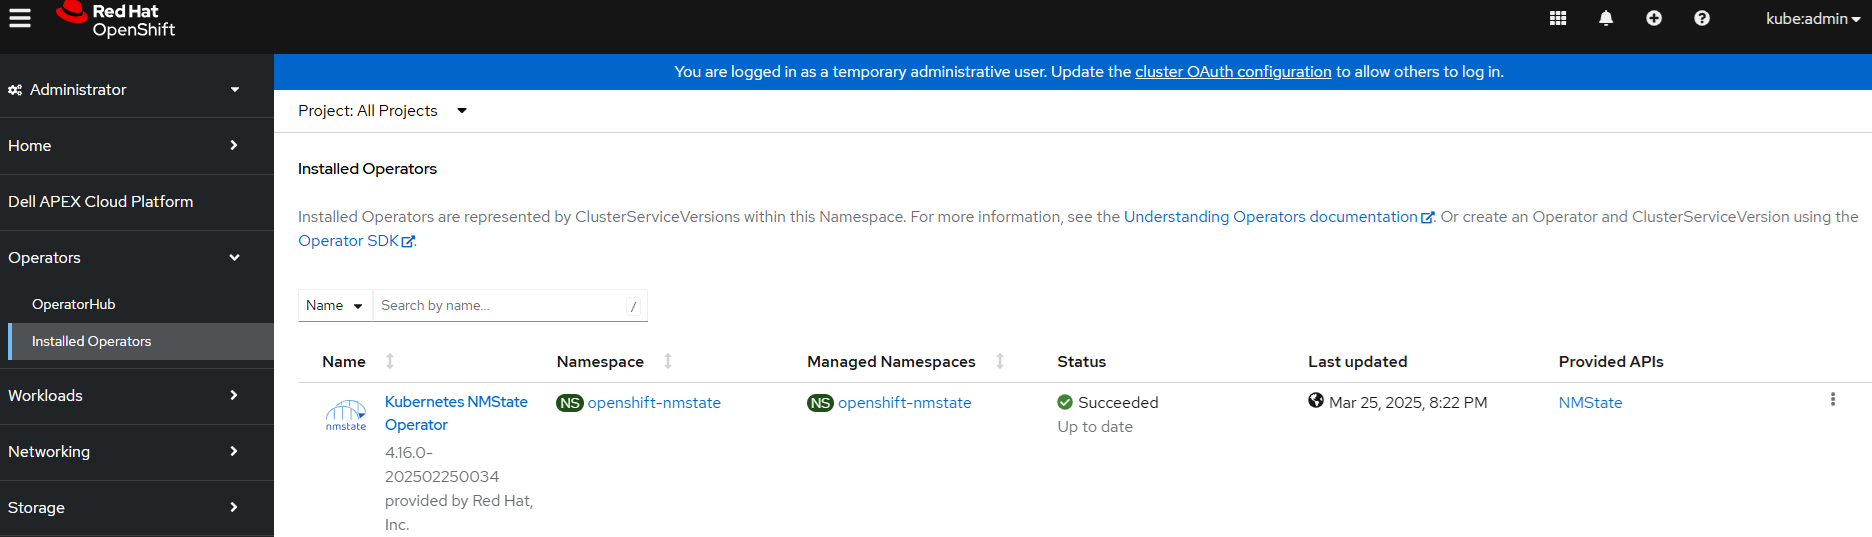
- Launch the web console of your Dell APEX Cloud Platform for Red Hat OpenShift.
- Select Operators → Installed Operators, search operators “nmstate” to check whether NMState Operator is installed.
3. If the NMState Operator is not installed and your cluster has internet access, follow Chapter 8: Configure OperatorHub on an Internet-Connected System in the Deployment Guide to configure OperatorHub. Then, proceed to Step 5.
4. If the NMState Operator is not installed and your cluster is on a restricted network, follow Chapter 8: Configure OperatorHub on a Restricted Network in the Deployment Guide to prepare kubernetes-nmstate-operator. Use kubevirt-hyperconverged as the operator name to set up both the NMState and Virtualization Operators in OperatorHub. Then, proceed to Step 5.
5. Follow the OpenShift Knowledgebase solution 'How to Install the Kubernetes NMState Operator' for installation instructions.
Steps
1. Log in to the cluster.
Run the following command to log in to the cluster using the OpenShift CLI (OC) tool from either your laptop or the jump server. Ensure <cluster_admin_username> has the cluster-admin role, and enter the password when prompted.
oc login https://api.<cluster_name>.<top_level_domain>:6443 -u=<cluster_admin_username>
2. Check current NodeNetworkState objects in the cluster.
2.1 Run the following command to list current NodeNetworkState objects in the cluster.
oc get nnsExample output:
mystic@mystic-vm:~$ oc get nns
NAME                     AGE
c3-esx01.rackg10.local   45h
c3-esx02.rackg10.local   47h
c3-esx03.rackg10.local   47h
c3-esx04.rackg10.local   47h
2.2 Run the following command to inspect a NodeNetworkState object and view the network configuration on the node. The output will display the current DNS settings under 'dns-resolver'.
oc get nns <node_hostname> -o yamlExample output:
mystic@mystic-vm:~$ oc get nns c3-esx01.rackg10.local -o yaml
apiVersion: nmstate.io/v1beta1
kind: NodeNetworkState
metadata:
  creationTimestamp: "2025-03-25T11:44:15Z"
  generation: 1
  labels:
    nmstate.io/force-nns-refresh: "1742984117342487473"
  name: c3-esx01.rackg10.local
  ownerReferences:
  - apiVersion: v1
    kind: Node
    name: c3-esx01.rackg10.local
    uid: 659cd517-6b59-4599-b3c3-91c5523fc275
  resourceVersion: "1328052"
  uid: d26ceea7-c1bb-4f18-8394-6b619ef2701d
status:
  currentState:
    dns-resolver:
      config:
        search: []
        server:
        - 20.100.10.8
      running:
        search: []
        server:
        - 20.100.10.8
    interfaces:
    - accept-all-mac-addresses: false
    ......
3. Update DNS settings using a NodeNetworkConfigurationPolicy (NNCP) manifest file.
3.1 Create a node-network-policy.yml file (NNCP manifest) defining the NodeNetworkConfigurationPolicy, which includes the DNS configuration changes.
apiVersion: nmstate.io/v1
kind: NodeNetworkConfigurationPolicy
metadata:
  name: modify-dns-servers
spec:
  nodeSelector: {} # Apply the policy to all nodes
  desiredState:
    dns-resolver:
      config:
        search:
          - example.com
          - example.org # Replace with your desired search domain(s)
        server:
          - 8.8.8.8 # Replace with your desired DNS resolver IP address(es
Example manifest file (node-network-policy.yml) to update DNS to '20.100.10.7' for all cluster nodes:
apiVersion: nmstate.io/v1
kind: NodeNetworkConfigurationPolicy
metadata:
  name: modify-dns-servers
spec:
  nodeSelector: {} # Apply the policy to all nodes
  desiredState:
    dns-resolver:
      config:
        search: []
        server:
                - 20.100.10.7
3.2. Apply the node network policy to update the DNS settings in cluster by running the following command.
oc apply -f node-network-policy.ymlExample output:
mystic@mystic-vm:~$ oc apply -f  node-network-policy.yml
nodenetworkconfigurationpolicy.nmstate.io/modify-dns-servers configured
4. Confirming node network policy updates on nodes
4.1. To confirm that the policy has been applied to the cluster, list the policies and their status:
oc get nncpExample output:
mystic@mystic-vm:~$ oc get nncp
NAME                 STATUS      REASON
modify-dns-servers   Available   SuccessfullyConfigured
4.2. Optional: If a policy is taking longer than expected to successfully configure, you can inspect the requested state and status conditions of a particular policy by running following command:
oc get nncp <policy_name> -o yamlExample output:
mystic@mystic-vm:~$ oc get nncp modify-dns-servers -o yaml
apiVersion: nmstate.io/v1
kind: NodeNetworkConfigurationPolicy
metadata:
  annotations:
    kubectl.kubernetes.io/last-applied-configuration: |
      {"apiVersion":"nmstate.io/v1","kind":"NodeNetworkConfigurationPolicy","metadata":{"annotations":{},"name":"modify-dns-servers"},"spec":{"desiredState":{"dns-resolver":{"config":{"search":[],"server":["20.100.10.7"]}}},"nodeSelector":{}}}
    nmstate.io/webhook-mutating-timestamp: "1742984115155498338"
  creationTimestamp: "2025-03-26T09:25:12Z"
  generation: 3
  name: modify-dns-servers
  resourceVersion: "1397345"
  uid: fd23a4a7-476d-44fc-b1b2-eb1c76c1cd99
spec:
  desiredState:
    dns-resolver:
      config:
        search: []
        server:
        - 20.100.10.7
  nodeSelector: {}
status:
  conditions:
  - lastHeartbeatTime: "2025-03-26T10:15:18Z"
    lastTransitionTime: "2025-03-26T10:15:18Z"
    message: 4/4 nodes successfully configured
    reason: SuccessfullyConfigured
    status: "True"
    type: Available
  - lastHeartbeatTime: "2025-03-26T10:15:18Z"
    lastTransitionTime: "2025-03-26T10:15:18Z"
    reason: SuccessfullyConfigured
    status: "False"
    type: Degraded
  - lastHeartbeatTime: "2025-03-26T10:15:18Z"
    lastTransitionTime: "2025-03-26T10:15:18Z"
    reason: ConfigurationProgressing
    status: "False"
    type: Progressing
  lastUnavailableNodeCountUpdate: "2025-03-26T09:25:21Z"
4.3. Optional: If a policy is taking longer than expected to successfully configure on all nodes, you can list the status of the enactments on the cluster:
oc get nnceExample output:
mystic@mystic-vm:~$ oc get nnce
NAME                                        STATUS      STATUS AGE   REASON
c3-esx01.rackg10.local.modify-dns-servers   Available   22h          SuccessfullyConfigured
c3-esx02.rackg10.local.modify-dns-servers   Available   22h          SuccessfullyConfigured
c3-esx03.rackg10.local.modify-dns-servers   Available   22h          SuccessfullyConfigured
c3-esx04.rackg10.local.modify-dns-servers   Available   22h          SuccessfullyConfigured
4.4. Optional: To view the configuration of a particular enactment, including any error reporting for a failed configuration:
oc get nnce <node>.<policy> -o yamlExample output:
mystic@mystic-vm:~$ oc get nnce c3-esx01.rackg10.local.modify-dns-servers -o yaml
apiVersion: nmstate.io/v1beta1
kind: NodeNetworkConfigurationEnactment
metadata:
  creationTimestamp: "2025-03-26T09:25:12Z"
  generation: 1
  labels:
    nmstate.io/node: c3-esx01.rackg10.local
    nmstate.io/policy: modify-dns-servers
  name: c3-esx01.rackg10.local.modify-dns-servers
  ownerReferences:
  - apiVersion: v1
    kind: Node
    name: c3-esx01.rackg10.local
    uid: 659cd517-6b59-4599-b3c3-91c5523fc275
  resourceVersion: "823259"
  uid: eae49147-1fbd-46e8-a2b7-0a8bfbec3201
status:
  conditions:
  - lastHeartbeatTime: "2025-03-26T10:15:17Z"
    lastTransitionTime: "2025-03-26T10:15:17Z"
    reason: SuccessfullyConfigured
    status: "False"
    type: Progressing
  - lastHeartbeatTime: "2025-03-26T10:15:17Z"
    lastTransitionTime: "2025-03-26T10:15:17Z"
    reason: SuccessfullyConfigured
    status: "False"
    type: Failing
  - lastHeartbeatTime: "2025-03-26T10:15:17Z"
    lastTransitionTime: "2025-03-26T10:15:17Z"
    message: successfully reconciled
    reason: SuccessfullyConfigured
    status: "True"
    type: Available
  - lastHeartbeatTime: "2025-03-26T10:15:17Z"
    lastTransitionTime: "2025-03-26T10:15:15Z"
    reason: SuccessfullyConfigured
    status: "False"
    type: Pending
  - lastHeartbeatTime: "2025-03-26T10:15:17Z"
    lastTransitionTime: "2025-03-26T10:15:15Z"
    reason: SuccessfullyConfigured
    status: "False"
    type: Aborted
  desiredState:
    dns-resolver:
      config:
        search: []
        server:
        - 20.100.10.7
  desiredStateMetaInfo: {}
  features:
  - static-dns-name-server
  - static-dns-search
  policyGeneration: 2
Additional Information
Related Red Hat OCP documentation:
- https://docs.redhat.com/en/documentation/openshift_container_platform/4.16/html/networking/networking-operators#k8s-nmstate-about-the-k8s-nmstate-operator
- https://docs.redhat.com/en/documentation/openshift_container_platform/4.16/html/networking/kubernetes-nmstate#k8s-nmstate-updating-node-network-config