How to Enable Display Stream Compression on Latitude, Precision and XPS
Zusammenfassung: This article explains how to enable Display Stream Compression (DSC) feature on Intel Tiger Lake.
Dieser Artikel gilt für
Dieser Artikel gilt nicht für
Dieser Artikel ist nicht an ein bestimmtes Produkt gebunden.
In diesem Artikel werden nicht alle Produktversionen aufgeführt.
Weisungen
Affected Products:
- Latitude 9520
- Latitude 9420
- Latitude 7x20
- Latitude 7320
- Latitude 5x21
- Latitude 5x20
- Latitude 3x20
- Latitude 3320
- Precision 7760
- Precision 7560
- Precision 5760
- Precision 5560
- Precision 3561
- Precision 3560
- XPS 17
- XPS 15
- XPS 13
- XPS 13 2-in-1
Steps to enable DSC:
- In the search box on the taskbar, type Device Manager. Then select Device Manager from the program list that is displayed. The Device Manager window should open and look similar to the example shown below:
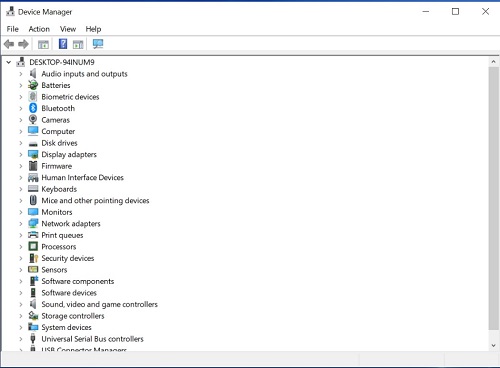
Figure 1: (English Only) Device Manager
- In the Device Manager, open the section Display adapters. This section displays which graphic card is in use by the computer.

Figure 2: (English Only) Display adapters
- Right-click the displayed graphic card and click Properties
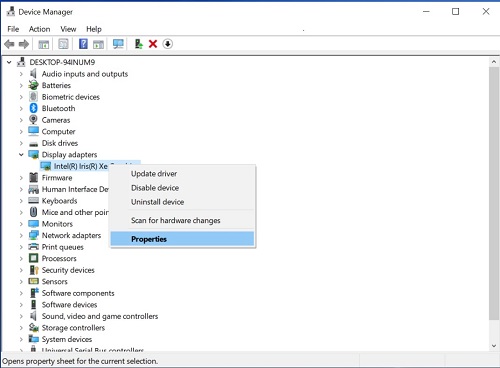
Figure 3: (English Only) Display card properties
- Click the Details tab, select Driver key in property drop-down Property. This displays which driver path is in use by the graphics card.
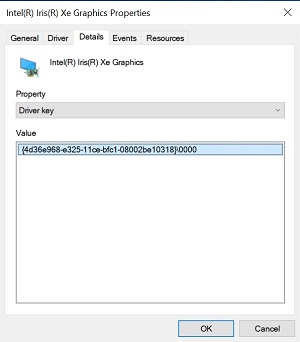
Figure 4: (English Only) Details tab of Intel Iris Xe Graphic Properties
Warning: The next step is a Windows Registry edit:
- Backup the Registry before proceeding, reference How to Back Up and Restore the Registry in Windows
.
- Editing the Registry can cause the computer to become unresponsive on the next reboot.
- Contact Dell Technical Support for assistance if you have concerns about performing this step.
- In the search box on the taskbar, type regedit. Then select regedit from the program list that is displayed. If prompted by User Account Control, click Yes to open the Registry Editor. The Registry Editor window should open and look similar to the example shown below.
- On the window Registry Editor, click the folder HKEY_LOCAL_MACHINE.
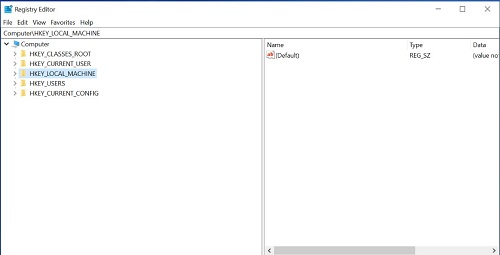
Figure 5: (English Only) HKEY_LOCAL_MACHINE in Registry Editor
- Go to Edit and click Find.

Figure 6: (English Only) Search for DpMstDscDisable
- The Find dialog box opens. Type in
DpMstDscDisableand click the Find Next button.
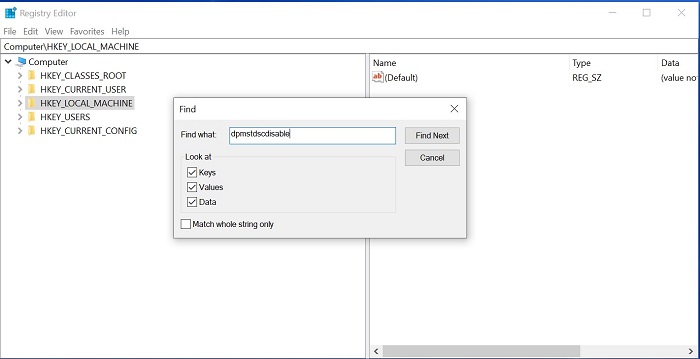
Figure 7: (English Only) Click Find from Edit dropdown
- It starts the search and displays the first entry result when found. It looks similar to the example shown below.
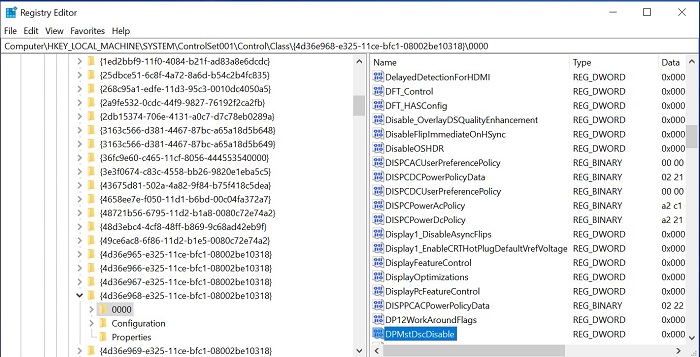
Figure 8: (English Only) Example of Registry entry
- Check if the driver path in Registry Editor is the same as driver path in Step 4. If it is not the same, Press F3, or click Edit and Find Next, to find the next entry for.
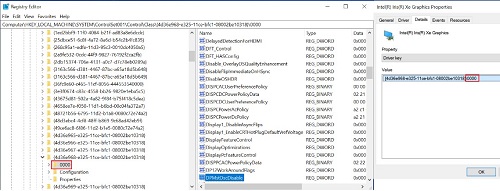
Figure 9: (English Only) Verify version of DpMstDscDisable
- If the driver path in Registry Editor is the same as driver path in Step 4. Click
DpMstDscDisableto edit it is value to 0, then click the OK button.
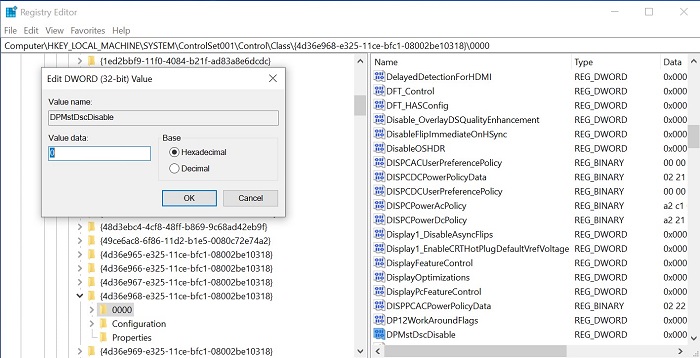
Figure 10: (English Only) Change value data to 0
- Restart your computer to enable the DSC feature.
For more information, see Dell Knowledge Base articles:
Betroffene Produkte
XPS 13, XPS 15, XPS 17, Latitude 7320, Latitude 7320 Detachable, Latitude 5421, Latitude 7420, Latitude 9420, Latitude 5520, Latitude 5521, Latitude 7520, Latitude 9520, Latitude 5420, Precision 3560, Precision 3561, Precision 5560, Precision 7560
, Precision 5760, Precision 7760
...
Artikeleigenschaften
Artikelnummer: 000197102
Artikeltyp: How To
Zuletzt geändert: 24 Apr. 2025
Version: 13
Antworten auf Ihre Fragen erhalten Sie von anderen Dell NutzerInnen
Support Services
Prüfen Sie, ob Ihr Gerät durch Support Services abgedeckt ist.