Dell Security Management Server Virtualをアップグレードする方法
Summary: Dell Security Management Server VirtualおよびDell Data Protection Virtual Editionは、次の手順に従ってアップグレードできます。
Instructions
この記事では、Dell Security Management Server Virtual(旧Dell Data Protection Virtual Edition)をアップグレードする方法について説明します。
対象製品:
- Dell Security Management Server Virtual
- Dell Data Protection Virtual Edition
対象オペレーティング システム:
- Linux
act.credant.comの詳細を確認してください。
Dell Security Management Server Virtualのアップグレードは、次のバージョンによって異なります。
特定の手順については、ご使用の環境で実行されているDell Security Management Server Virtualのバージョンをクリックしてください。バージョン情報については、「 Dell Data Security Serverのバージョンを識別する方法」を参照してください。
- インプレース アップグレードは、サポートされているアップグレード パスを使用して、Dell Security Management Server Virtualを最新バージョンにアップデートします。以下のバージョン リストは、お使いの環境で実行されているDell Security Management Server Virtualのバージョンのアップグレード手順を表示するためにのみ使用されます。これは、サポートされているアップグレード パスを意味するものではありません。
- サポートされているアップグレード パスについては、「Dell Security Management Server Virtualのシステム要件」のアップグレード情報を参照してください。
- アップグレードする前に、ご使用の環境が 「Dell Security Management Server Virtualのシステム要件」を満たしていることを確認してください。
v11.6.0
バージョン11.6.0では、バージョン11.7.0以降への手動アップグレードが必要です。
- 現在のDell Security Management Server Virtualで、次の操作を実行します。
- サービスを停止します。
- バックアップを作成します。
- 外部の場所にバックアップをオフロードします。
- Dell Security Management Server Virtualインスタンスをシャットダウンします。
注:- 詳細については、「 Dell Security Management Server Virtualのサービスを停止および開始する方法」を参照してください。
- 詳細については、「 Dell Security Management Server Virtualをバックアップおよび復元する方法」を参照してください。
- Dell Security Management Server Virtual v11.7.0の新しいインスタンスをインストールします。
注:詳細については、「Dell Security Management Server Virtual/Dell Data Protection Virtual Editionのアップグレード方法」を参照してください。
- Dell Security Management Server Virtualの新しいインスタンスにバックアップをアップロードします(手順1C)。
注:バックアップをロードするには、SFTPが有効化されている必要があります。詳細については、「 Dell Security Management Server VirtualでFTPユーザーを作成する方法」を参照してください。
- Dell Security Management Server Virtualの新しいインスタンスで、手順3のバックアップをリストアします。
- 新しいインスタンスがテストおよび検証されたら、手順1のレガシーのDell Security Management Server Virtualを廃止します。
v10.2.13.14から11.5.0
- Dell Enterprise Server Virtual管理コンソールにログインします。
 注:
注:- Dell Security Management Server Virtualのデフォルト認証情報は次のとおりです。
- Username:
delluser - Password:
delluser
- Username:
- 管理者は、製品の[Virtual Appliance Menu]内でデフォルトのパスワードを変更できます。
- Dell Security Management Server Virtualのデフォルト認証情報は次のとおりです。
- [Main Menu]から[Basic Configuration]を選択し、Enterを押します。

- [Update Dell Security Management Server Virtual]を選択してから、Enterを押します。
![[Update Dell Security Management Server Virtual]](https://supportkb.dell.com/img/ka0Do000000m6OlIAI/ka0Do000000m6OlIAI_ja_3.jpeg)
- [Install Updates]を選択してから、Enterを押します。
![[Install Updates]](https://supportkb.dell.com/img/ka0Do000000m6OlIAI/ka0Do000000m6OlIAI_ja_4.jpeg)
- [Yes]を選択してから、Enterを押します。

- [Yes]を選択してから、Enterを押します。

- [Database Access Menu]から、次の操作を実行します。
- オプションとして、IPv4のリモート アクセスを有効にします。
- オプションとして、IPv6のリモート アクセスを有効にします。
- 新しいデータベース パスワードを入力します 。
- 新しいデータベース パスワードを確認します。
- [Reboot Appliance]を選択し、次にEnterを押します。

サーバーのアップグレードは、管理コンソールの上部に新しいバージョンが表示されていることで確認できます。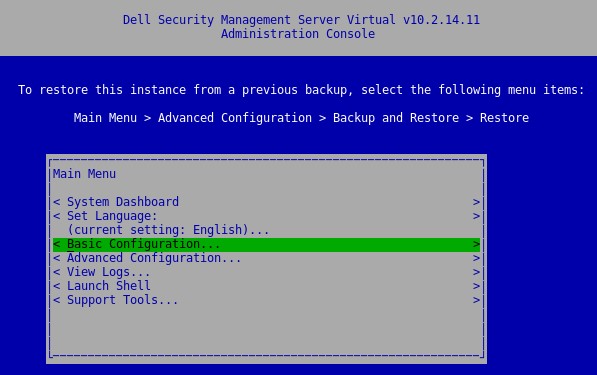
v10.2.13.13
バージョン10.2.13.13では、バージョン10.2.13.14以降への手動アップグレードが必要です。
- 現在のDell Security Management Server Virtualで、次の操作を実行します。
- サービスを停止します。
- バックアップを作成します。
- 外部の場所にバックアップをオフロードします。
- Dell Security Management Server Virtualインスタンスをシャットダウンします。
注:- 詳細については、「 Dell Security Management Server Virtualのサービスを停止および開始する方法」を参照してください。
- 詳細については、「 Dell Security Management Server Virtualをバックアップおよび復元する方法」を参照してください。
- Dell Security Management Server Virtual v10.2.13.14以降の新しいインスタンスをインストールします。
注:詳細については、「Dell Security Management Server Virtual/Dell Data Protection Virtual Editionのアップグレード方法」を参照してください。
- Dell Security Management Server Virtualの新しいインスタンスにバックアップをアップロードします(手順1C)。
注:バックアップをロードするには、SFTPが有効化されている必要があります。詳細については、「 Dell Security Management Server VirtualでFTPユーザーを作成する方法」を参照してください。
- Dell Security Management Server Virtualの新しいインスタンスで、手順3のバックアップをリストアします。
- 新しいインスタンスがテストおよび検証されたら、手順1のレガシーのDell Security Management Server Virtualを廃止します。
v9.11.0~10.2.12
- Dell Enterprise Server Virtual管理コンソールにログインします。
 注:
注:- Dell Security Management Server Virtualのデフォルト認証情報は次のとおりです。
- Username:
delluser - Password:
delluser
- Username:
- 管理者は、製品の[Virtual Appliance Menu]内でデフォルトのパスワードを変更できます。
- Dell Security Management Server Virtualのデフォルト認証情報は次のとおりです。
- [Main Menu]から[Basic Configuration]を選択し、Enterを押します。

- [Update Dell Security Management Server Virtual]を選択してから、Enterを押します。
![[Update Dell Security Management Server Virtual]](https://supportkb.dell.com/img/ka0Do000000m6OlIAI/ka0Do000000m6OlIAI_ja_11.jpeg)
- [Install Updates]を選択してから、Enterを押します。
![[Install Updates]](https://supportkb.dell.com/img/ka0Do000000m6OlIAI/ka0Do000000m6OlIAI_ja_12.jpeg)
- [Yes]を選択してから、Enterを押します。

- [Yes]を選択してから、Enterを押します。

- インストールが応答しなくなった場合は、Enterを押します。
 注:詳細については、「Dell Security Management Server Virtualのアップグレートが応答していないように見える(英語)」を参照してください。
 - [Database Access Menu]から、次の操作を実行します。
- オプションとして、IPv4のリモート アクセスを有効にします。
- オプションとして、IPv6のリモート アクセスを有効にします。
- 新しいデータベースのパスワードを入力します。
- 新しいデータベース パスワードを確認します。
- [Reboot Appliance]を選択し、次にEnterを押します。

v9.10.1
バージョン9.10.1では、バージョン9.11から10.2.13.14への手動アップグレードが必要です。
Dell Data Security - Security Management Server Virtual 9.10.1から9.11へのアップグレード
再生時間:00:08:38 (hh:mm:ss)
利用可能な場合、このビデオ プレーヤーのCCアイコンを使用してクローズド キャプション(字幕)の言語設定を選択できます。
- 現在のDell Security Management Server Virtualで、次の操作を実行します。
- サービスを停止します。
- バックアップを作成します。
- 外部の場所にバックアップをオフロードします。
- Dell Security Management Server Virtualインスタンスをシャットダウンします。
注:- 詳細については、「 Dell Security Management Server Virtualのサービスを停止および開始する方法」を参照してください。
- 詳細については、「 Dell Security Management Server Virtualをバックアップおよび復元する方法」を参照してください。
- Dell Security Management Server Virtual v9.11~10.2.13.14の新しいインスタンスをインストールします。
注:詳細については、「Dell Security Management Server Virtual/Dell Data Protection Virtual Editionのアップグレード方法」を参照してください。
- Dell Security Management Server Virtualの新しいインスタンスにバックアップをアップロードします(手順1C)。
注:バックアップをロードするには、SFTPが有効化されている必要があります。詳細については、「 Dell Security Management Server VirtualでFTPユーザーを作成する方法」を参照してください。
- Dell Security Management Server Virtualの新しいインスタンスで、手順3のバックアップをリストアします。
- 新しいインスタンスがテストおよび検証されたら、手順1のレガシーのDell Security Management Server Virtualを廃止します。
v9.8.2~9.10.0
詳細については、[ ダウンロード ]または[ インストール]をクリックしてください。
ダウンロード
- Dell Enterprise Server Virtual管理コンソールにログインします。
 注:
注:- Dell Data Protection Enterprise Server Virtual Editionのデフォルト認証情報は次のとおりです。
- Username:
ddpuser - Password:
ddpuser
- Username:
- 管理者は、製品の[Virtual Appliance Menu]内でデフォルトのパスワードを変更できます。
- Dell Data Protection Enterprise Server Virtual Editionのデフォルト認証情報は次のとおりです。
- [Main Menu]から[Basic Configuration]を選択し、Enterを押します。

- [Update Dell Security Management Server Virtual]を選択してから、Enterを押します。
![[Update Dell Security Management Server Virtual]](https://supportkb.dell.com/img/ka0Do000000m6OlIAI/ka0Do000000m6OlIAI_ja_19.jpeg)
- [Download Update]を選択してから、Enterを押します。

- ダウンロードが完了したら、Enterを押して続行します。

インストール
- Dell Enterprise Server Virtual管理コンソールにログインします。
 注:
注:- Dell Data Protection Enterprise Server Virtual Editionのデフォルト認証情報は次のとおりです。
- Username:
ddpuser - Password:
ddpuser
- Username:
- 管理者は、製品の[Virtual Appliance Menu]内でデフォルトのパスワードを変更できます。
- Dell Data Protection Enterprise Server Virtual Editionのデフォルト認証情報は次のとおりです。
- [Main Menu]から[Basic Configuration]を選択し、Enterを押します。

- [Update Dell Security Management Server Virtual]を選択してから、Enterを押します。
![[Update Dell Security Management Server Virtual]オプション](https://supportkb.dell.com/img/ka0Do000000m6OlIAI/ka0Do000000m6OlIAI_ja_24.jpeg)
- [Apply Update]を選択し、次にEnterを押します。
![[Apply Update]](https://supportkb.dell.com/img/ka0Do000000m6OlIAI/ka0Do000000m6OlIAI_ja_25.jpeg)
- インストールするアップデート ファイルを選択し、 Enterを押します。
 注:
注:- アップデート ファイルは、前述の例によって異なる場合があります。
- アップデート ファイルを選択した後に、「pending policy commit detected」エラーが発生することがあります。この問題を解決するには、「 Dell Data Security Serverのポリシーをコミットする方法」を参照してください。解決したら、 アップデートのインストール 手順を再開します。
- 正常にインストールされると、サーバーは自動的に再起動します。

 注:アップデートのインストール ステータスの例は、バージョンによって異なる場合があります。
 - 管理サーバーにログインします。

- ログインすると、サーバーのアップデートが確認されます。[OK]でEnterを押して、管理コンソールに戻ります。

- 新しいデータベース パスワードを入力し、再入力します。入力したら、[OK]を選択し、次にEnterを押します。
![[Set Database Password]](https://supportkb.dell.com/img/ka0Do000000m6OlIAI/ka0Do000000m6OlIAI_ja_31.jpeg)
v8.2.0~9.7.0
詳細については、[ ダウンロード ]または[ インストール]をクリックしてください。
ダウンロード
- Dell Enterprise Server Virtual管理コンソールにログインします。
 注:
注:- Dell Data Protection Enterprise Server Virtual Editionのデフォルト認証情報は次のとおりです。
- Username:
ddpuser - Password:
ddpuser
- Username:
- 管理者は、製品の[Virtual Appliance Menu]内でデフォルトのパスワードを変更できます。
- Dell Data Protection Enterprise Server Virtual Editionのデフォルト認証情報は次のとおりです。
- [Main Menu]から[Basic Configuration]を選択し、Enterを押します。

- [Update DDP Enterprise Server - VE]を選択し、次にEnterを押します。
![[Update DDP Enterprise Server - VE]](https://supportkb.dell.com/img/ka0Do000000m6OlIAI/ka0Do000000m6OlIAI_ja_34.jpeg)
- [Download Update]を選択してから、Enterを押します。

- ダウンロードが完了したら、Enterを押して続行します。

インストール
- Dell Enterprise Server Virtual管理コンソールにログインします。
 注:
注:- Dell Data Protection Enterprise Server Virtual Editionのデフォルト認証情報は次のとおりです。
- Username:
ddpuser - Password:
ddpuser
- Username:
- 管理者は、製品の[Virtual Appliance Menu]内でデフォルトのパスワードを変更できます。
- Dell Data Protection Enterprise Server Virtual Editionのデフォルト認証情報は次のとおりです。
- [Main Menu]から[Basic Configuration]を選択し、Enterを押します。

- [Update DDP Enterprise Server - VE]を選択し、次にEnterを押します。
![[Update DDP Enterprise Server - VE]](https://supportkb.dell.com/img/ka0Do000000m6OlIAI/ka0Do000000m6OlIAI_ja_39.jpeg)
- [Apply Update]を選択し、次にEnterを押します。
![[Apply Update]](https://supportkb.dell.com/img/ka0Do000000m6OlIAI/ka0Do000000m6OlIAI_ja_40.jpeg)
- インストールするアップデート ファイルを選択し、Enterを押します。
 注:
注:- アップデート ファイルは、前述の例によって異なる場合があります。
- アップデート ファイルを選択した後に、「pending policy commit detected」エラーが発生することがあります。この問題を解決するには、「 Dell Data Security Serverのポリシーをコミットする方法」を参照してください。解決したら、 アップデートのインストール 手順を再開します。
- 正常にインストールされると、サーバーは自動的に再起動します。

- 管理サーバーにログインします。

- サーバーのアップデートは、管理コンソールの上部に新しいバージョンが表示されていることで確認できます。

サポートに問い合わせるには、「Dell Data Securityのインターナショナル サポート電話番号」を参照してください。
TechDirectにアクセスして、テクニカル サポート リクエストをオンラインで生成します。
さらに詳しい情報やリソースについては、「デル セキュリティ コミュニティー フォーラム」に参加してください。