Article Number: 000126835
How to Modify Policies in Dell Threat Defense
Summary: Policies for Dell Threat Defense may be changed by following these instructions.
Article Content
Symptoms
Note:
- As of May 2022, Dell Threat Defense has reached End of Maintenance. This product and its articles are no longer updated by Dell. For more information, reference Product Life Cycle (End of Support / End of Life) Policy for Dell Data Security. If you have any questions on alternative articles, either reach out to your sales team or contact endpointsecurity@dell.com.
- Reference Endpoint Security for additional information about current products.
This article covers how to modify policies for Dell Threat Defense.
Affected Products:
Dell Threat Defense
Cause
Not applicable.
Resolution
Dell Threat Defense uses policies to manage the advanced threat prevention (ATP) engine behavior on endpoints. It is important to modify the default policy or create a new policy before deploying Threat Defense.
Note: For more information about recommended policies and policy definitions, reference Dell Threat Defense Policy Recommendations.
To Modify Policy:
- From a web browser, go to the Dell Threat Defense administration console at:
- North America: https://dellthreatdefense.cylance.com/Login

- Europe: https://dellthreatdefense-eu.cylance.com

- Asia Pacific: https://dellthreatdefense-au.cylance.com

- North America: https://dellthreatdefense.cylance.com/Login
- Log in to the Dell Threat Defense administration console.
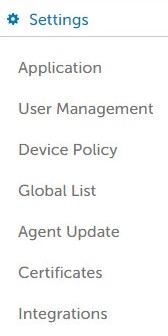
- In the console, click the Settings tab.

- Under Settings, click Device Policy.
- Click Add New Policy.

Note: Dell recommends setting policies in a "Learning Mode" configuration to train Dell Threat Defense for the environment before switching to a "Protect Mode" configuration. For more information about recommended policies and policy definitions, reference Dell Threat Defense Policy Recommendations.
- Populate a Policy Name.

- Under File Type Executable check:
- Auto Quarantine with Execution Control to automatically quarantine items marked unsafe.
- Auto Quarantine with Execution Control to automatically quarantine items marked abnormal.

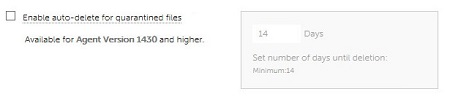
- Enable auto-delete for quarantined files to auto-delete quarantined files after a minimum of 14 days, up to a maximum of 365 days.
- Auto Upload to upload items marked unsafe to Cylance’s InfinityCloud to provide additional data to help with triage.
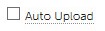
Note: To help manage bandwidth usage, there is a 250MB upload limit per device each day. In addition, any threat file larger than 51 is not uploaded to the InfinityCloud for analysis.
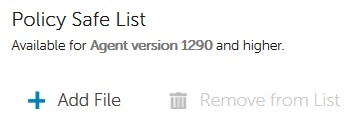
- Under Policy Safe List, click Add File if any files must be safelisted from threat detection.
- Click the Protection Settings tab.

- Check Prevent service shutdown from device to prohibit the ability to locally terminate Threat Defense service.

- Check Kill unsafe running processes and their sub processes to have Threat Defense automatically terminate any classified unsafe process.

- Check Background Threat Detection to have Threat Defense automatically check executable files for dormant threats.

- Check Watch For New Files to have Threat Defense check new or modified executable files for threats.

- Check Copy File Samples to have Threat Defense copy threats to a defined repository for research.

- Check the Agent Settings tab.

- Check Enable auto-upload of log files to automatically upload device logs to Cylance Support.

- Check Enable Desktop Notifications to allow prompts on abnormal or unsafe files.

- Click the Script Control tab.

- Check Script Control to enable monitoring of PowerShell and active scripts.
- If Script Control is enabled, determine if Threat Defense should Alert or Block on detection.
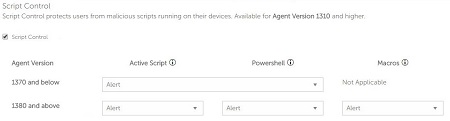
- If Script Control is enabled, determine if Disable Script Control should be enabled.

- Populate Folder Exclusions (includes subfolders) with the relative path of any folders to be excluded from Script Control.

Note: For more information about relative pathing, reference Policy Definitions for Folder Exclusions (includes subfolders) in Dell Threat Defense Policy Recommendations.
- Once all settings have been configured, click Create.

Note: Policies can be edited at any time by clicking their name within Device Policy. Any changes to policies are communicated to devices over data.cylance.com on port 443.
To contact support, reference Dell Data Security International Support Phone Numbers.
Go to TechDirect to generate a technical support request online.
For additional insights and resources, join the Dell Security Community Forum.
Additional Information
Videos
Article Properties
Affected Product
Dell Threat Defense
Last Published Date
19 Dec 2022
Version
8
Article Type
Solution