系統不符合 BitLocker 自動裝置加密需求
Summary: 在執行 Windows 10 的 OptiPlex 3060、5060、7060 和 XE3 系統中,手動取得 BitLocker 加密硬碟的步驟。
This article applies to
This article does not apply to
This article is not tied to any specific product.
Not all product versions are identified in this article.
Symptoms
BitLocker 自動裝置加密需求
執行 Windows 10 64 位元專業版和企業版的 OptiPlex 3060、5060、7060 和 XE3 系統不會自動啟用 BitLocker 功能。
您可以使用下列步驟來驗證 BitLocker 功能。
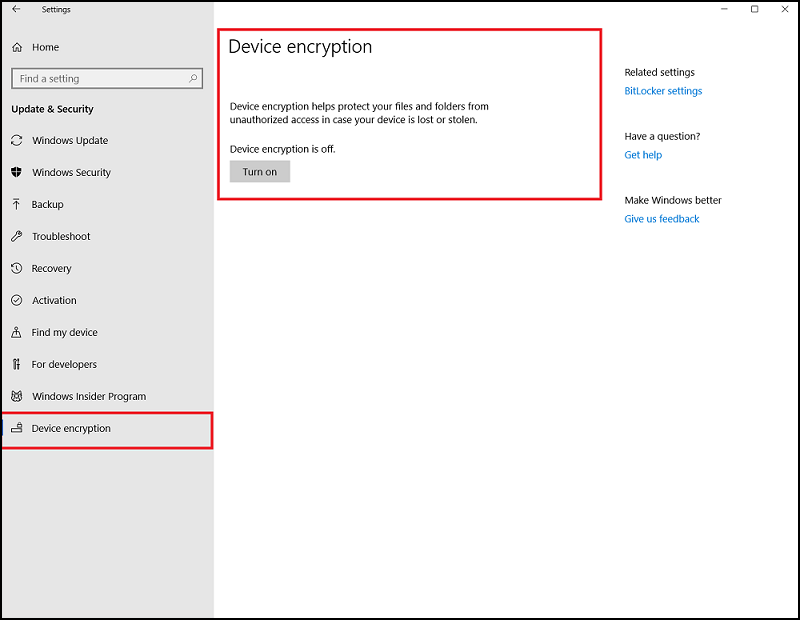
- 按下 Windows 鍵 並輸入 設定。
- 選取更新與安全性。
- 下列畫面會顯示系統是否符合 BitLocker 自動加密需求。
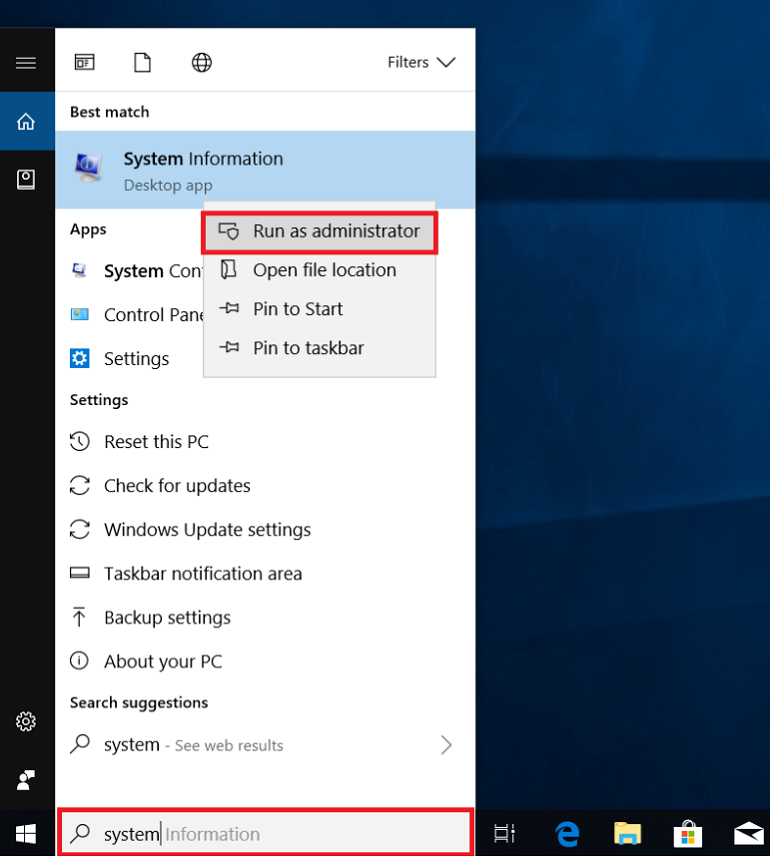
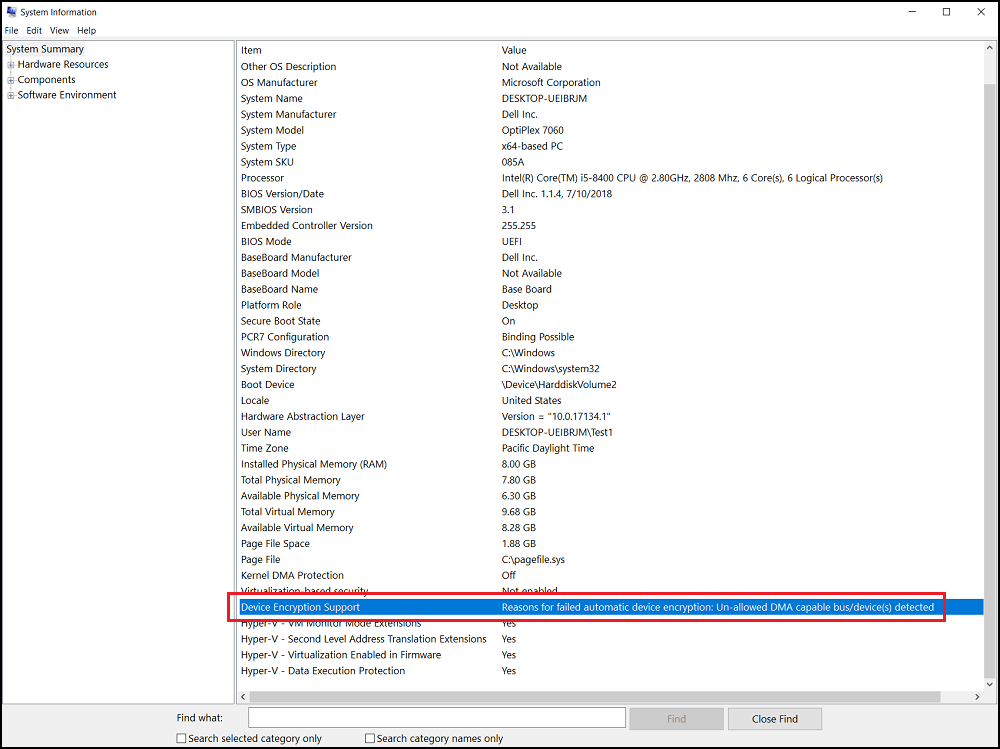
以系統管理員身分執行系統資訊 (按右鍵),然後勾選「裝置加密支援」欄位。檢查「自動裝置加密失敗的原因:偵測到啟用 DMA 功能的不允許的匯流排/裝置。」
Cause
沒有可用的原因資訊。
Resolution
您必須透過下列步驟手動設定 BitLocker 磁碟機加密。
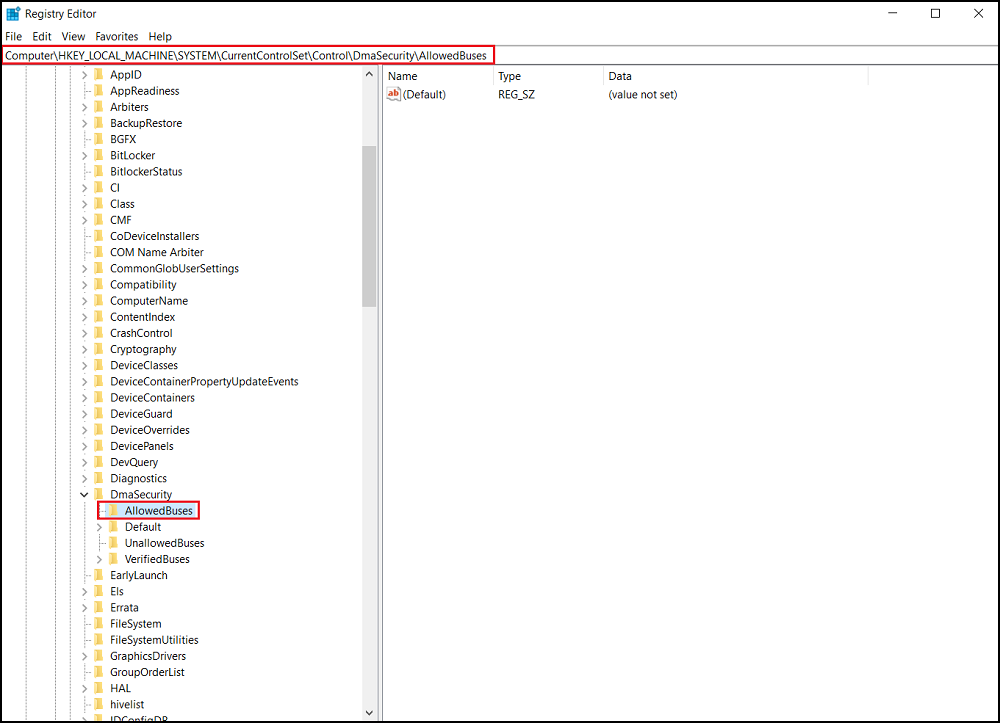
必須將總線或設備添加到允許清單中。前往登錄機碼:
- 執行「regedit」以開啟 Registry Editor。
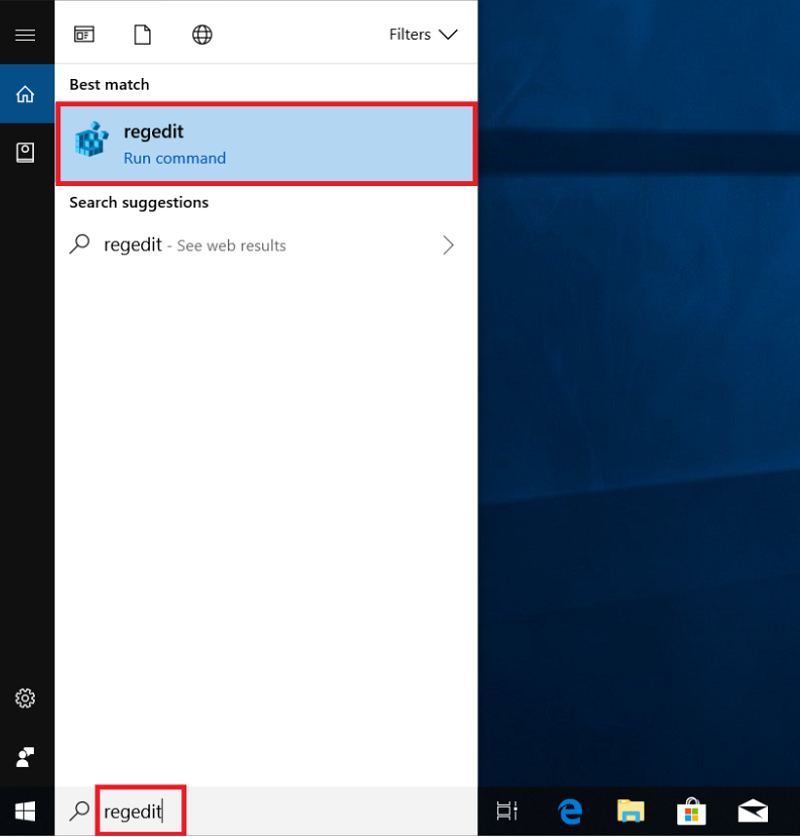
- 尋找以下註冊表項路徑:
[HKEY_LOCAL_MACHINE\SYSTEM\CurrentControlSet\Control\DmaSecurity\AllowedBuses]
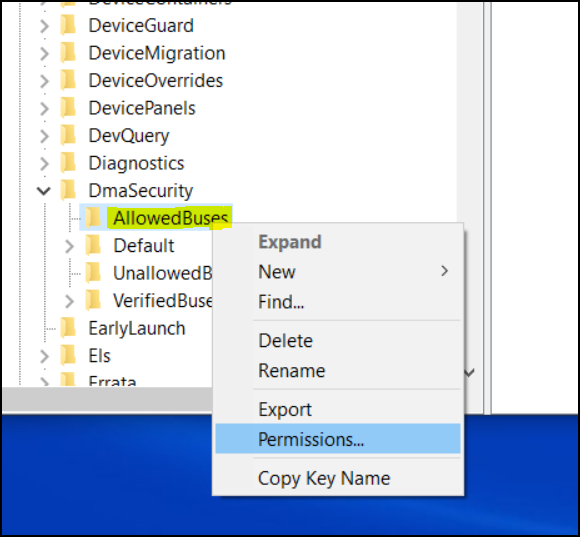
- 右鍵按下“AllowedBuses”並選擇“許可權”。
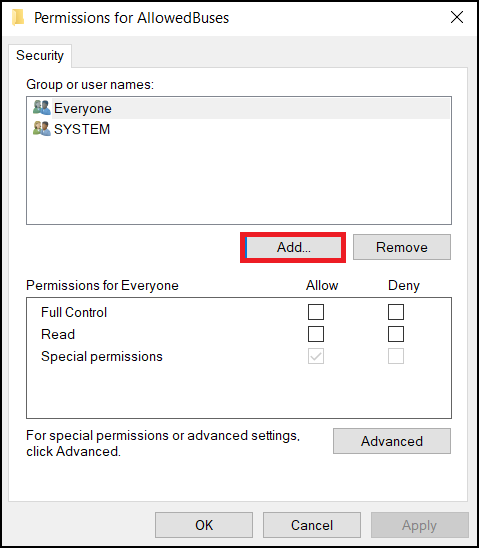
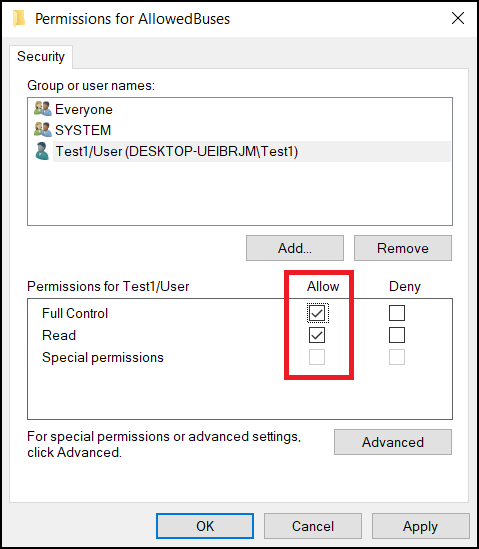
- 選取「新增...」以將您的使用者名稱新增至「允許的巴士權限」視窗中
輸入您的 Windows 使用者帳戶名稱,然後按一下確定完成。
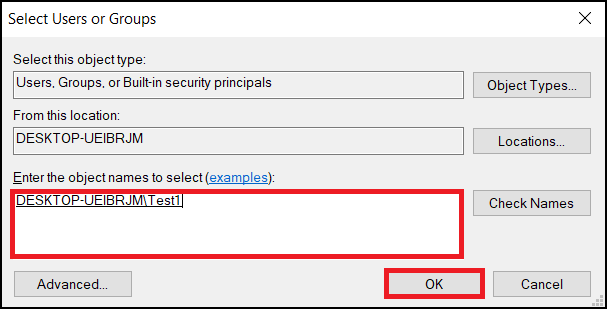
- 勾選您使用者帳戶的「完全控制」和「讀取」權限上的「允許」,然後選取「套用」以儲存設定。
- 在 Windows 桌面上按右鍵,然後選取新增 -> 文字文件。
- 複製下列文字並另存為 Add_AllowedBuses.reg
Windows Registry Editor 版本 5.00
[HKEY_LOCAL_MACHINE\SYSTEM\CurrentControlSet\Control\DmaSecurity\AllowedBuses]

 "Intel 300 Series Chipset Family LPC Controller(Q370)"="PCI\\VEN_8086&DEV_A306"

 "Intel 300 Series Chipset Family LPC Controller(H370)"="PCI\\VEN_8086&DEV_A304"

 "PCI-to-PCI Bridge#1"="PCI\\VEN_8086&DEV_1901"

 "PCI-to-PCI Bridge#2"="PCI\\VEN_104C&DEV_8240"

 "PCI Express Root Port #1"="PCI\\VEN_8086&DEV_A338"

 "PCI Express Root Port #2"="PCI\\VEN_8086&DEV_A339"

 "PCI Express Root Port #3"="PCI\\VEN_8086&DEV_A33A"

 "PCI Express Root Port #4"="PCI\\VEN_8086&DEV_A33B"

 "PCI Express Root Port #5"="PCI\\VEN_8086&DEV_A33C"

 "PCI Express Root Port #6"="PCI\\VEN_8086&DEV_A33D"

 "PCI Express Root Port #7"="PCI\\VEN_8086&DEV_A33E"

 "PCI Express Root Port #8"="PCI\\VEN_8086&DEV_A33F"

 "PCI Express Root Port #9"="PCI\\VEN_8086&DEV_A330"

 "PCI Express Root Port #10"="PCI\\VEN_8086&DEV_A331"

 "PCI Express Root Port #11"="PCI\\VEN_8086&DEV_A332"

 "PCI Express Root Port #12"="PCI\\VEN_8086&DEV_A333"

 "PCI Express Root Port #13"="PCI\\VEN_8086&DEV_A334"

 "PCI Express Root Port #14"="PCI\\VEN_8086&DEV_A335"

 "PCI Express Root Port #15"="PCI\\VEN_8086&DEV_A336"

 "PCI Express Root Port #16"="PCI\\VEN_8086&DEV_A337"

 "PCI Express Root Port #17"="PCI\\VEN_8086&DEV_A340"

 "PCI Express Root Port #18"="PCI\\VEN_8086&DEV_A341"

 "PCI Express Root Port #19"="PCI\\VEN_8086&DEV_A342"

 "PCI Express Root Port #20"="PCI\\VEN_8086&DEV_A343"

 "PCI Express Root Port #21"="PCI\\VEN_8086&DEV_A32C"

 "PCI Express Root Port #22"="PCI\\VEN_8086&DEV_A32D"

 "PCI Express Root Port #23"="PCI\\VEN_8086&DEV_A32E"

 "PCI Express Root Port #24"="PCI\\VEN_8086&DEV_A32F"
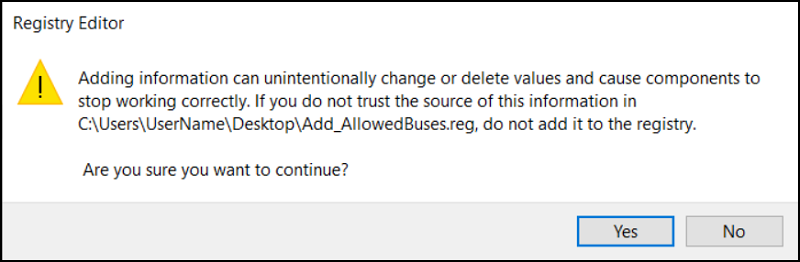
- 按兩下 Add_AllowedBuses.reg 檔以添加註冊表項。
- 按「是」以繼續新增登錄機碼
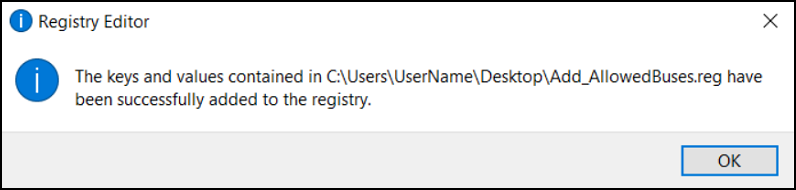
- 所有第 8 代 PCI Express 根連接埠裝置 ID 均已成功新增至系統登錄機碼。
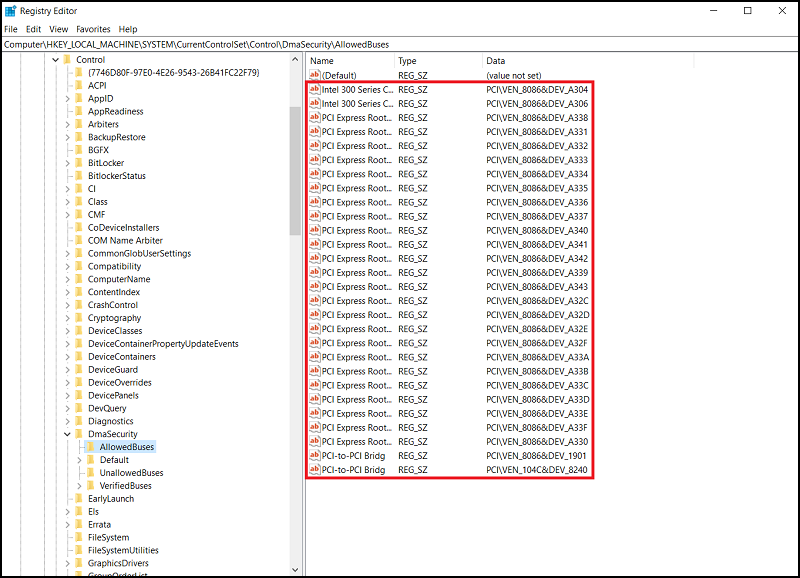
- 檢查以下路徑的系統登錄機碼,所有 PCI Express 根連接埠裝置 ID 均已成功新增。
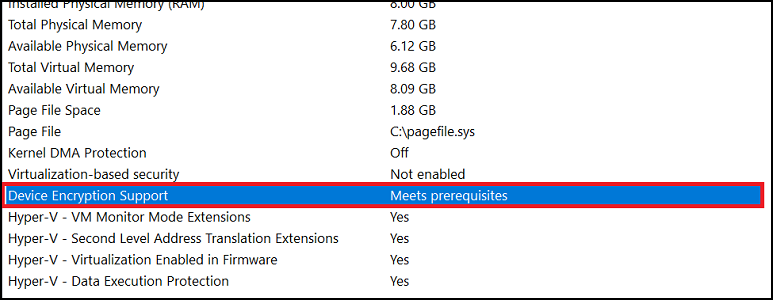
- 以系統管理員身分執行系統資訊 (按右鍵)
[支援裝置加密] -> [符合先決條件]
- 您現在可以按一下「開啟」按鈕,從 [設定] -> [裝置加密] 啟用裝置加密

Affected Products
Security, Software, OptiPlex 3060 Tower, OptiPlex 3060 Micro, OptiPlex 3060 Small Form Factor, OptiPlex 5060 Tower, OptiPlex 5060 Micro, OptiPlex 5060 Small Form Factor, OptiPlex 7060 Tower, OptiPlex 7060 Micro, OptiPlex 7060 Small Form Factor
, Optiplex XE3
...
Article Properties
Article Number: 000124709
Article Type: Solution
Last Modified: 19 Apr 2026
Version: 7
Find answers to your questions from other Dell users
Support Services
Check if your device is covered by Support Services.