Unable to Activate Agent on Dell Security Management Server Enterprise Using Self-Signed Certificates
Summary: When using a self-signed certificate in Dell Security Management Server Enterprise (formerly Dell Data Protection | Enterprise Edition server unable to activate the agent.
This article applies to
This article does not apply to
This article is not tied to any specific product.
Not all product versions are identified in this article.
Symptoms
Affected Products:
- Dell Security Management Server
- Dell Data Protection | Enterprise Edition
Affected Versions:
- v9.5 - v9.8
If a self-sign certificate is chosen during installation of Dell Security Management Server (formerly Dell Data Protection | Enterprise Edition Server) v9.5 to v9.8.x, agent registrations (Self-Encrypting Drive Management, BitLocker Manager, Advanced Threat Protection, and Threat Protection), it may fail due to an incorrectly set up Dell Management (DM) certificate during install. Agents and policy signing require a secure SSL or TLS for communication. The Dell Management (DM) certificate is used to facilitate this secure communication. The DM certificate may be incorrectly set up in Dell Security Management Server v9.5 to 9.8.x.
Cause
Not Applicable
Resolution
Note: This issue has been resolved in 9.9.2.
To resolve the issue:
- Log in to the affected Dell Security Management Server Enterprise.
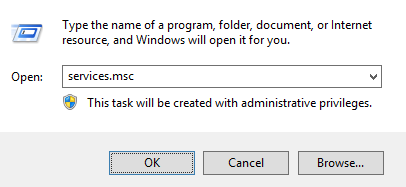
- Right-click the Windows Start Menu and then select Run.

- In the Run UI, type services.msc and then click OK.
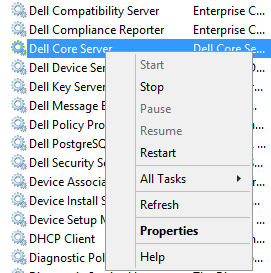
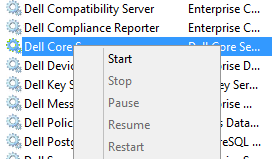
- Right-click Dell Core Server and then select Stop.
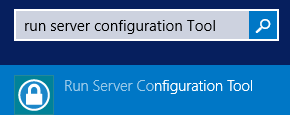
- In the Window Search Menu, type and then select Server Configuration Tool.
- Go to Actions > Configure Certificates.

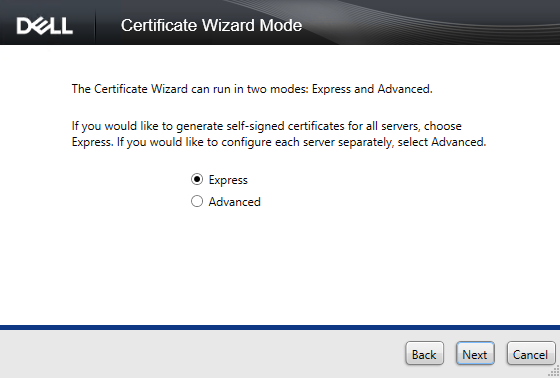
- In the Certificate Configuration, press Next.

- Select Express and then press Next.
- Press Yes to use the current certificate.
 Note: This prompt only appears if a self-signed certificate is already present.
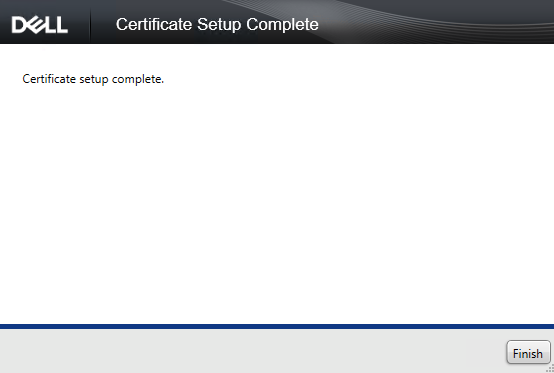
 - Click Finish to close the certificate setup.
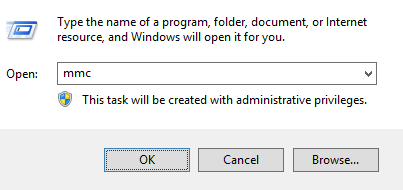
- Right-click the Windows Start Menu and then select Run.

- In the Run UI, type
mmcand then press OK.
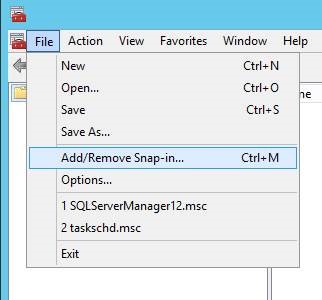
- In the managed migration utility (MMC) user interface (UI), Select File and then Add/Remove Snap-In.
- In the Snap-in UI, select Certificates and then press Add.
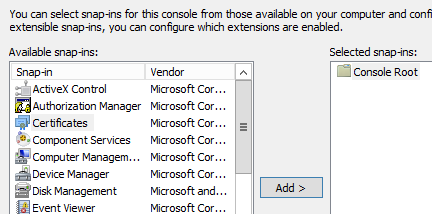
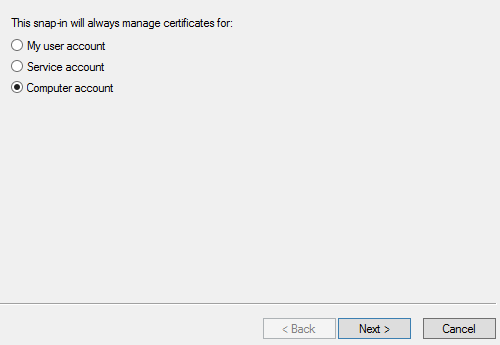
- Select Computer account and then press Next.
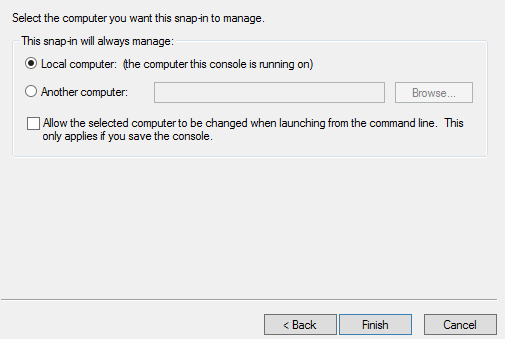
- Select Local computer and then press Finish.
- In the Snap-in UI, press OK.
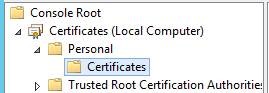
- In the MMC, expand Certificates (Local Computer) > Personal > Certificates
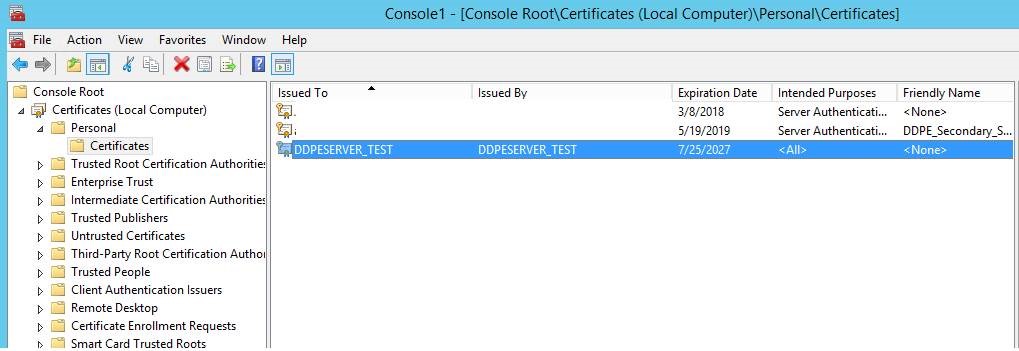
- The newly created certificate is listed. Double-click the certificate to check the Expiration Date to ensure that the certificate matches today’s date +10 years.

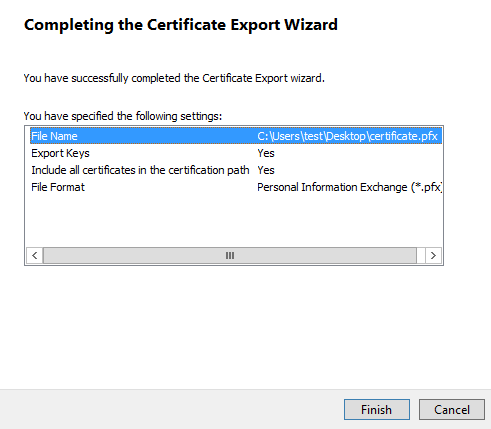
- Right-click the new certificate and select All Tasks > Export.

- In the Certificate Export Wizard, select Next.

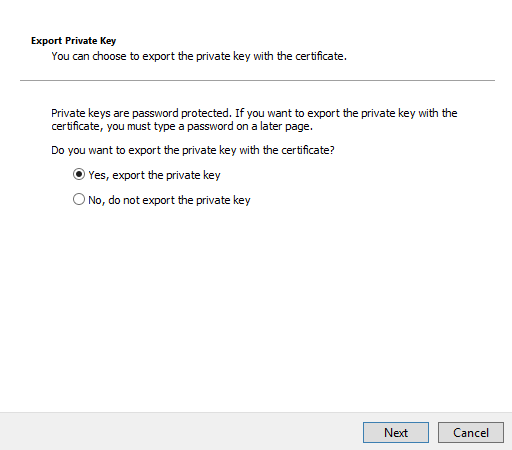
- Select Yes, export the private key, and then press Next.
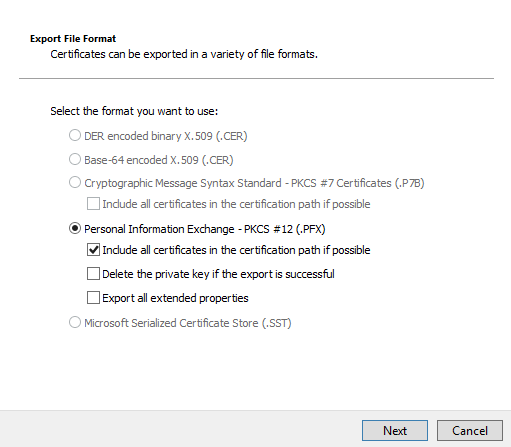
- Leave the default options selected for format and then press Next.
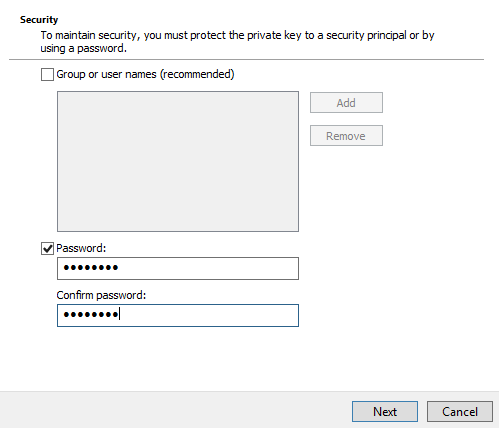
- Check the password and set and confirm a password. Once populated, press Next.
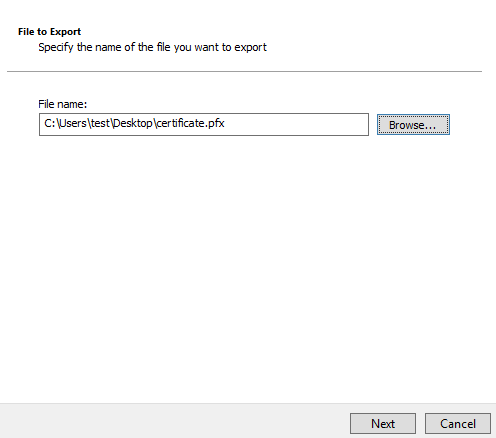
- Browse and select a location for the exported certificate. Once a location is selected, click Next.
- Click Finish to complete the certificate export.
- Go back to the Server Configuration Tool and select Actions > Import DM Certificate.

- Select the exported certificate (Step 25).
- Enter the exported certificate password (Step 24) and then press OK.

- If you are using Windows Authentication to reach SQL, enter the information for the service account that has SQL permissions, and then click Next. If you are using SQL Authentication, click Next.
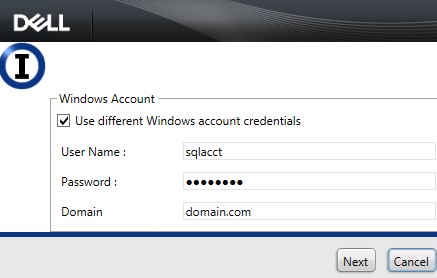 Note: In the example, we are using Windows authentication. No information is required if using SQL authentication.
 - Exit the Service Configuration Tool.
- Select Yes on the prompt to save.

- In the Services UI, right-click Dell Core Server and then select Start.
- Exit the Services UI.
To contact support, reference Dell Data Security International Support Phone Numbers.
Go to TechDirect to generate a technical support request online.
For additional insights and resources, join the Dell Security Community Forum.
Affected Products
Dell EncryptionArticle Properties
Article Number: 000124931
Article Type: Solution
Last Modified: 23 Jul 2024
Version: 12
Find answers to your questions from other Dell users
Support Services
Check if your device is covered by Support Services.