Número del artículo: 000125205
Dell Data Security Server에 대한 Advanced Threat Prevention 인증서를 백업하고 복원하는 방법
Resumen: Advanced Threat Prevention 인증서는 이러한 지침에 따라 Dell Data Security 또는 Dell Data Protection 서버에서 백업할 수 있습니다.
Contenido del artículo
Síntomas
이 문서에서는 Dell Data Security(이전의 Dell Data Protection) 서버에서 Advanced Threat Prevention의 인증서를 백업 및 복원하는 단계를 제공합니다. 이 인증서에는 Dell Security Management Server가 등록되어 있는 현재 등록된 Advanced Threat Prevention SaaS 기반 환경에 대한 등록 정보가 포함되어 있습니다. 어떤 이유로 데이터베이스가 손실되거나 Advanced Threat Prevention 환경에 대한 연결이 손상된 경우 이 인증서를 통해 기존 Advanced Threat Prevention SaaS 환경에 대해 다른 Dell Security Management Server(또는 Dell Security Management Server Virtual)를 구성할 수 있습니다.
영향을 받는 제품:
- Dell Security Management Server
- Dell Data Protection | Enterprise Edition Server
- Dell Security Management Server Virtual
- Dell Data Protection | Virtual Edition 서버
영향을 받는 버전:
- v9.2 이상
Causa
해당 사항 없음
Resolución
관리자는 Advanced Threat Prevention 인증서를 백업 하고 Dell Data Security 서버에 복원 할 수 있습니다. 자세한 내용을 확인하려면 해당 작업을 클릭하십시오.
백업
- Dell Data Security 관리 콘솔에 로그인합니다.
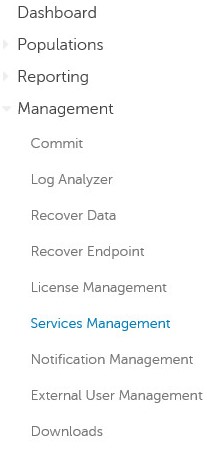
- 왼쪽 메뉴 창에서 Management를 클릭한 다음 Services Management를 클릭합니다.

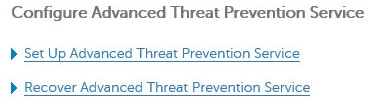
- Advanced Threats 탭에서 Back Up Certificate를 클릭합니다.
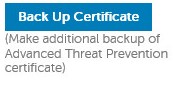
- Download Existing Certificate를 클릭합니다.
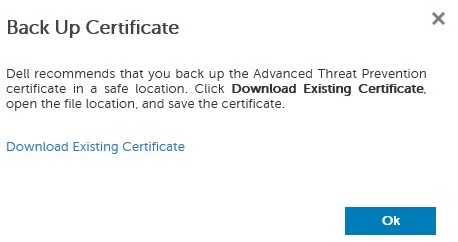
- provisionData.pfx 파일을 저장합니다.
- 확인을 클릭합니다.

복원
- Dell Data Security 관리 콘솔에 로그인합니다.

- 왼쪽 메뉴 창에서 Management를 클릭한 다음 Services Management를 클릭합니다.
- Advanced Threats 탭에서 Recover Advanced Threat Prevention Service를 클릭합니다.
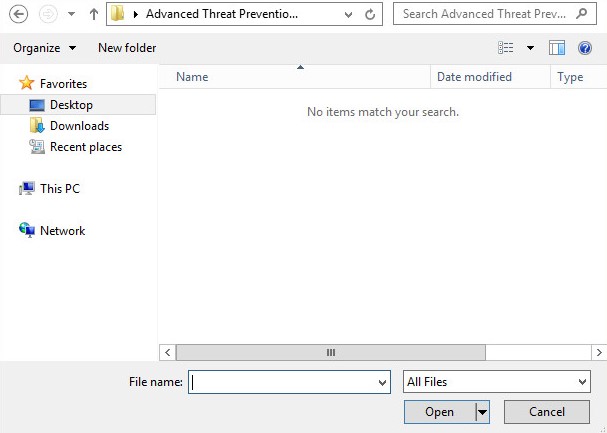
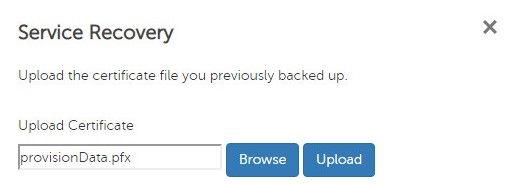
- 찾아보기를 클릭합니다.
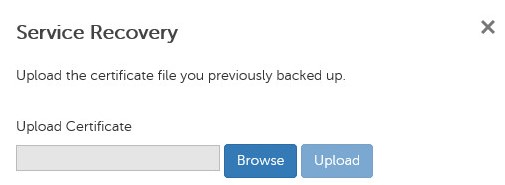
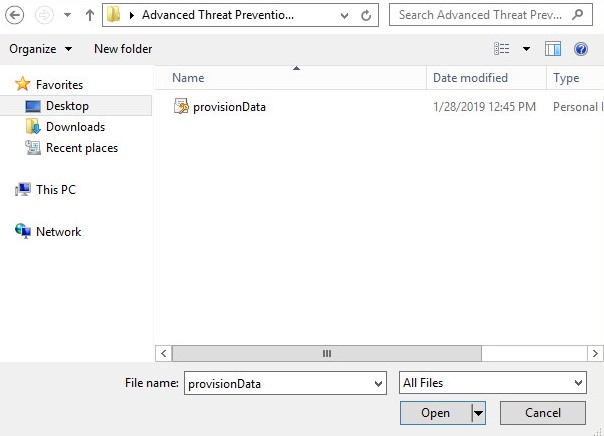
- 이전에 백업한 provisionData.pfx 인증서 파일(백업 5단계)로 이동한 다음 Open을 클릭합니다.
- Upload를 클릭합니다.
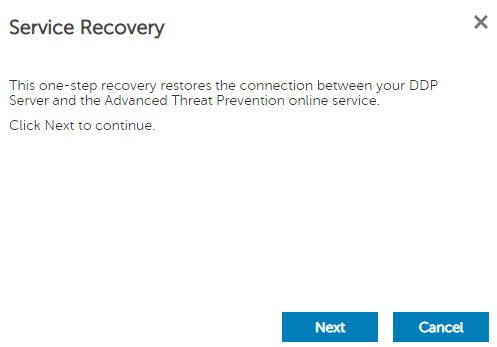
- Next를 클릭합니다.
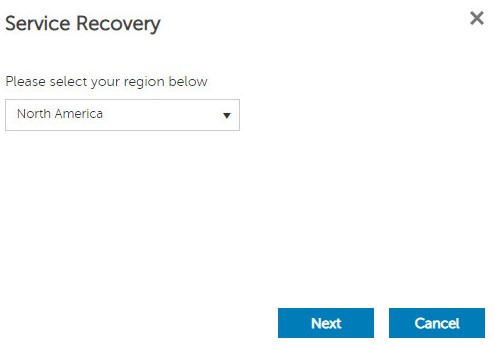
- 지역을 선택한 후 Next를 클릭합니다.
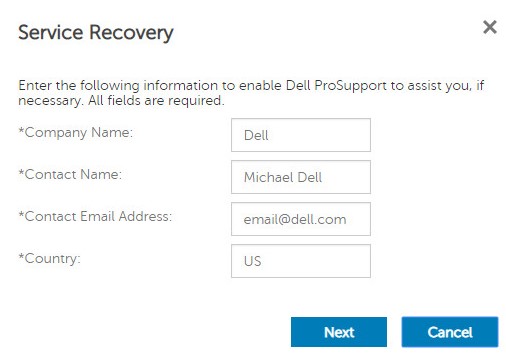
- 서비스 복구 메뉴에서 다음을 수행합니다.
- Company Name에 회사 이름을 입력합니다.
- Contact Name에 연락처 이름을 입력합니다.
- Contact Email Address에 연락처 이메일 주소를 입력합니다.
- Country에 국가를 입력합니다.
- Next를 클릭합니다.
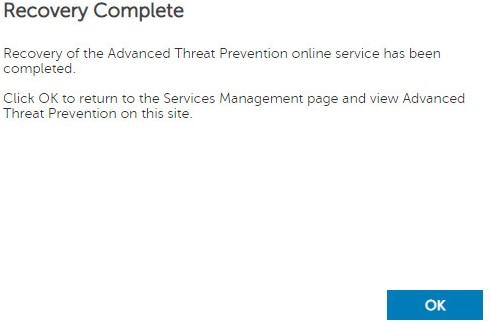
- 확인을 클릭합니다.
지원 부서에 문의하려면 Dell Data Security 국제 지원 전화번호를 참조하십시오.
온라인으로 기술 지원 요청을 생성하려면 TechDirect로 이동하십시오.
추가 정보 및 리소스를 보려면 Dell 보안 커뮤니티 포럼에 참여하십시오.
Información adicional
Videos
Propiedades del artículo
Producto comprometido
Dell Encryption
Fecha de la última publicación
19 oct 2023
Versión
10
Tipo de artículo
Solution