Número del artículo: 000125428
First time setup of TeraDici 2400 PCoIP 4 port card
Resumen: Steps for initial setup of your TeraDici 2400 PCoIP 4 port card.
Contenido del artículo
Síntomas
Causa
Resolución
This article provides information on how to setup the TeraDici 2400 PCoIP 4 port card for the first time.
Card installed but not configured.
First time setup of TeraDici 2400 PCoIP 4 port card.
If the card is functioning (but not configured), you will see two additional "Standard" USB Controllers in Device Manager (Figure 1):
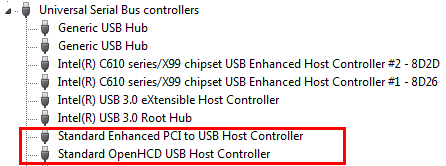
Figure 1: Standard USB controllers in Device Manager
Configuration Process.
Configure the Teradici 2400 PCoIP 4 port card using the following steps:
- Open a browser of choice (Internet Explorer, Chrome, Firefox etc.) on the URL line Log in to the Teradici host card by typing the URL 192.168.1.100 (unless a DHCP server is present) the press the Enter Key.
 NOTE: If a DHCP server is present, Determine the IP address assigned to the Teradici card based on the MAC address of the card (The MAC address is on a sticker on the card) then log in to the assigned MAC address. Once done, you can manually assign a IP address to the card outside the DHCP range.
- The PCoIP configuration page should appear. Click on Configuration, then click Initial Setup (Figure 2):
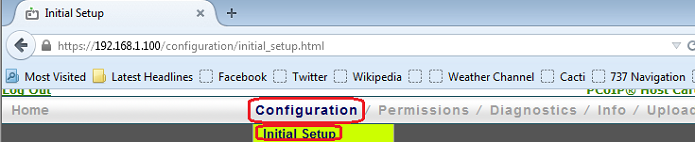
Figure 2: Go to Initial Setup on PCoIP configuration page
- Check the box next to Enable HD Audio, Click Apply.
- Next, under the Network section, turn off Dynamic Host Configuration Protocol (DHCP)by un-checking the box next to Enable DHCP and select a proper Static IP address for the network. (This information must be provided from the network in use.) Click Apply (Figure 3):

Figure 3:Choose the Static IP address for the network
- In the Host Driver Function section, Check the check box to Enable the Host Driver Function, Click Apply (Figure 4):
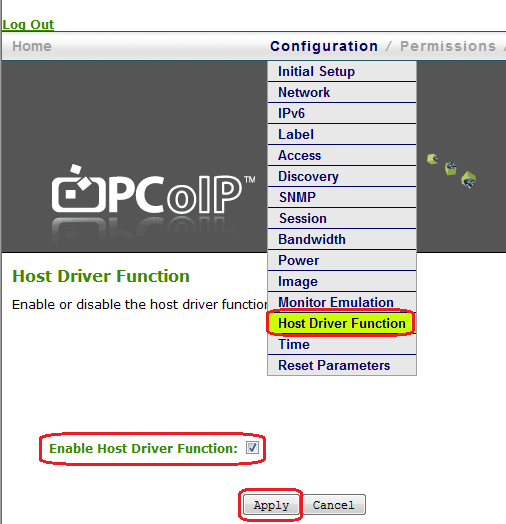
Figure 4:Enable the Host Driver Function
- In the Diagnostics menu, under PCoIP Processor, Schedule the PCoIP card to reset at the next system reboot. Restart the system (Figure 5):
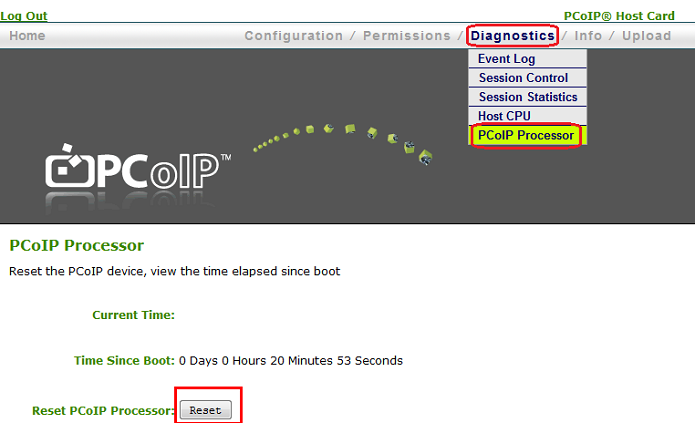
Figure 5: Schedule the PCoIP card to reset at next system boot
- After a reboot, two additional PCI Devices will appear in Device Manager (Figure 6):
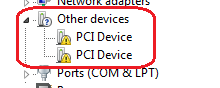
Figure 6: PCI Devices showing in Device Manager after reboot
- Install the latest PCoIP drivers (Figure 7):
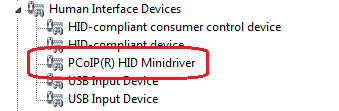
Figure 7: Install the latest drivers for the PCoIP
Optional: You may need to configure Monitor Emulation if you are not receiving an image on the remote device (Figure 8):
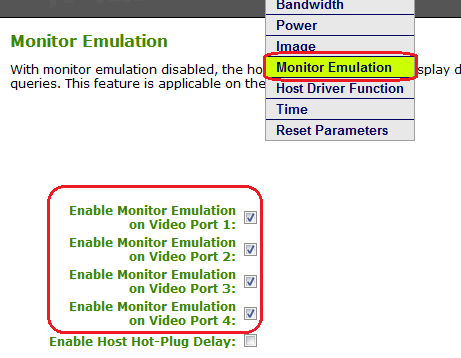
Figure 8: Configure Monitor Emulation if no image appears on remote device
Propiedades del artículo
Fecha de la última publicación
20 feb 2024
Versión
4
Tipo de artículo
Solution