Número del artículo: 000149636
Wie konfiguriere ich LUNs auf meinem Dell|EMC®-Array? - Training Information - 179267
Contenido del artículo
Síntomas
Create a RAID group in Navisphere.
- In the Navisphere Storage tab, right-click the array and select Create RAID Group.
- Under Disk Selection: click to select the Manual radio button and then click the Select button. (Figure 1)
The Disk Selection window appears.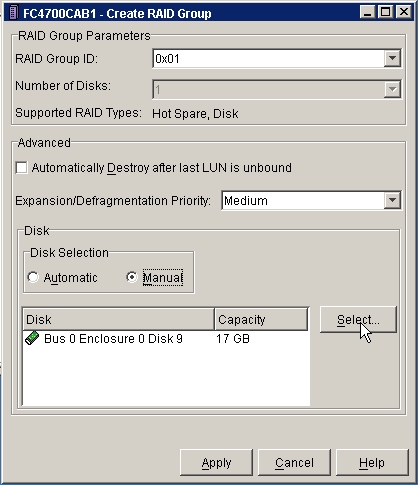
Figure 1 - Manual Radio Button - Using the Select From: drop-down menu (Figure 2), click to select the enclosure you would like to use.
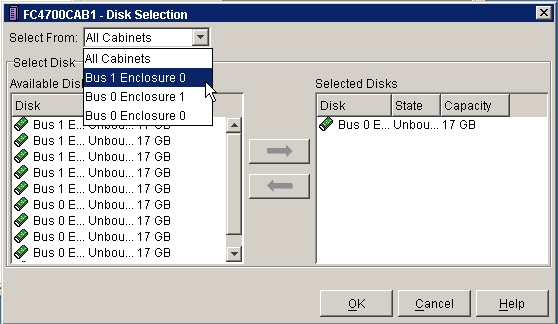
Figure 2 -Select Enclosure - Click to highlight the disks you would like to use in the RAID group and click the picture of the right arrow button to move them to the Selected Disks pane (Figure 3).
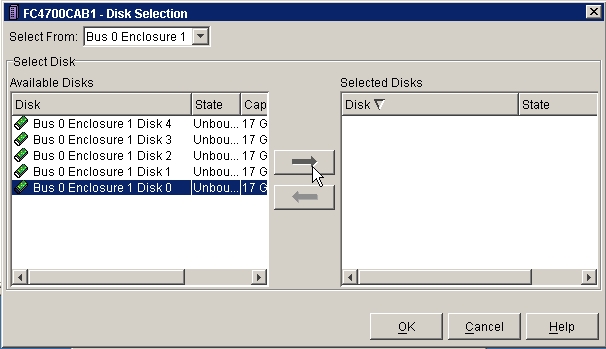
Figure 3 - Disk Selection - Click the OK button.
The Create RAID Group window appears. - Click the Apply button. (Figure 4
The Confirm: Create RAID Group window appears.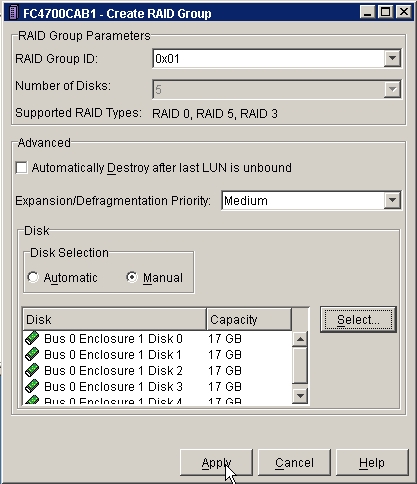
Figure 4 - Create RAID Group - Click Yes to initiate the create RAID group operation.
The Success: Create RAID Group window appears. - Click OK.
The Create RAID Group window appears. (Figure 5)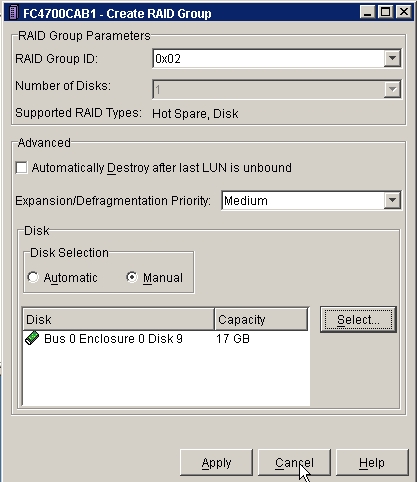
Figure 5 - Create RAID Group - Return to step 2 to create additional RAID groups or click Cancel to exit.
Bind LUNs
- In the Navisphere Storage tab, right-click the array and select Bind LUN (Figure 1).
The Bind LUN window will open.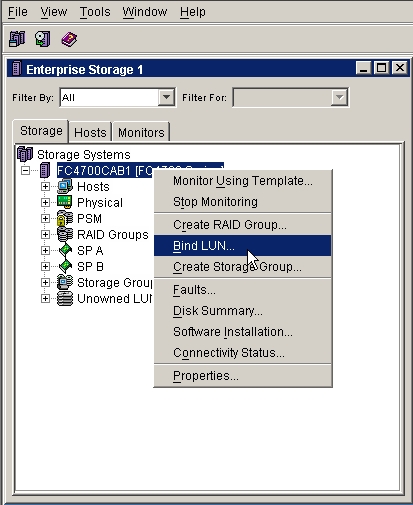
Figure 1 - Navisphere Storage Tab - Use the RAID Type: drop down box to select the RAID type of the LUN.
- Use the RAID Group for new LUN: drop down box to select the RAID group to bind (Figure 2).
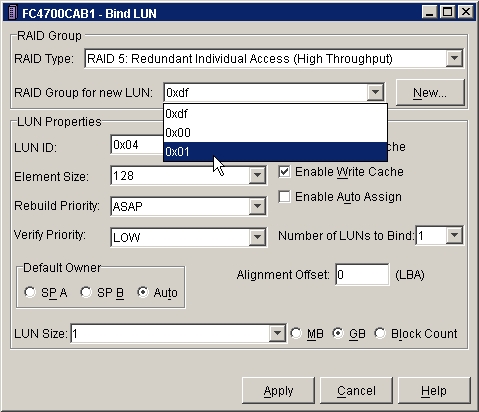
Figure 2 - Select Raid group - Make any necessary changes to the LUN properties (Figure 3) and click Apply.
The Confirm: Bind LUN dialog box will open.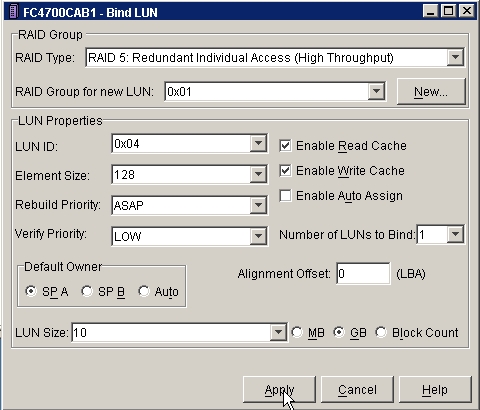
Figure 3 - LUN properties - Click the YES button to bind the LUN.
The Message: Bind Lun window will open, reporting the bind operation was initiated successfully. - Click the OK button.
The Bind Lun Window will reopen. - Return to step 6 to bind additional LUNs or click Cancel to exit.
Weisen Sie LUNs zu Hosts zu, indem Sie Speichergruppen erstellen.
- Klicken Sie auf der Registerkarte Navisphere Storage (Navisphere-Speicher) mit der rechten Taste auf Storage (Speicher) (Abbildung 1), und wählen Sie Create Storage Groups (Speichergruppen erstellen) aus.
Das Fenster Create Storage Group (Speichergruppe erstellen) wird geöffnet.
Abbildung 1: Registerkarte "Navisphere Storage" (Navisphere-Speicher) - Geben Sie den Namen der Speichergruppe in das Feld Storage Group (Speichergruppe) ein.
- Heben Sie zum Hinzufügen einer LUN die entsprechende LUN hervor, und klicken Sie auf den Pfeil nach rechts, um die LUN in den Fensterbereich Selected LUNs (Ausgewählte LUNs) zu verschieben. (Abbildung 2)
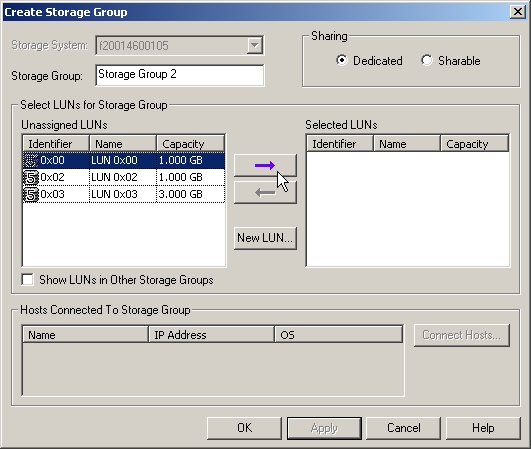
Abbildung 2: Zuweisen einer LUN zu einer Speichergruppe - Wiederholen Sie Schritt 3, um weitere LUNs hinzuzufügen.
- Klicken Sie auf die Schaltfläche Connect Hosts (Hosts verbinden).
Das Fenster Connect Hosts to Storage (Hosts mit Speicher verbinden) wird geöffnet.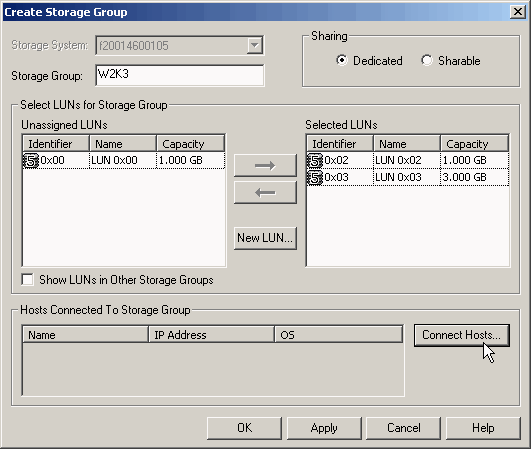
Abbildung 3: Verbinden von Hosts - Heben Sie zum Zuweisen einer Speichergruppe zu einem Host den entsprechenden Host im Fensterbereich Available Hosts (Verfügbare Hosts) hervor, und klicken Sie auf den Pfeil nach unten, um den Host in den Fensterbereich Hosts to be Connected (Zu verbindende Hosts) zu verschieben. (Abbildung 4)
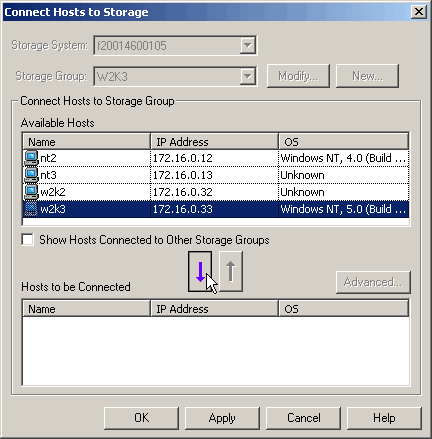
Abbildung 4: Verbinden von Hosts - Klicken Sie auf OK.
- Klicken Sie auf die Schaltfläche Apply (Übernehmen) und anschließend auf die Schaltfläche OK.
Das Warnfenster Create Storage Group (Speichergruppe erstellen) wird geöffnet. - Klicken Sie auf die Schaltfläche Ja. (Abbildung 5)
Das Bestätigungsfenster Create Storage Group (Speichergruppe erstellen) wird geöffnet.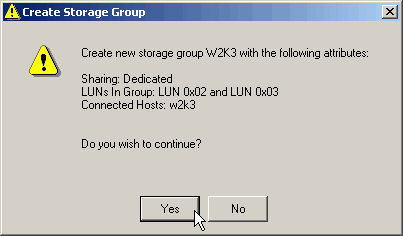
Abbildung 5: Warnung beim Erstellen einer Speichergruppe - Klicken Sie auf die Schaltfläche OK. (Abbildung 6)
Damit ist die Speichergruppe erstellt und einem Host zugewiesen.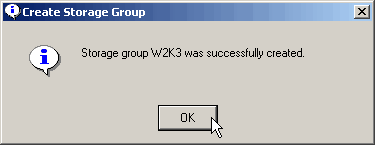
Abbildung 6: Bestätigungsfenster beim Erstellen einer Speichergruppe
Propiedades del artículo
Fecha de la última publicación
21 feb 2021
Versión
3
Tipo de artículo
Solution