Using the Intel Rapid Storage Technology Option ROM to create a RAID 0 configuration
Resumen: Information on the Intel Rapid Storage Technology Option ROM and how to use it to create a RAID 0 configuration.
Este artículo se aplica a
Este artículo no se aplica a
Este artículo no está vinculado a ningún producto específico.
No se identifican todas las versiones del producto en este artículo.
Síntomas
Follow the steps outlined in this article to use the Intel Rapid Storage Technology Option ROM to create a RAID 0 configuration.
Solution:
 NOTE: The Intel Rapid Storage Technology Option ROM replaces the earlier Intel Matrix Storage Manager software in newer Dell desktop, workstation, and portable systems. The walk-through below is meant to provide not just detailed instructions on creating a RAID 0 configuration, but also an overview of the option ROM utility.
Follow the steps below to configure a RAID 0 configuration using the Intel Rapid Storage Technology Option ROM (version 10.5.0.1034):
- Press Ctrl+I when prompted after the system begins the Power On Self-Test (POST) (Figure 1):
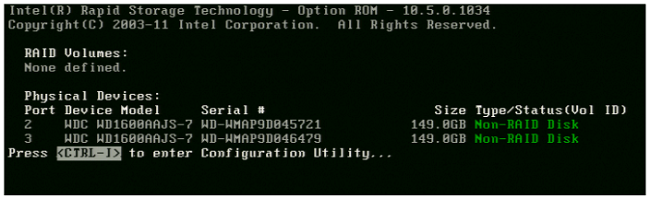
Figure 1: Press Ctrl+I when prompted at POST - Select the option to Create RAID Volume from the Main Menu and press Enter (Figure 2):
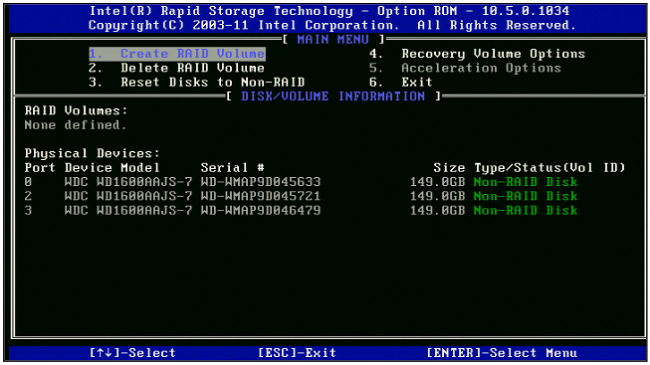
Figure 2: Select Create RAID Volume from Main Menu - Type in a volume name, or accept the default name, and press Enter (Figure 3):
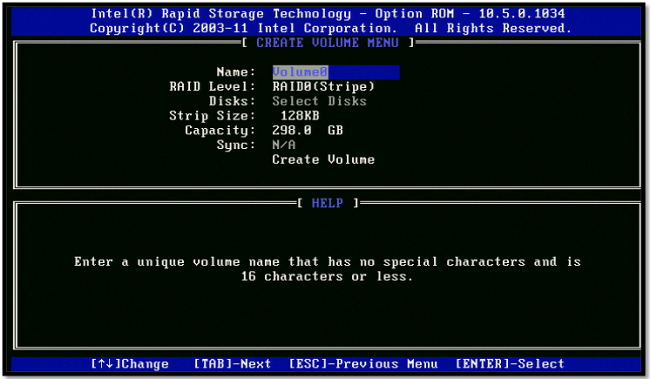
Figure 3: Enter volume name - Press the up or down arrows on the keyboard to choose the RAID Level and press Enter (Figure 4):
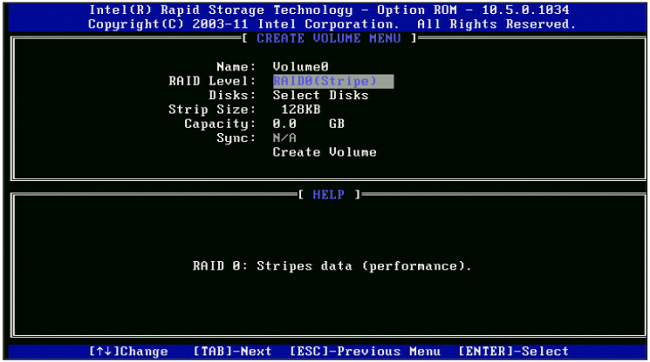
Figure 4: Select RAID Level from list - Use the Space Bar to select the hard drives for the RAID configuration and press Enter when done (Figure 5):
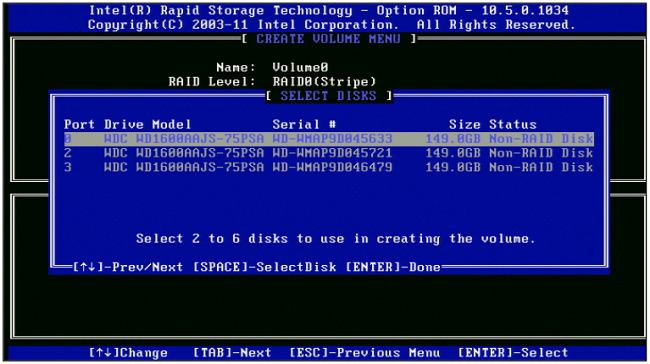
Figure 5: Select hard drives using Space Bar - Choose the recommended 128 KB Strip Size for the RAID 0 configuration and press Enter (this setting will not be available or necessary for a RAID 1 setup) (Figure 6):
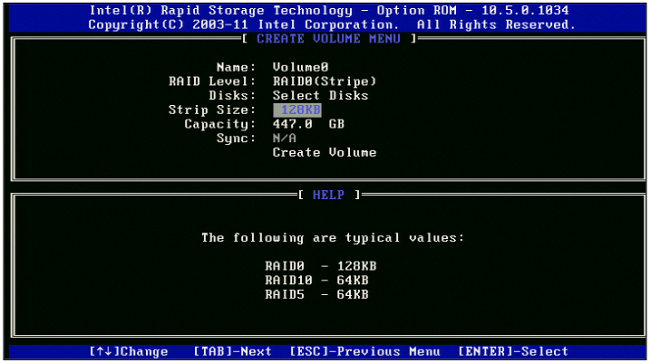
Figure 6: Choose 128 KB Strip Size for RAID 0 configuration - Choose the desired size of the RAID array and press Enter (Figure 7):
 NOTE: The default value for Capacity is the maximum volume capacity using the selected hard drives. If the Capacity chosen is less than the maximum available, then a second volume must be created to utilize the remaining disk space on the hard drives.
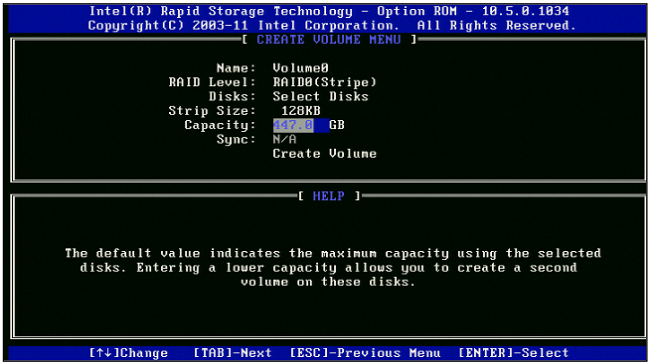
Figure 7: Choose desired RAID volume size - Highlight Create Volume and press Enter, then choose Y when the warning prompt appears to continue (Figure 8):
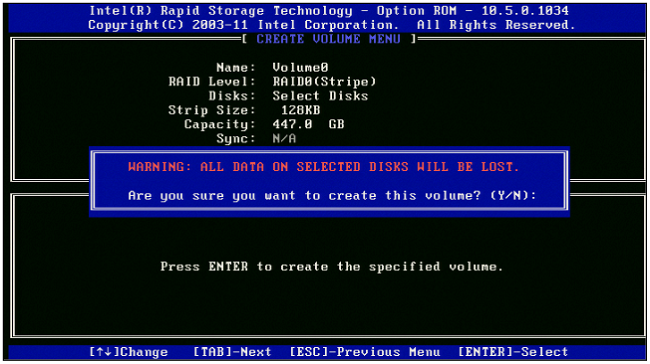
Figure 8: Select Create Volume, press Enter, and then Y when warning prompt appears - Once the RAID volume is created, reboot the machine and proceed either with OS installation if booting to the boot drive, or lettering of the drive in Windows.
Reference the following resources for further assistance using the Intel Rapid Storage Technology Option ROM to create, delete, or troubleshoot RAID configurations:
Causa
NA
Resolución
Refer to the Symptoms tab.
Propiedades del artículo
Número del artículo: 000131244
Tipo de artículo: Solution
Última modificación: 19 abr 2026
Versión: 7
Encuentre respuestas a sus preguntas de otros usuarios de Dell
Servicios de soporte
Compruebe si el dispositivo está cubierto por los servicios de soporte.