How to Configure Proxy Settings in Dell Security Management Server
Resumen: Learn about how to configure proxy settings for Dell Security Management Server or Dell Data Protection Enterprise Edition Server using these instructions.
Este artículo se aplica a
Este artículo no se aplica a
Este artículo no está vinculado a ningún producto específico.
No se identifican todas las versiones del producto en este artículo.
Instrucciones
This article explains how to enable proxy usage for security server processes in Dell Security Management Server (formerly Dell Data Protection Enterprise Edition Server).
Affected Products:
- Dell Security Management Server
- Dell Data Protection Enterprise Edition Server
Affected Operating Systems:
- Windows
Dell Security Management Server proxy settings may be configured to:
- Validate on-the-box product licenses.
- Communicate with the Advanced Threat Prevention (ATP) tenant.
- Communicate with an external syslog server.
Note:
- Volume product licenses do not require external validation.
- ATP Tenant is only used with Dell Endpoint Security Suite Enterprise.
- Proxy settings may require configuration for more than one function.
The proxy configuration steps differ between v9.4.0 and Later and v8.5.1 to 9.3.0. Click the appropriate Dell Security Management Server version for proxy configuration steps. For versioning information, reference How to Identify the Dell Data Security Server Version.
v9.4.0 and Later
- From the Dell Security Management Server, back up
C:\Program Files\Dell\Enterprise Edition\Security Server\conf\application.properties.Note: Theapplication.propertieslocation may differ from the example if another directory was chosen during install. - Go to
%SystemRoot%\System32. - Right-click
Notepad.exeand then select Run as administrator.
- Click File and then select Open.

- In the Open UI:
- Go to the folder
C:\Program Files\Dell\Enterprise Edition\Security Server\conf. - Change the menu selection from Text Documents (*.txt) to All Files (*.*).
- Select the
application.propertiesfile. - Click Open.

- Go to the folder
- Locate the
#Proxy server settings.
- At
proxy.server.enabled=false, deletefalseand typetrue.
- At
proxy.server.host=, type the fully qualified domain name (FQDN) of the proxy server. Note: The example,
proxy.company.com, will differ from the FQDN in your environment. - At
proxy.server.port.ssl=, type the proxy server’s SSL port. Note: The example, 443, may differ from the port in your environment.
 - At
proxy.server.port.http=, type the proxy server’s HTTP port. Note: The example, 80, may differ from the port in your environment.
 - If the proxy server requires authentication, go to Step 11A. If the proxy server does not require authentication, go to Step 12.
- At
proxy.server.username=, type the proxy server’s username. Note: The example,
proxyusername, may differ from the username in your environment. - At
proxy.server.password=, replaceENCwithCLR.
- At
proxy.server.password=, replace the alphanumeric information betweenCLR()with theproxyusername’s password. Note: The example,
proxypassword, may differ from the password in your environment. Once the Dell Security Server service is restarted, the password is encrypted.
- At
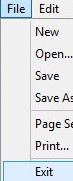
- Click File and then select Save.

- Click File and then select Exit.
- Restart the Dell Security Server service.
Note: For more information, reference How to Stop and Start Services in Dell Security Management Server.
v8.5.1 to 9.3.0
- From the Dell Security Management Server, back up
C:\Program Files\Dell\Enterprise Edition\Security Server\conf\application.properties.Note: Theapplication.propertieslocation may differ from the example if another directory was chosen during install. - Go to
%SystemRoot%\System32. - Right-click
Notepad.exeand then select Run as administrator.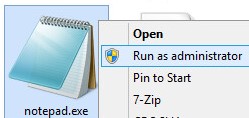
- Click File and then select Open.

- In the Open UI:
- Go to the folder
C:\Program Files\Dell\Enterprise Edition\Security Server\conf. - Change the menu selection from Text Documents (*.txt) to All Files (*.*).
- Select the
application.propertiesfile. - Click Open.

- Go to the folder
- Locate the
#Proxy server settings.
- At
proxy.server.enabled=false, deletefalseand typetrue.
- At
proxy.server.host=, type the fully qualified domain name (FQDN) of the proxy server. Note: The example,
proxy.company.com, will differ from the FQDN in your environment. - At
proxy.server.port.ssl=, type the proxy server’s SSL port. Note: The example, 443, may differ from the port in your environment.
 - At
proxy.server.port.http=, type the proxy server’s HTTP port. Note: The example, 80, may differ from the port in your environment.
 - If the proxy server requires authentication, go to Step 11A. If the proxy server does not require authentication, go to Step 12.
- At
proxy.server.username=, type the proxy server’s username. Note: The example,
proxyusername, may differ from the username in your environment. - At
proxy.server.password=, type theproxyusername’s password. Note: The example,
proxypassword, may differ from the password in your environment. Once the Dell Security Server service is restarted, the password is encrypted.
- At
- Click File and then select Save.

- Click File and then select Exit.

- Restart the Dell Security Server service.
Note: For more information, reference How to Stop and Start Services in Dell Security Management Server.
To contact support, reference Dell Data Security International Support Phone Numbers.
Go to TechDirect to generate a technical support request online.
For additional insights and resources, join the Dell Security Community Forum.
Productos afectados
Dell EncryptionPropiedades del artículo
Número del artículo: 000126363
Tipo de artículo: How To
Última modificación: 17 jun 2025
Versión: 14
Encuentre respuestas a sus preguntas de otros usuarios de Dell
Servicios de soporte
Compruebe si el dispositivo está cubierto por los servicios de soporte.