Dell Encryption Enterprise 缺少升級期間發生的本機快取 MSI 錯誤
Résumé: 在升級 Dell Encryption Enterprise (先前稱為 Dell Data Protection |Enterprise Edition),您可能會收到錯誤「目前安裝的 Dell Encryption 缺少本機快取 MSI」或「目前安裝的 Dell Data Protection |加密缺少本機快取的 MSI。」
Cet article concerne
Cet article ne concerne pas
Cet article n’est associé à aucun produit spécifique.
Toutes les versions du produit ne sont pas identifiées dans cet article.
Symptômes
受影響的產品:
- Dell Encryption Enterprise
- Dell Data Protection | Enterprise Edition
受影響的版本:
- v8.0.0 及更新版本
Cause
不適用
Résolution
視錯誤參考的是 Dell Encryption 或 Dell Data Protection | 而定,解決方案會有所不同加密。如需詳細資訊,請按一下參照的產品名稱。
若要更換 MSI:
- 請聯絡 Dell Data Security ProSupport 以要求
DDPE_[bitdepth]_setup.exe
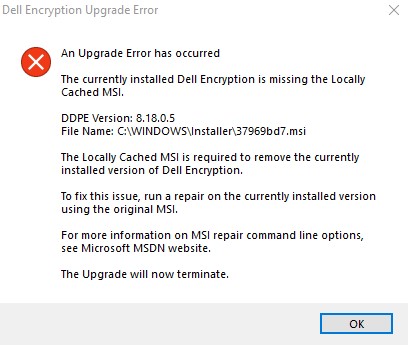
圖 1:(僅英文)Dell Encryption 升級錯誤
注意:
- 如需聯絡資訊,請參閱 Dell Data Security 國際支援電話號碼。
[bitdepth]表示操作系統處理器位。- 在此範例影像中,.exe 安裝程式適用於版本 8.18.0。
- 版本和檔名可能與範例影像不同。
- 執行
DDPE_[bitdepth]_setup.exe以載入 歡迎使用安裝精靈 畫面,但 不要 按下一步。

圖 2:(僅英文)Dell Encryption 64 位元設定
- 以滑鼠右鍵按一下 Windows 開始功能表,然後按一下執行。
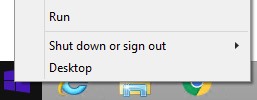
圖 3:(僅英文) 執行
- 在執行 UI 中輸入
%temp%然後按下確認。這將打開用戶的臨時目錄。

圖 4:(僅英文) %temp%
- 從 Windows 檔案總管:
- 排序依據 修改日期。

圖 5:(僅英文)依修改日期排序
- 識別符合以下條件的日期與時間範圍:
DDPE_[bitdepth]_setup.exe - 找到時間戳記接近步驟 2 的 [DELL ENCRYPTION] 檔案。
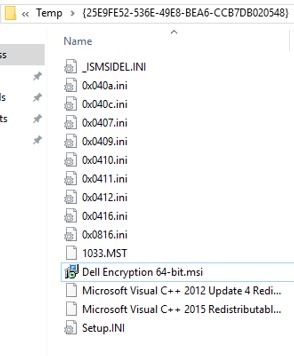
圖 6:(僅英文)Dell Encryption 64-bit.msi
注意:
- [DELL ENCRYPTION] =
- x86 = Dell Encryption.msi
- x64 = Dell Encryption 64-bit.msi
- [DELL ENCRYPTION] 可能包含在 Temp 資料夾內的另一個資料夾中。
- 將 [DELL ENCRYPTION] (步驟 5c) 複製到 C:\Windows\Installer。
- 重新命名 [DELL ENCRYPTION] (步驟 5c),以符合收到錯誤的.msi的檔案名稱 (步驟 1)。

圖 7:(僅英文)重新命名檔案
注意:範例錯誤影像 (步驟 1) 需要重新命名為 37969bd7.msi 的檔案。此檔名在您的環境中可能有所不同。
- 關閉 安裝精靈。
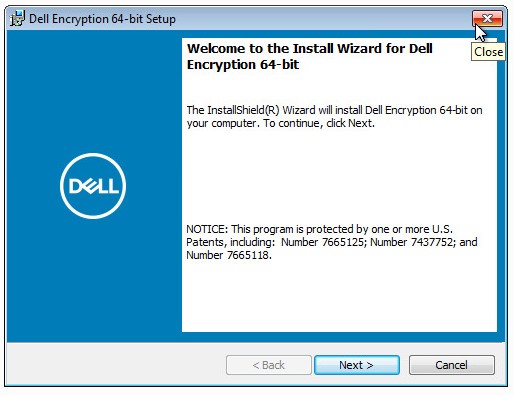
圖 8:(僅英文)Dell Encryption 64 位元設定
- 重試升級。
若要更換 MSI:
- 請聯絡 Dell Data Security ProSupport 以要求
DDPE_[bitdepth]_setup.exe
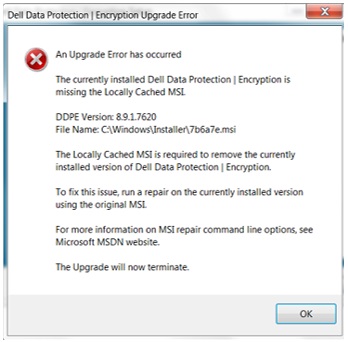
圖 9:(僅英文)戴爾數據保護 |加密升級錯誤
注意:
- 如需聯絡資訊,請參閱 Dell Data Security 國際支援電話號碼。
[bitdepth]表示操作系統處理器位。- 在此範例影像中,.exe 安裝程式適用於版本 8.9.1。
- 版本和檔名可能與範例影像不同。
- 執行
DDPE_[bitdepth]_setup.exe以載入 歡迎使用安裝精靈 畫面,但 不要 按下一步。

圖 10:(僅英文)戴爾數據保護 |加密 64 位元設定
- 以滑鼠右鍵按一下 Windows 開始功能表,然後按一下執行。

圖 11:(僅英文) 執行
- 在執行 UI 中輸入
%temp%然後按下確認。這將打開用戶的臨時目錄。

圖 12:(僅英文) %temp%
- 從 Windows 檔案總管:
- 排序依據 修改日期。

圖 13:(僅英文)依修改日期排序
- 識別符合以下條件的日期與時間範圍:
DDPE_[bitdepth]_setup.exe - 找到時間戳記接近步驟 2 的 [DELL DATA PROTECTION] 檔案。
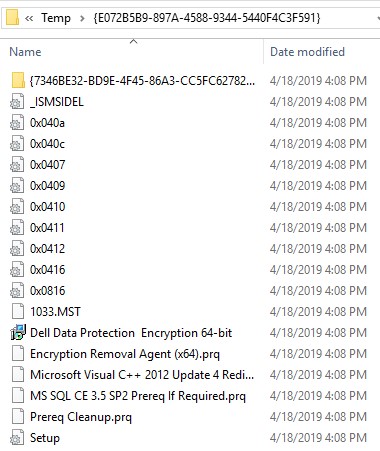
圖 14:(僅英文)Dell Data Protection Encryption 64 位元
注意:
- [DELL DATA PROTECTION] =
- x86 = Dell Data Protection Encryption.msi
- x64 = Dell Data Protection Encryption 64-bit.msi
- [DELL DATA PROTECTION] 可能包含在 Temp 資料夾內的另一個資料夾中。
- 將 [DELL DATA PROTECTION] (步驟 5c) 複製到 C:\Windows\Installer。
- 重新命名 [DELL DATA PROTECTION] (步驟 5c),以符合收到錯誤的.msi的檔案名稱 (步驟 1)。
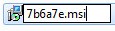
圖 15:(僅英文) 重新命名檔案
注意:範例錯誤影像 (步驟 1) 需要重新命名為 7b6a7e.msi 的檔案。此檔名在您的環境中可能有所不同。
- 關閉 安裝精靈。
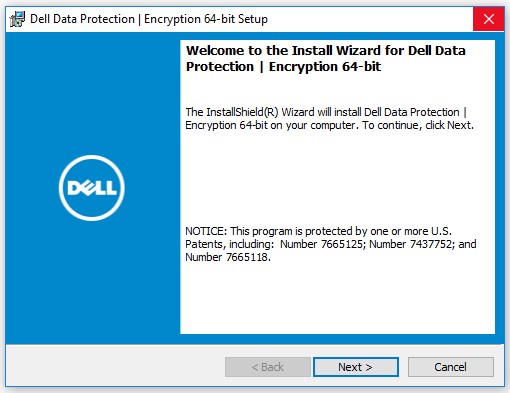
圖 16:(僅英文)戴爾數據保護 |加密 64 位元設定
- 重試升級。
如要聯絡支援部門,請參閱 Dell Data Security 國際支援電話號碼。
請前往 TechDirect,以線上產生技術支援要求。
如需更多深入見解與資源,請加入 Dell 安全性社群論壇。
Informations supplémentaires
Vidéos
Produits concernés
Dell EncryptionPropriétés de l’article
Numéro d’article: 000124941
Type d’article: Solution
Dernière modification: 11 Apr 2024
Version: 8
Trouvez des réponses à vos questions auprès d’autres utilisateurs Dell
Services de support
Vérifiez si votre appareil est couvert par les services de support.