Bienvenue
Bienvenue dans l’univers Dell
Mon compte
- Passer des commandes rapidement et facilement
- Afficher les commandes et suivre l’état de votre expédition
- Créez et accédez à une liste de vos produits
- Gérer vos sites, vos produits et vos contacts au niveau des produits Dell EMC à l’aide de la rubrique Gestion des informations de l’entreprise.
Numéro d’article: 000194424
How to Calibrate LCD Panel Color Temperature in Windows 11 and Windows 10
Résumé: This article provides information about how to calibrate the laptop LCD panel color temperature (yellowish) in Windows 11 and Windows 10.
Contenu de l’article
Instructions
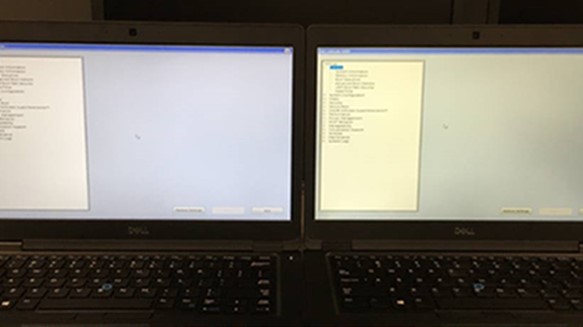
Figure 1: Yellowish LCD panel color
To calibrate your LCD panel on a Windows 11 and Windows 10 computer, go to Settings > Display > Calibrate display color. Then go follow the steps to set your gamma, brightness, contrast, and colors. You can also use online tools to calibrate your LCD panel.
NOTE: Before adjusting your LCD panel, ensure that it has been turned on for at least 30 minutes. This ensures that the LCD panel has already warmed up and is displaying its normal brightness and colors.
- Click the magnifying glass icon in the bottom-left corner of your screen. This brings up the search bar.
- Then type Calibrate display color into the Windows search bar.
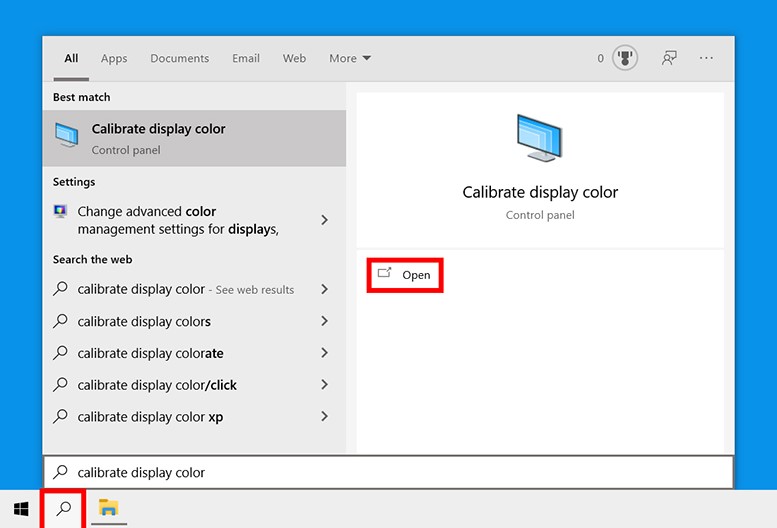
Figure 2: Calibrate display color in the search menu
- Next, click Open. A new window will then appear that says, Welcome to Display Color Calibration.
- Then click Next to start the calibration process. You will also have to click Next between each of the following steps.
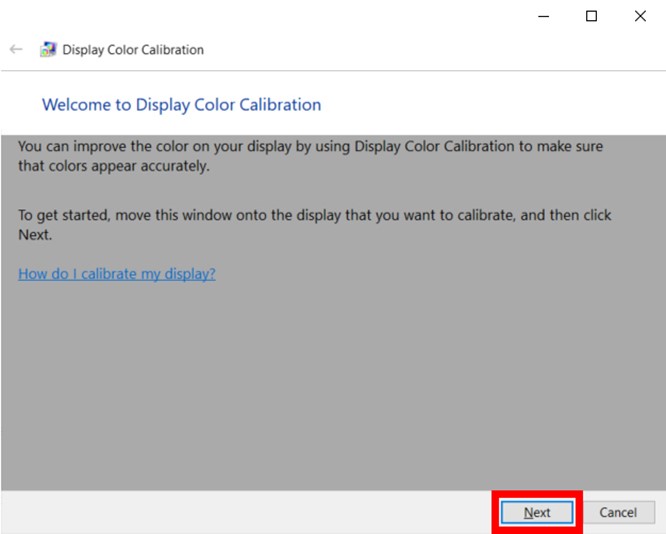
Figure 3: Display color calibration utility in Windows 11 and Windows 10
NOTE: Ensure to set your LCD panel to factory settings at this point. Otherwise, you will not get the best results. To reset your LCD panel to factory conditions, use the buttons that are located on the front, side, or back. However, if your LCD panel lets you set the gamma, you should set it to 2.2 or as close as possible. - Next, use the slider to adjust the gamma. To do this, move the slider until the dots in the middle of the image appear less visible. This changes both the brightness and color of your screen
NOTE: Do not worry if you cannot make the circles in the center completely disappear. If you want a better way of testing, you can also use this gamma correction test image. Try to make as many numbers appear on the top and bottom bars as possible. With better LCD panel s, you can see six numbers in each bar, while lower-grade LCD panel s will only be able to show four numbers.
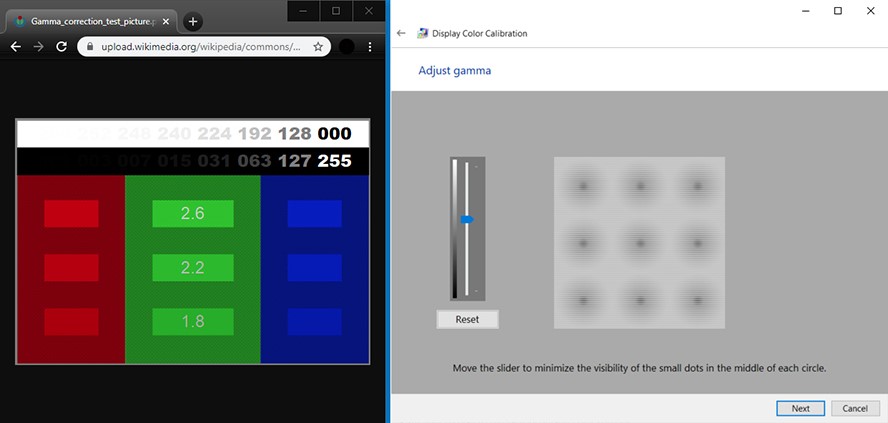
Figure 4: Adjusting gamma settings in Windows 11 and Windows 10
NOTE: If you cannot adjust the slider, you might have to change the gamma settings by using your LCD panel ’s controls. You should still keep the display settings window and gamma correction image test open while you do this. - Next, adjust the brightness. To do this, use the control buttons on your LCD panel until you can see the shirt and suit in the image, but not so much that the X stands out from the background. You should still be able to see the "X," but the wall behind it should not be washed out.
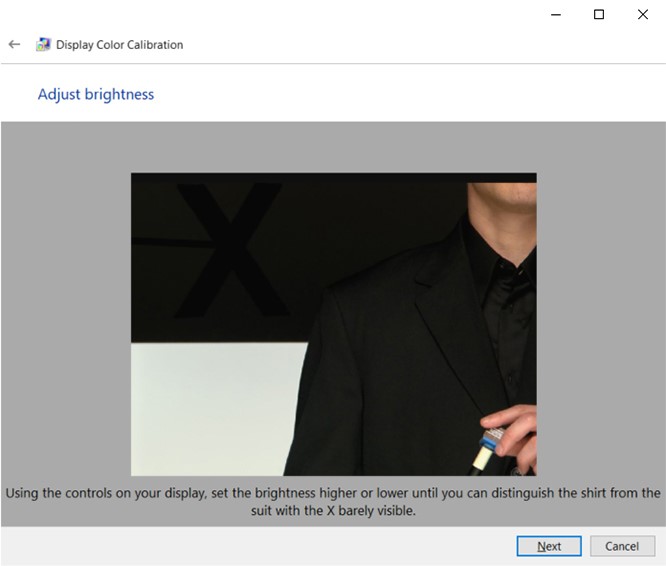
Figure 5: Adjust screen brightness in the Display color calibration utility in Windows 11 and Windows 10
NOTE: Your screen looks different depending on what angle that you are looking at it. For the best results, you should step back and look at your LCD panel from far away. - Next, adjust the contrast. To do this, use the buttons on your LCD panel. You want to set your contrast so you can just see the wrinkles and buttons on the shirt of the man in the figure. The background of the image should not be bright white.
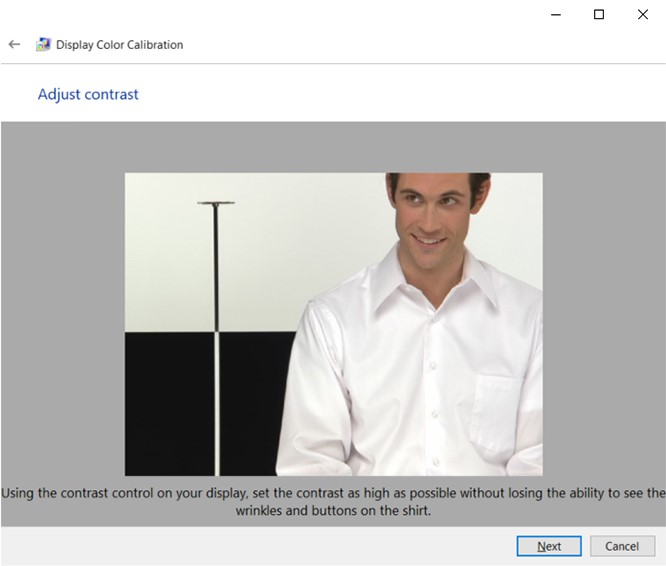
Figure 6: Adjust contrast screen in the Display color calibration utility in Windows 11 and Windows 10
- Then adjust your colors. To do this, use the sliders at the bottom of the window until all the bars are a neutral gray. If you find this difficult, you can also download an image of color bars and use that image to see when your colors are off.
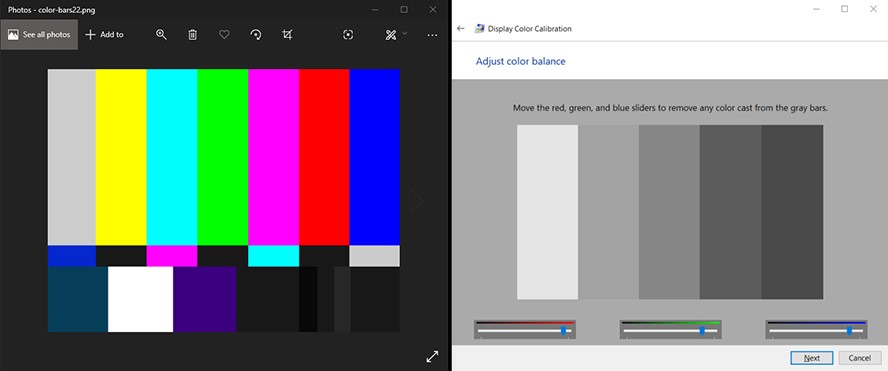
Figure 7: Adjust color balance screen in the Display color calibration utility in Windows 11 and Windows 10
- Next, click Previous calibration and Current calibration to see if you like the changes you made. Doing this will not change your calibration. You can go back and change any settings by clicking the arrow in the top-left corner of the window.
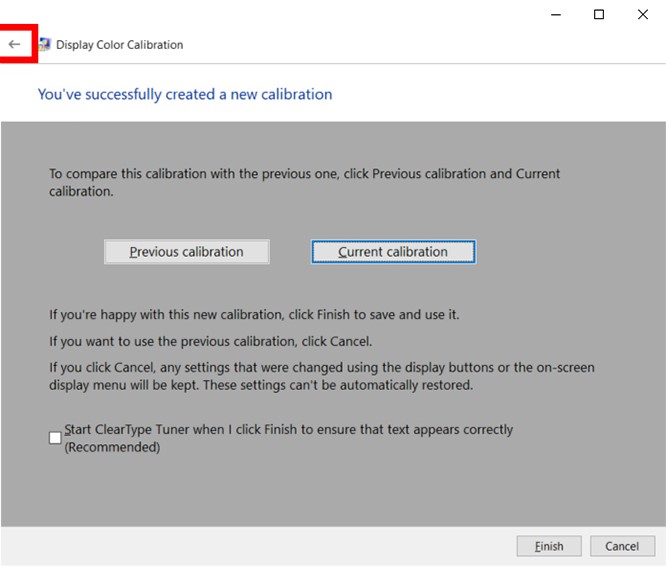
Figure 8: Color calibration is successful in Windows 11 and Windows 10
- If you are satisfied with the new calibration, click Finish. If not, click Cancel, and you can start all over. To get the best results, you can do the steps over again. For the best results, you might want to go through the steps again, but backward this time. This is because each step affects the next one, so changing the order helps you fine-tune your calibration even more.
NOTE: You can check the "Start ClearType Tuner…" box to adjust the clarity of text on your screen. You will then be asked to do a quick test to calibrate the text on your screen.
Propriétés de l’article
Produit concerné
G Series, Alienware, Inspiron, Latitude, 3000 Series, 5000 Series, 7000 Series, 9000 Series, Vostro, Latitude Tablets
Produit
XPS, XPS Tablets
Dernière date de publication
03 نوفمبر 2023
Version
4
Type d’article
How To