Windows Installed on the Wrong Drive
Summary: This article provides information about how to copy the mechanical hard drive information to the SSD drive without reinstalling the Operating System.
This article applies to
This article does not apply to
Symptoms
|
Windows Installed on the Wrong Drive
|
|

Supported Systems:
| Alienware 15 | |
| Alienware 17 R2 |
What is Reflect?
Reflect is a software developed by Macrium that creates backup images and copy entire hard drive partitions into another, without affecting the data in the source drive.
Cause
No cause information
Resolution
How to clone my hard drive using Reflect?
In order to clone a disk, you must ensure that your computer has the target/destination disk that is installed in the computer. It is possible to delete and reconfigure any existing partitions or configure new partitions within Macrium Reflect, so there is no need to do this prior to the cloning process. However, in this tutorial, it is assumed that the new disk contains no partitions.
In addition to cloning to a hard drive installed in your computer, you can also clone your hard drive to a hard drive installed in a 'USB hard drive Caddy' using this as the Target/Destination. In order to boot your computer with the hard drive from the Caddy, the hard drive must be installed into your computer such as by using SATA.
There are some links at the bottom of the tutorial for further help with Cloning or Imaging.
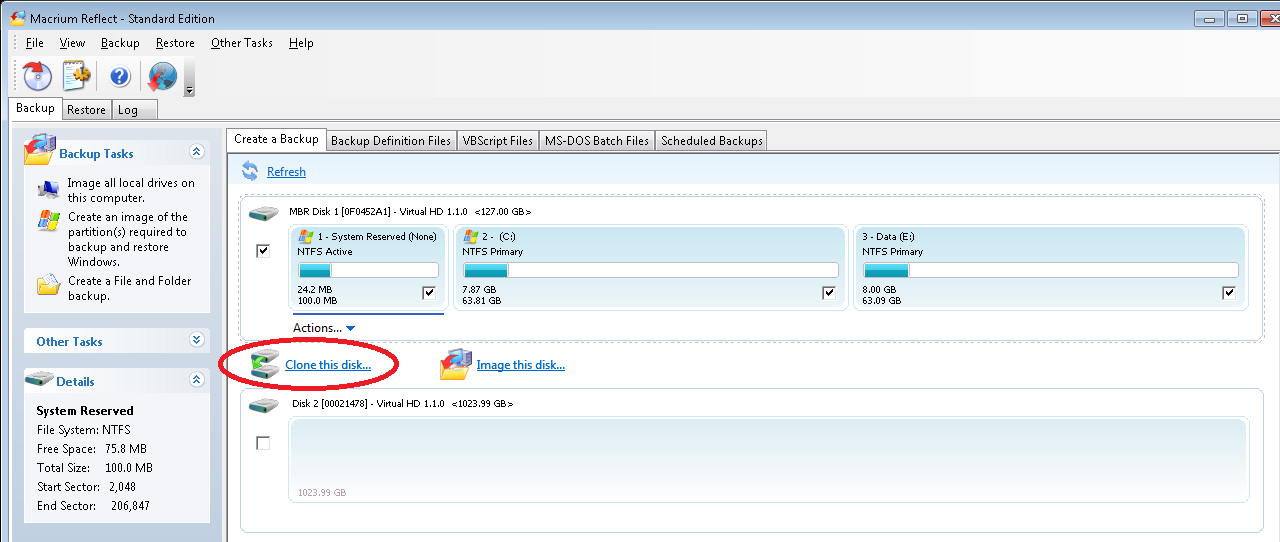
- Click the disk that you want to clone. In this case MBR Disk 1[0F0452A1] and click 'Clone this disk' as shown in red below
- The clone disk wizard dialogue should appear. In the destination section, click the 'Select a disk to clone to…' link.
- Now select the hard disk that you want to clone to. In this case, there is only one disk available for cloning to.
- You can now drag and drop the partitions that you want to be cloned as shown by the red arrow below. If you already have established partitions on the target disk, you must select each one and click the Delete Existing partition link before you can drag and resize partitions from the source.

In this example, the 127GB disk is being cloned to a 1TB disk. Obviously, this fits but may leave large parts of the target disk unused. Therefore it is possible to modify the size of each partition to fit the new disk.
- To modify the partition sizes, click the 'Cloned Partition Properties' link.
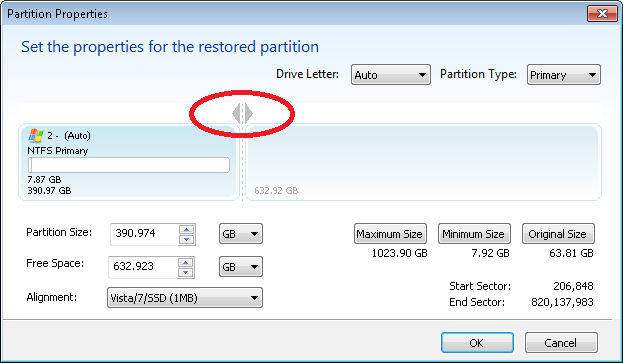
This gives the partition properties. To adjust the size of the partition, you can drag the arrows circled in red, you can set the partition size precisely using the 'Partition Size' entry boxes or you can default the partition to the maximum size available on the new disk, the minimum size or the original size using the buttons on the right.
- When the target partition size has been set as required, click OK.
- Repeat the drag-and-drop and configuration process for all the partitions that are to be cloned and when satisfied, click Next.
- A summary screen is shown. Review the settings and then click Finish.
How to fix "Not all partitions copied. Insufficient space" error message?
In the following example, all partitions from a 2TB source disk are copied to a 127GB destination disk by clicking the 'Copy-selected partitions' link. Taking the 'Copy selected partition' option will always attempt to place the restored partition at the same offset as source.
Note: The same result occurs by clicking the 'Next' button with the 'Copy selected partitions when I click Next' option selected.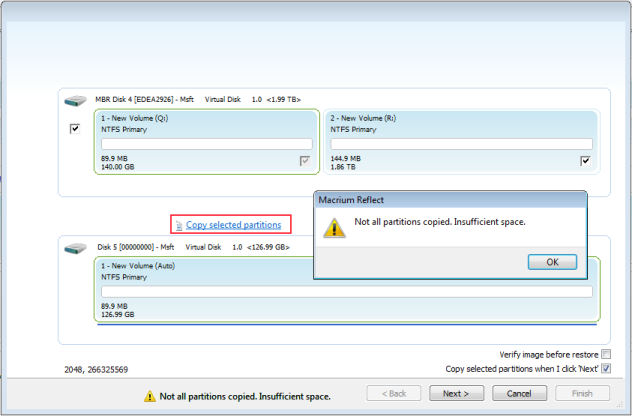
The error 'Not all partitions copied. Insufficient space' will displayed because of the following conditions:
In the case above, the first partition is copied successfully and shrunk from 149 GB to 127 GB (the size of the destination disk) but the second partition, which starts at offset 149 GB, cannot fit on the destination disk.
Note: The same error would occur if a single partition were selected for restore and that partition starts at a position that is greater than the size of the destination disk. Taking the 'Copy selected partition' option will always attempt to place the restored partition at the same offset as source. In this case drag and drop the single partition to free space on the destination disk.
In this case, to overcome this problem it is necessary to copy the first partition, shrink it to make space for the second and finally drag and drop the second partition in the space now available.
| Cannot find what you are looking for? |
 |
 |
 |
 |
||||||||||||||||||||
- The partitions that are selected will now be cloned and when complete, the old disk can be removed and replaced with the new disk as required.
- At least one of the sources partitions selected starts at an offset beyond the size of the destination disk.
- OR, the result of the copy operation would shrink the last partition due to the destination disk size and there is too much data on the source file system to allow the file system to shrink by that amount.
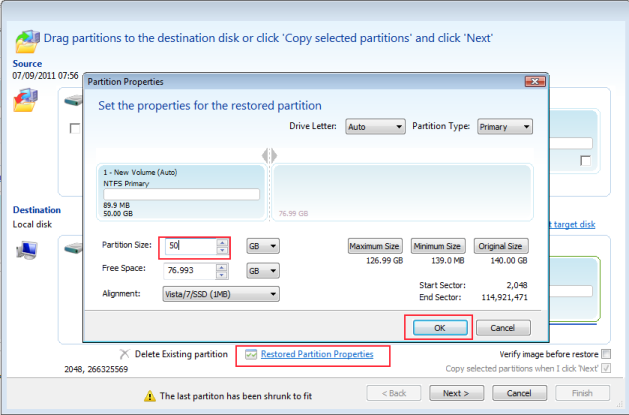
- Select the first partition and click 'Copy-selected partitions'
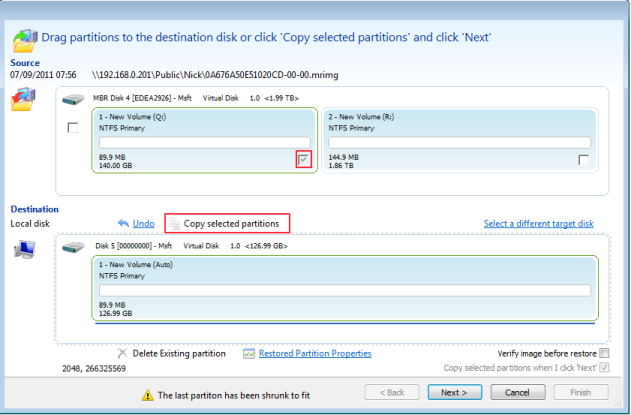
- Click 'Restored Partition Properties', change the 'Partition Size' value in the 'Partition Properties' dialog to make room for the second partition. In this case, we have resized the partition to 50 GB leaving 77 GB free for the second partition.
- Finally, drag and drop the second partition to the free space created.

- Once the second partition has been dropped on to the target click 'Next' to continue with the restore.