文章編號: 000124632
How to Identify the Dell Endpoint Security Suite Enterprise Version
摘要: The version of Dell Endpoint Security Suite Enterprise may be identified by following these instructions.
文章內容
症狀
Note:
- As of May 2022, Dell Endpoint Security Suite Enterprise has reached End of Maintenance. This article is no longer updated by Dell. For more information, reference Product Life Cycle (End of Support and End of Life) Policy for Dell Data Security. If you have any questions on alternative articles, either reach out to your sales team or contact endpointsecurity@dell.com.
- Reference Endpoint Security for additional information about current products.
Knowing the Dell Endpoint Security Suite Enterprise version lets you:
- Identify known issues
- Determine UI differences
- Understand workflow changes
- System Requirements
Affected Products:
- Dell Endpoint Security Suite Enterprise
Affected Versions:
- v1.0 and later
Affected Operating Systems:
- Windows
- Mac
- Linux
原因
Not applicable
解析度
Click Windows, Mac, or Linux for version information.
Windows
Versions can be determined either through the:
Click the appropriate method for more information.
UI
Note: Dell Endpoint Security Suite Enterprise must be installed before identifying the version through the UI. For more information, reference How to Install Dell Endpoint Security Suite Enterprise for Windows.
- On the desktop, double-click the DDP Console icon.

- Click the Advanced Threat Protection tile.
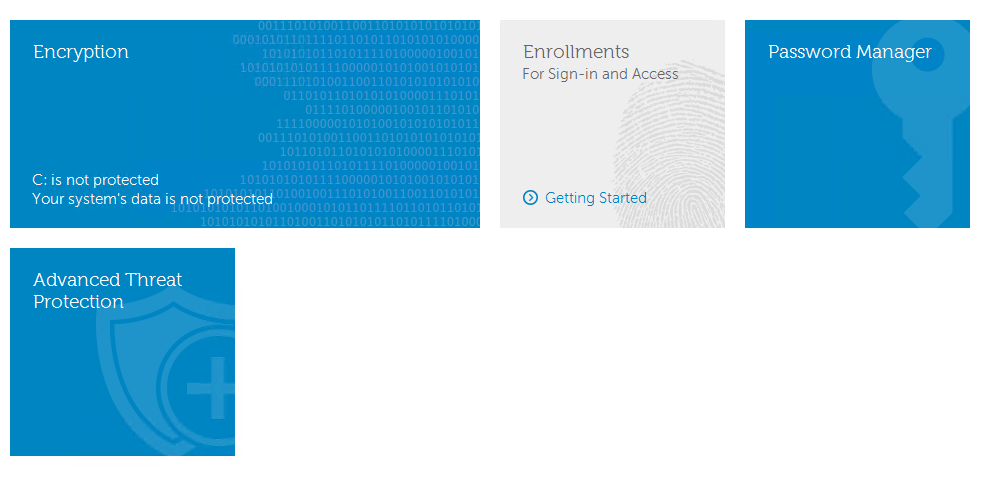
- In the bottom-left corner of the UI, document the Version.
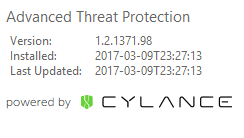
Note:
- The most important number is the third number. In the example, the third number is 1371.
- The Version in the example may differ in your environment.
Installer
Note: For information about downloading the installer, reference How to Download Dell Endpoint Security Suite Enterprise.
- Extract the ATP component from the master suite.
Note: For extraction steps, reference How to Extract Child Installers from the Dell Data Security Master Installer.
- Go to the location of the extracted ATP component.
- If extracted from DDSSuite.exe:
[EXTRACTION PATH]\ Advanced Threat Prevention\WinNtAll\ATP_AgentSetup.exe
- If extracted from DDPSuite.exe:
- 64 bit: [EXTRACTION PATH]
\ Advanced Threat Protection\Win64R\AdvancedThreatProtectionAgentSetup.exe - 32 bit: [EXTRACTION PATH]
\ Advanced Threat Protection\WinNtR\AdvancedThreatProtectionAgentSetup.exe
- 64 bit: [EXTRACTION PATH]
- If extracted from DDSSuite.exe:

Note: [EXTRACTION PATH] is based on the directory that is chosen by the end user. In the screenshot,
C:\Extracted is the [EXTRACTION PATH].
- Right-click the ATP Component (
ATP_AgentSetuporAdvancedThreatProtectionAgentSetup) and then select Properties.
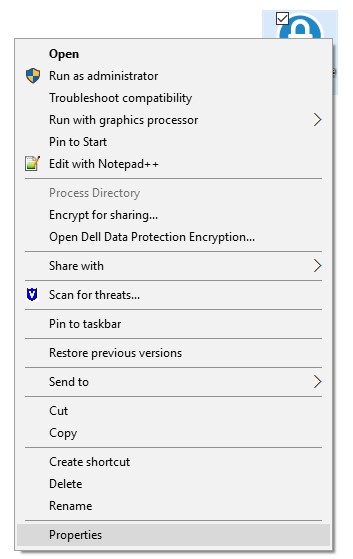
- Click the Details tab.

- Document the number under Product Name.
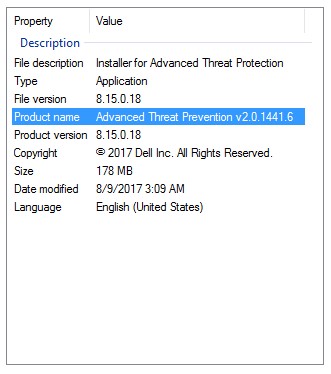
Note:
- The most important number is the third number. In the example, the third number is 1441.
- The version in the example may differ in your environment.
Mac
Note: Dell Endpoint Security Suite Enterprise must be installed before identifying the version through the UI. For more information, reference How to Install Dell Endpoint Security Suite Enterprise for Mac.
- In the Status Menu (at the top of the screen), right-click the Dell Data Protection | Endpoint Security Suite Enterprise icon and then select About.
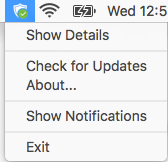
- Document the Version.

Note:
- The most important number is the third number. In the example, the third number is 1411.
- The Version in the example may differ in your environment.
Linux
Note: Dell Endpoint Security Suite Enterprise must be installed before identifying the version. For more information, reference How to Install Dell Endpoint Security Suite Enterprise for Linux.
- On the targeted endpoint, open Terminal.

- In Terminal, type
atp –vand then press Enter.

- Document the version.
Note:
- The most important number is the third number. In the example, the third number is 1471.
- The version in the example may differ in your environment.
To contact support, reference Dell Data Security International Support Phone Numbers.
Go to TechDirect to generate a technical support request online.
For additional insights and resources, join the Dell Security Community Forum.
其他資訊
影片
文章屬性
受影響的產品
Dell Endpoint Security Suite Enterprise
上次發佈日期
26 10月 2023
版本
14
文章類型
Solution