"Power Surge on the USB Port" Error in Windows
Summary: Learn how to fix the "Power surge on the USB port" error in Windows. Follow these simple steps to get your USB device working again.
Instructions
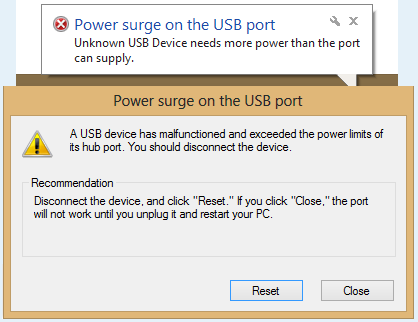
If you see a notification that says "Power surge on the USB port", this is a common Windows message that appears when a connected USB device is drawing more power than the port can provide.
The full message usually reads:
"Power surge on the USB port, A USB device has malfunctioned and exceeded the power limits of its hub port. You should disconnect the device."
This can happen for a few reasons: the USB device needs more power than the port can supply, the device or cable is faulty, your USB controller drivers need refreshing, or a power-saving setting has put the port to sleep at the wrong moment.
The steps below will help you sort this out quickly.
Before You Begin
- Make sure you have administrator access on your computer.
- Have your USB device and cable nearby.
- If you're using a USB hub, note whether it has its own power supply.
Step 1: Reset Your USB Connection
Start with the simplest fix first.
- Disconnect all USB devices from your computer.
- Select Reset on the error notification if it's still on screen.
- Restart your computer.
- Reconnect your USB device and check whether the error appears again.
If the error is gone, you're all set. If it comes back, move to Step 2.
Step 2: Try a Different Port or Cable
Before changing any settings, rule out the simplest hardware causes.
- Try plugging your USB device into a different USB port on your computer.
- If you have a spare cable, try a different cable too.
- Check the USB port for any visible damage or debris.
If the device works on a different port, the original port may be faulty, contact Dell Support for further help. If the error follows the device to every port, continue to Step 3.
Step 3: Run the Hardware Troubleshooter
Windows has a built-in tool that can automatically find and fix common hardware issues.
- Select the Start button, then select Settings.
- Select System, then select Troubleshoot.
- Select Other troubleshooters.
- Scroll down to Hardware and Devices, and then select Run.
- Follow the on-screen instructions in the Get Help app to complete the troubleshooting process.
- Restart your computer when the troubleshooter finishes, then reconnect your USB device.
If the error still shows up, continue to Step 4.
Step 4: Reinstall Your USB Controllers
Refreshing your USB controller drivers can clear up issues caused by outdated or corrupted software.
- Disconnect your USB device from the computer.
- Press Windows + R on your keyboard to open the Run dialog box.
- Type devmgmt.msc and then select OK. Device Manager opens.
- Select the arrow next to Universal Serial Bus Controllers to expand the section.
- Right-click the first device listed under Universal Serial Bus Controllers, and then select Uninstall device.
- Repeat step 5 for each device listed under Universal Serial Bus Controllers.
- Restart your computer. Windows will automatically reinstall the USB controller drivers.
- Reconnect your USB device and check whether the error is resolved.
If the error continues, go to Step 5.
Step 5: Turn Off USB Selective Suspend
Windows has a power-saving feature called USB Selective Suspend that can occasionally put a USB port to sleep at the wrong moment and trigger this error. Turning it off keeps your USB ports consistently powered.
- Select the Start button, type Control Panel in the search box, and then press Enter.
- Select Hardware and Sound, then select Power Options.
- Select Change plan settings next to your active power plan.
- Select Change advanced power settings.
- In the Power Options window, expand USB settings, then expand USB selective suspend setting.
- Change the setting to Disabled for both On battery and Plugged in.
- Select Apply, and then select OK.
- Restart your computer and check whether the error is resolved.
Note: Disabling USB Selective Suspend may slightly increase power consumption on laptops. You can re-enable it at any time by following the same steps and setting it back to Enabled.
If the error persists, continue to Step 6.
Step 6: Update Your Dell BIOS
An outdated system firmware (BIOS) can sometimes cause your computer to misread the power needs of a USB device. Updating to the latest version can resolve this.
The easiest way to check for and install a BIOS update on your Dell computer is through Dell SupportAssist, which comes pre-installed on most Dell PCs.
- Select the Start button, type SupportAssist in the search box, and then press Enter.
- Select Check for updates.
- If a BIOS update is available, follow the on-screen instructions to download and install it.
- Restart your computer when the update is complete, then reconnect your USB device.
If the error still appears, continue to Step 7.
Step 7: Use a Powered USB Hub
Some USB devices, like external hard drives, certain webcams, or charging accessories, need more power than a standard USB port on a laptop or desktop provides. In that case, a powered USB hub is the best solution.
A powered USB hub has its own power adapter, so it delivers the extra power your device needs without putting any extra demand on your computer's ports.
- Purchase a powered USB hub, one that comes with its own AC power adapter.
- Plug the USB hub into a wall outlet using its power adapter.
- Connect the USB hub to your computer's USB port.
- Connect your device to the powered USB hub instead of directly to your computer.
Check whether your device works normally with this setup.
Step 8: Run Dell's USB Diagnostics
If none of the steps above resolved the issue, Dell's diagnostics tool can help determine whether there's a hardware problem with your USB port.
- Go to the Dell USB Diagnostics page.
- Follow the on-screen prompts to scan and test your USB ports.
- Review the results and follow any recommended actions.
Still Need Help?
If you've worked through all the steps above and the error persists, your USB port may need a repair. Contact Dell Support for repairs options based on your device's warranty status.