Universal USB Dock Not Working: Fix Connection Problems
Common Symptoms of USB Dock Issues
- Power Issues: Your USB dock doesn't power on, leaving connected devices unresponsive. You might notice no lights or indicators on the dock itself.
- Connection Problems: Devices connected to the dock aren't recognized by your computer. You may experience intermitted connections or complete disconnections.
- Video Output Problems: Your monitor remains blank or displays a "No Signal" message despite being connected to the dock. The screen might flicker or show distorted images.
- USB Port Malfunctions: USB device, such as keyboard, mice, or external drivers, aren't detected when plugged into the dock. You might also experience slow data transfer speeds or frequent disconnections.
- Network Connectivity Problems: Your computer fails to connect to the Internet or local network through the dock's Ethernet port. You might experience slow or unstable network connections.
How to Resolve Universal USB Dock Problems
If you notice any of the symptoms listed above, follow these steps to effectively resolve problems with your USB docking station.
Step 1: Checking Power
Start by ensuring that your docking station is receiving power.
- Connect the AC adapter to the docking station and check for any LED indicators.
- If the LED light does not turn on, proceed to test with an alternate adapter.
- If the LED is on, your docking station is powered. Let's check the connections.
Step 2: Testing with an Alternate AC Adapter
If there is no power indicator, it might be an issue with your dock's AC adapter.
- Disconnect the existing AC adapter from the docking station.
- Connect a known-good AC adapter that is compatible with your docking station model.
- Check if the power LED turns on.
If the LED turns on with the alternate adapter, your original adapter might need to be replaced.
Step 3: Verifying Connections
Ensure that all the cables are securely connected:
- Confirm that the USB cable is properly connected to your laptop.
- Check the connection to external monitors and ensure they are connected via HDMI or DisplayPort correctly.
Step 4: Updating DisplayLink Driver
- Go to the Dell Drivers & Downloads website.
- Identify your dock using its Service Tag, Express Service Code, or Model Number.
- Locate the DisplayLink Dock Driver and click Download.
- After downloading, run the driver update utility and complete the installation.
- Restart the computer and test the dock's functionality.
Step 5: Updating Drivers and BIOS
Outdated drivers and BIOS can cause hardware malfunctions leading to docking station connection problems. SupportAssist is Dell's automated tool that scans your Windows computer for driver and firmware updates, downloads, and installs them.
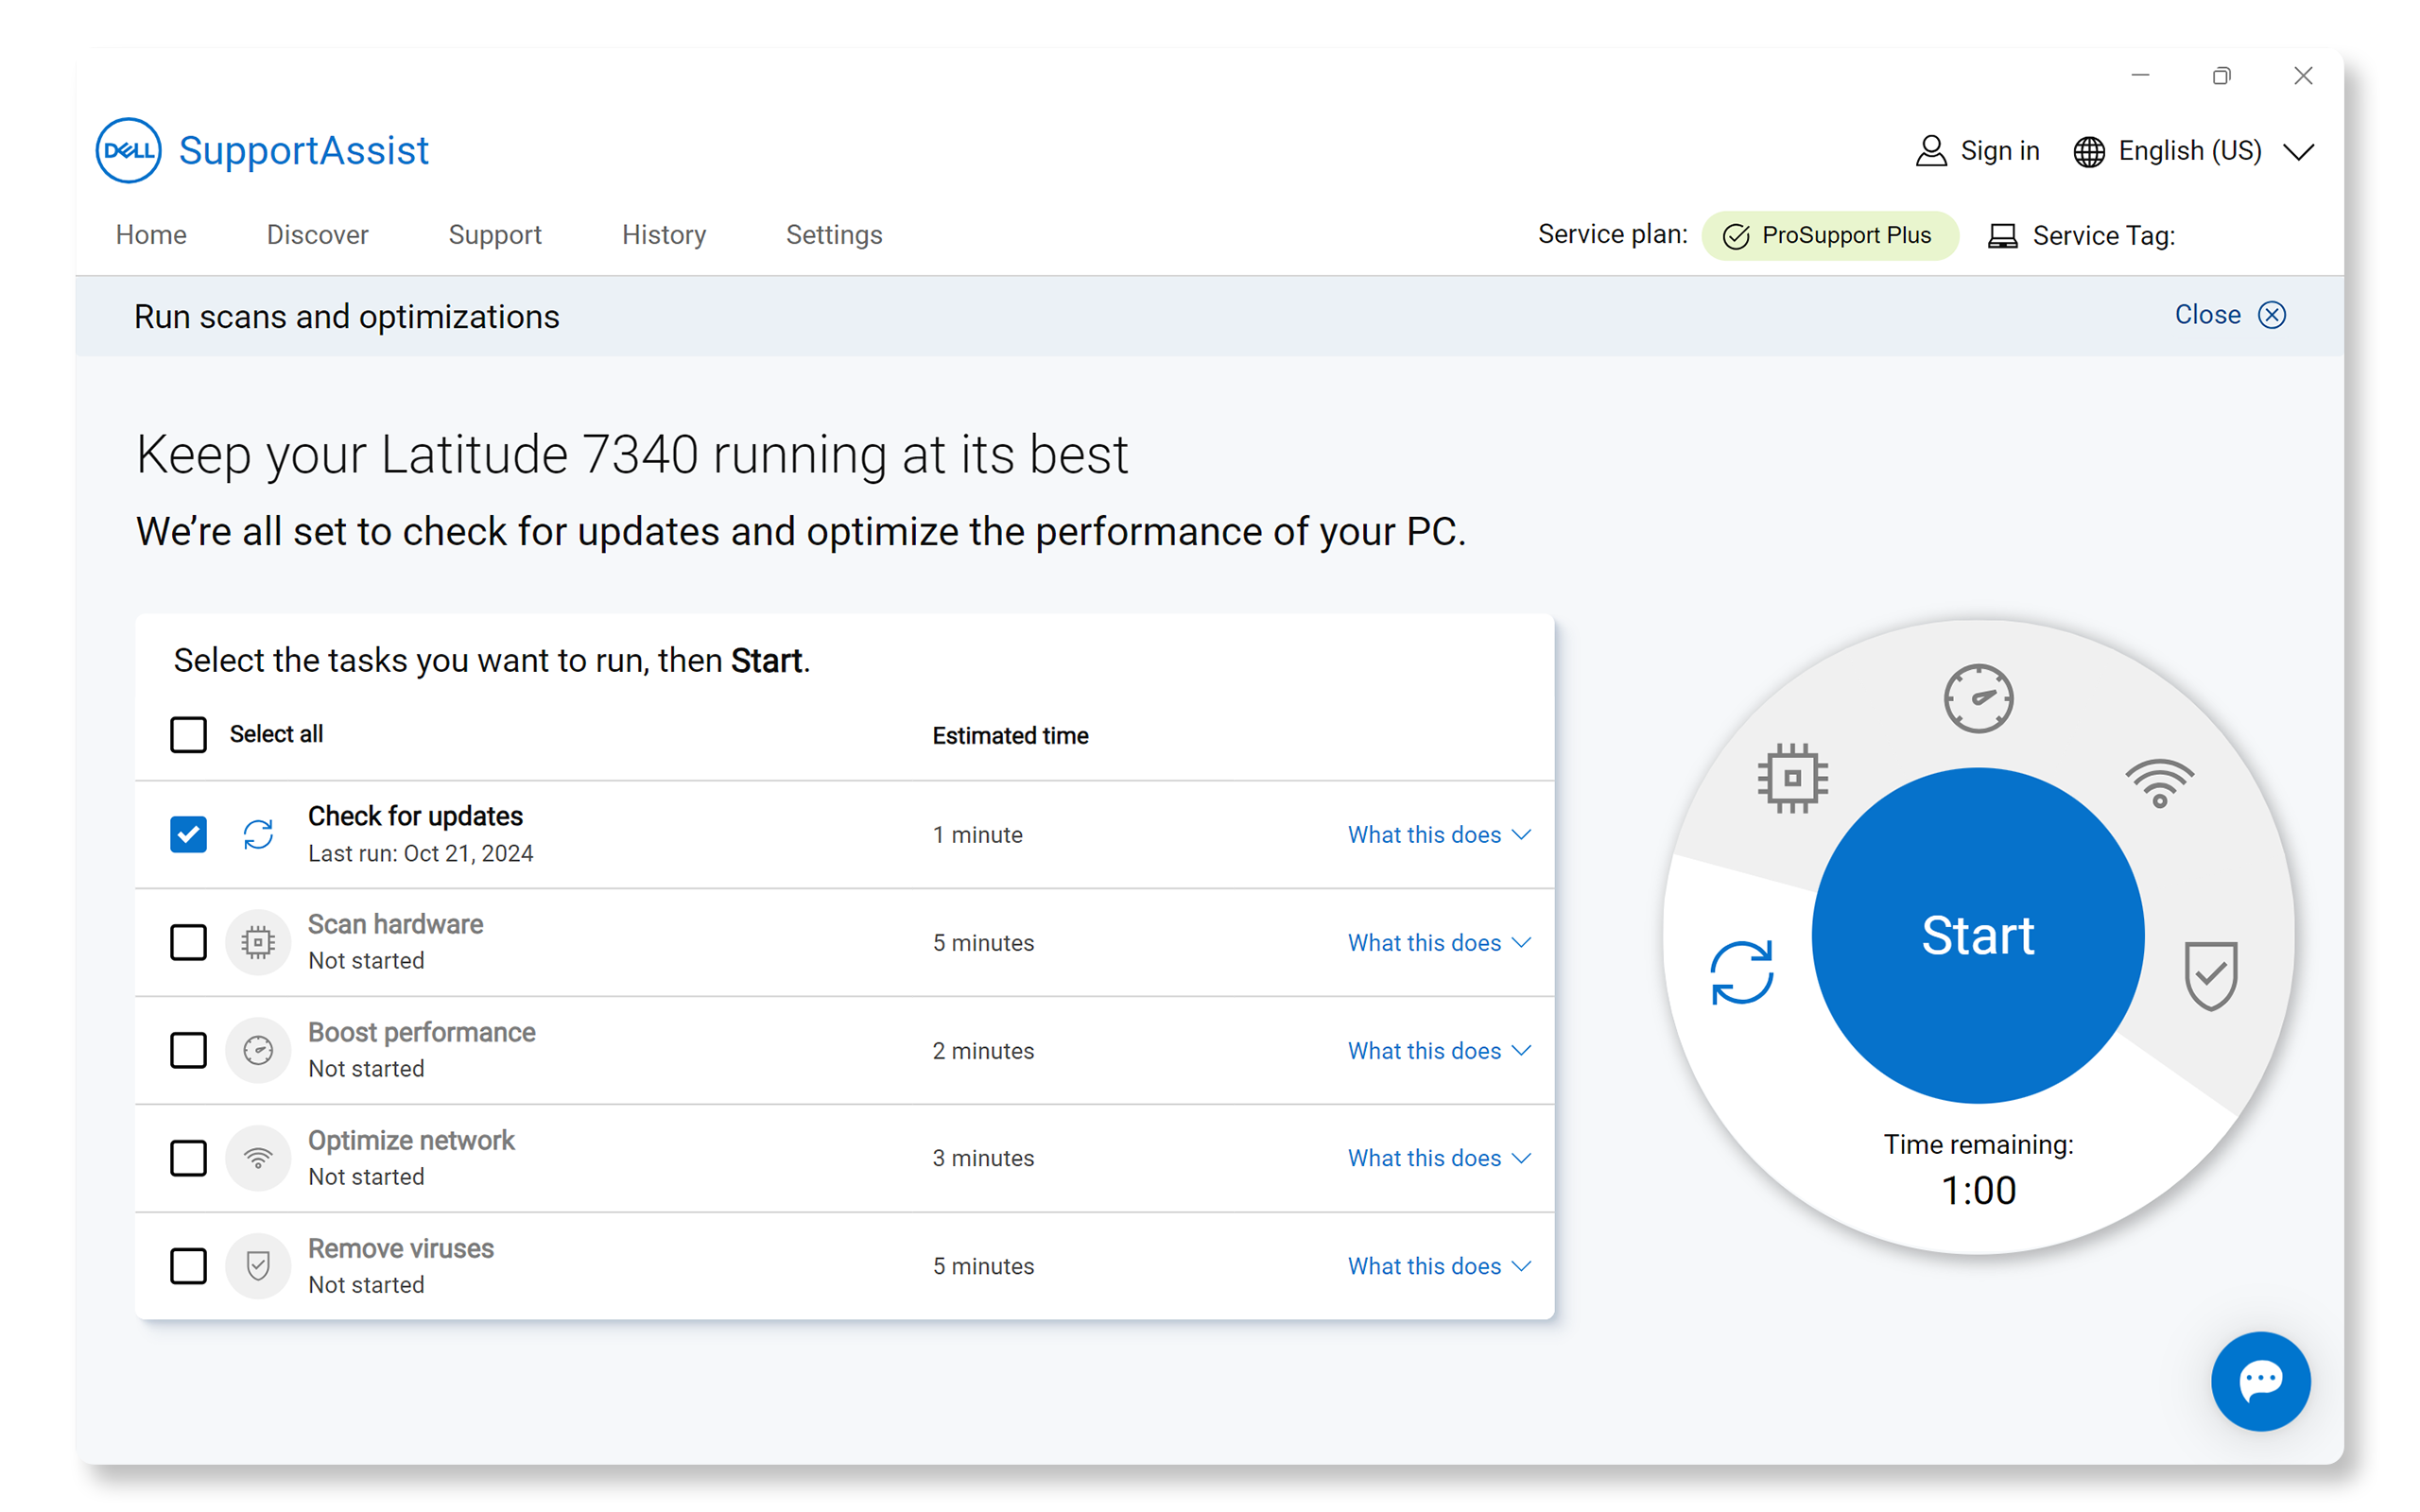
Using SupportAssist
- Search for SupportAssist in the Start menu and open the app.
- On the Home tab, select Update Software.
- Click Start to check for driver and BIOS updates.
- Follow the on-screen instructions to complete the installation and restart your computer if prompted
If you don't have SupportAssist, refer to our driver update guide for alternative methods to download and install Dell drivers.
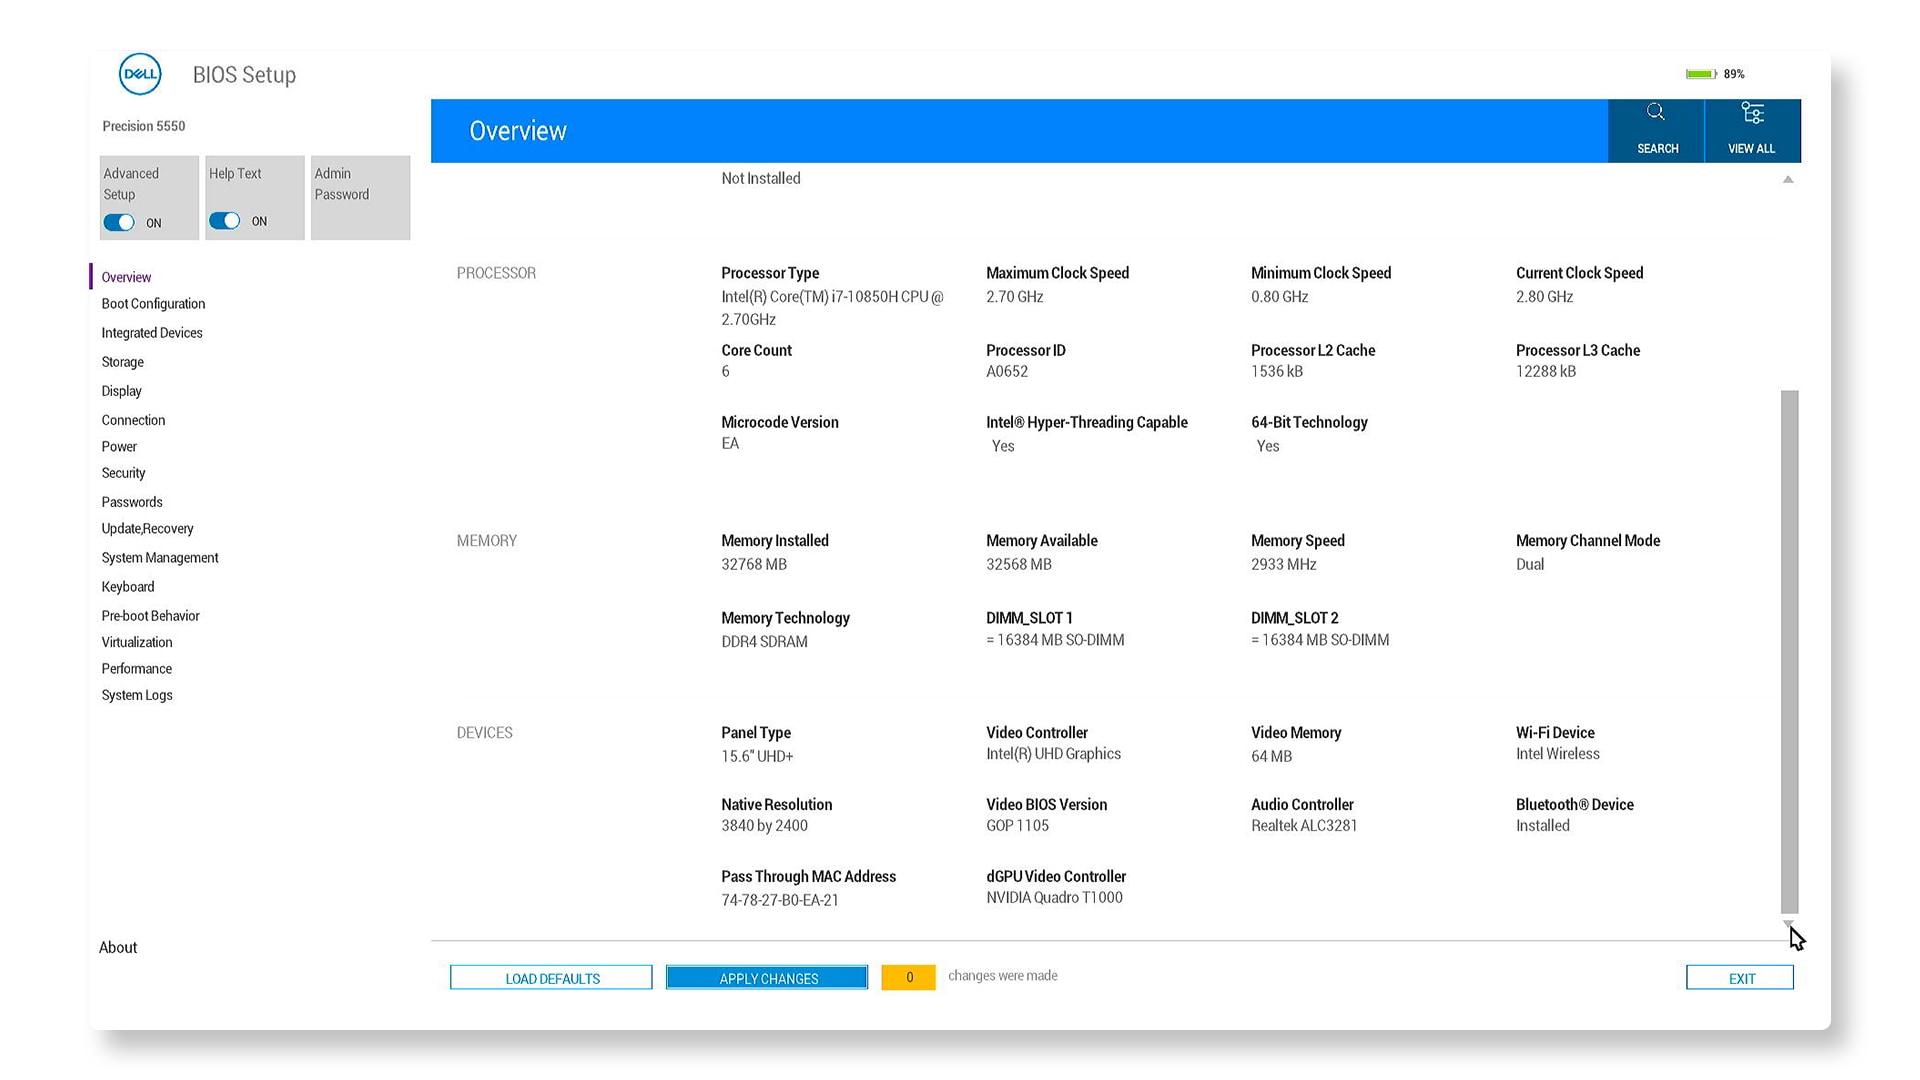
Step 6: Resetting BIOS Settings
Sometimes, BIOS settings can prevent proper functionality of docking stations:
- Turn on or restart your laptop.
- Press the F2 key repeatedly to access the BIOS/UEFI settings.
- Locate the option to reset to default settings, usually Load Defaults or Restore Settings button.
Can't find the same options in BIOS? Check your computer's user manual for BIOS or UEFI navigation.
Step 7: Running Diagnostics on Your Dock Using SupportAssist
Use SupportAssist to run a quick diagnostic test. It's fast, easy, and helps check your dock for hardware issues. Here's how:
- Search for and open SupportAssist, then go to the Support tab.
- Under Test my hardware, select Get started.
- Under Dock Devices, click Run test next to Dock.

If it passes, proceed to the next step. If the test fails, contact Dell Technical Support.
Step 8: Testing Peripherals
If specific peripherals are not working:
- Disconnect and reconnect each device.
- Try connecting devices directly to your laptop to rule out issues with the peripherals themselves.
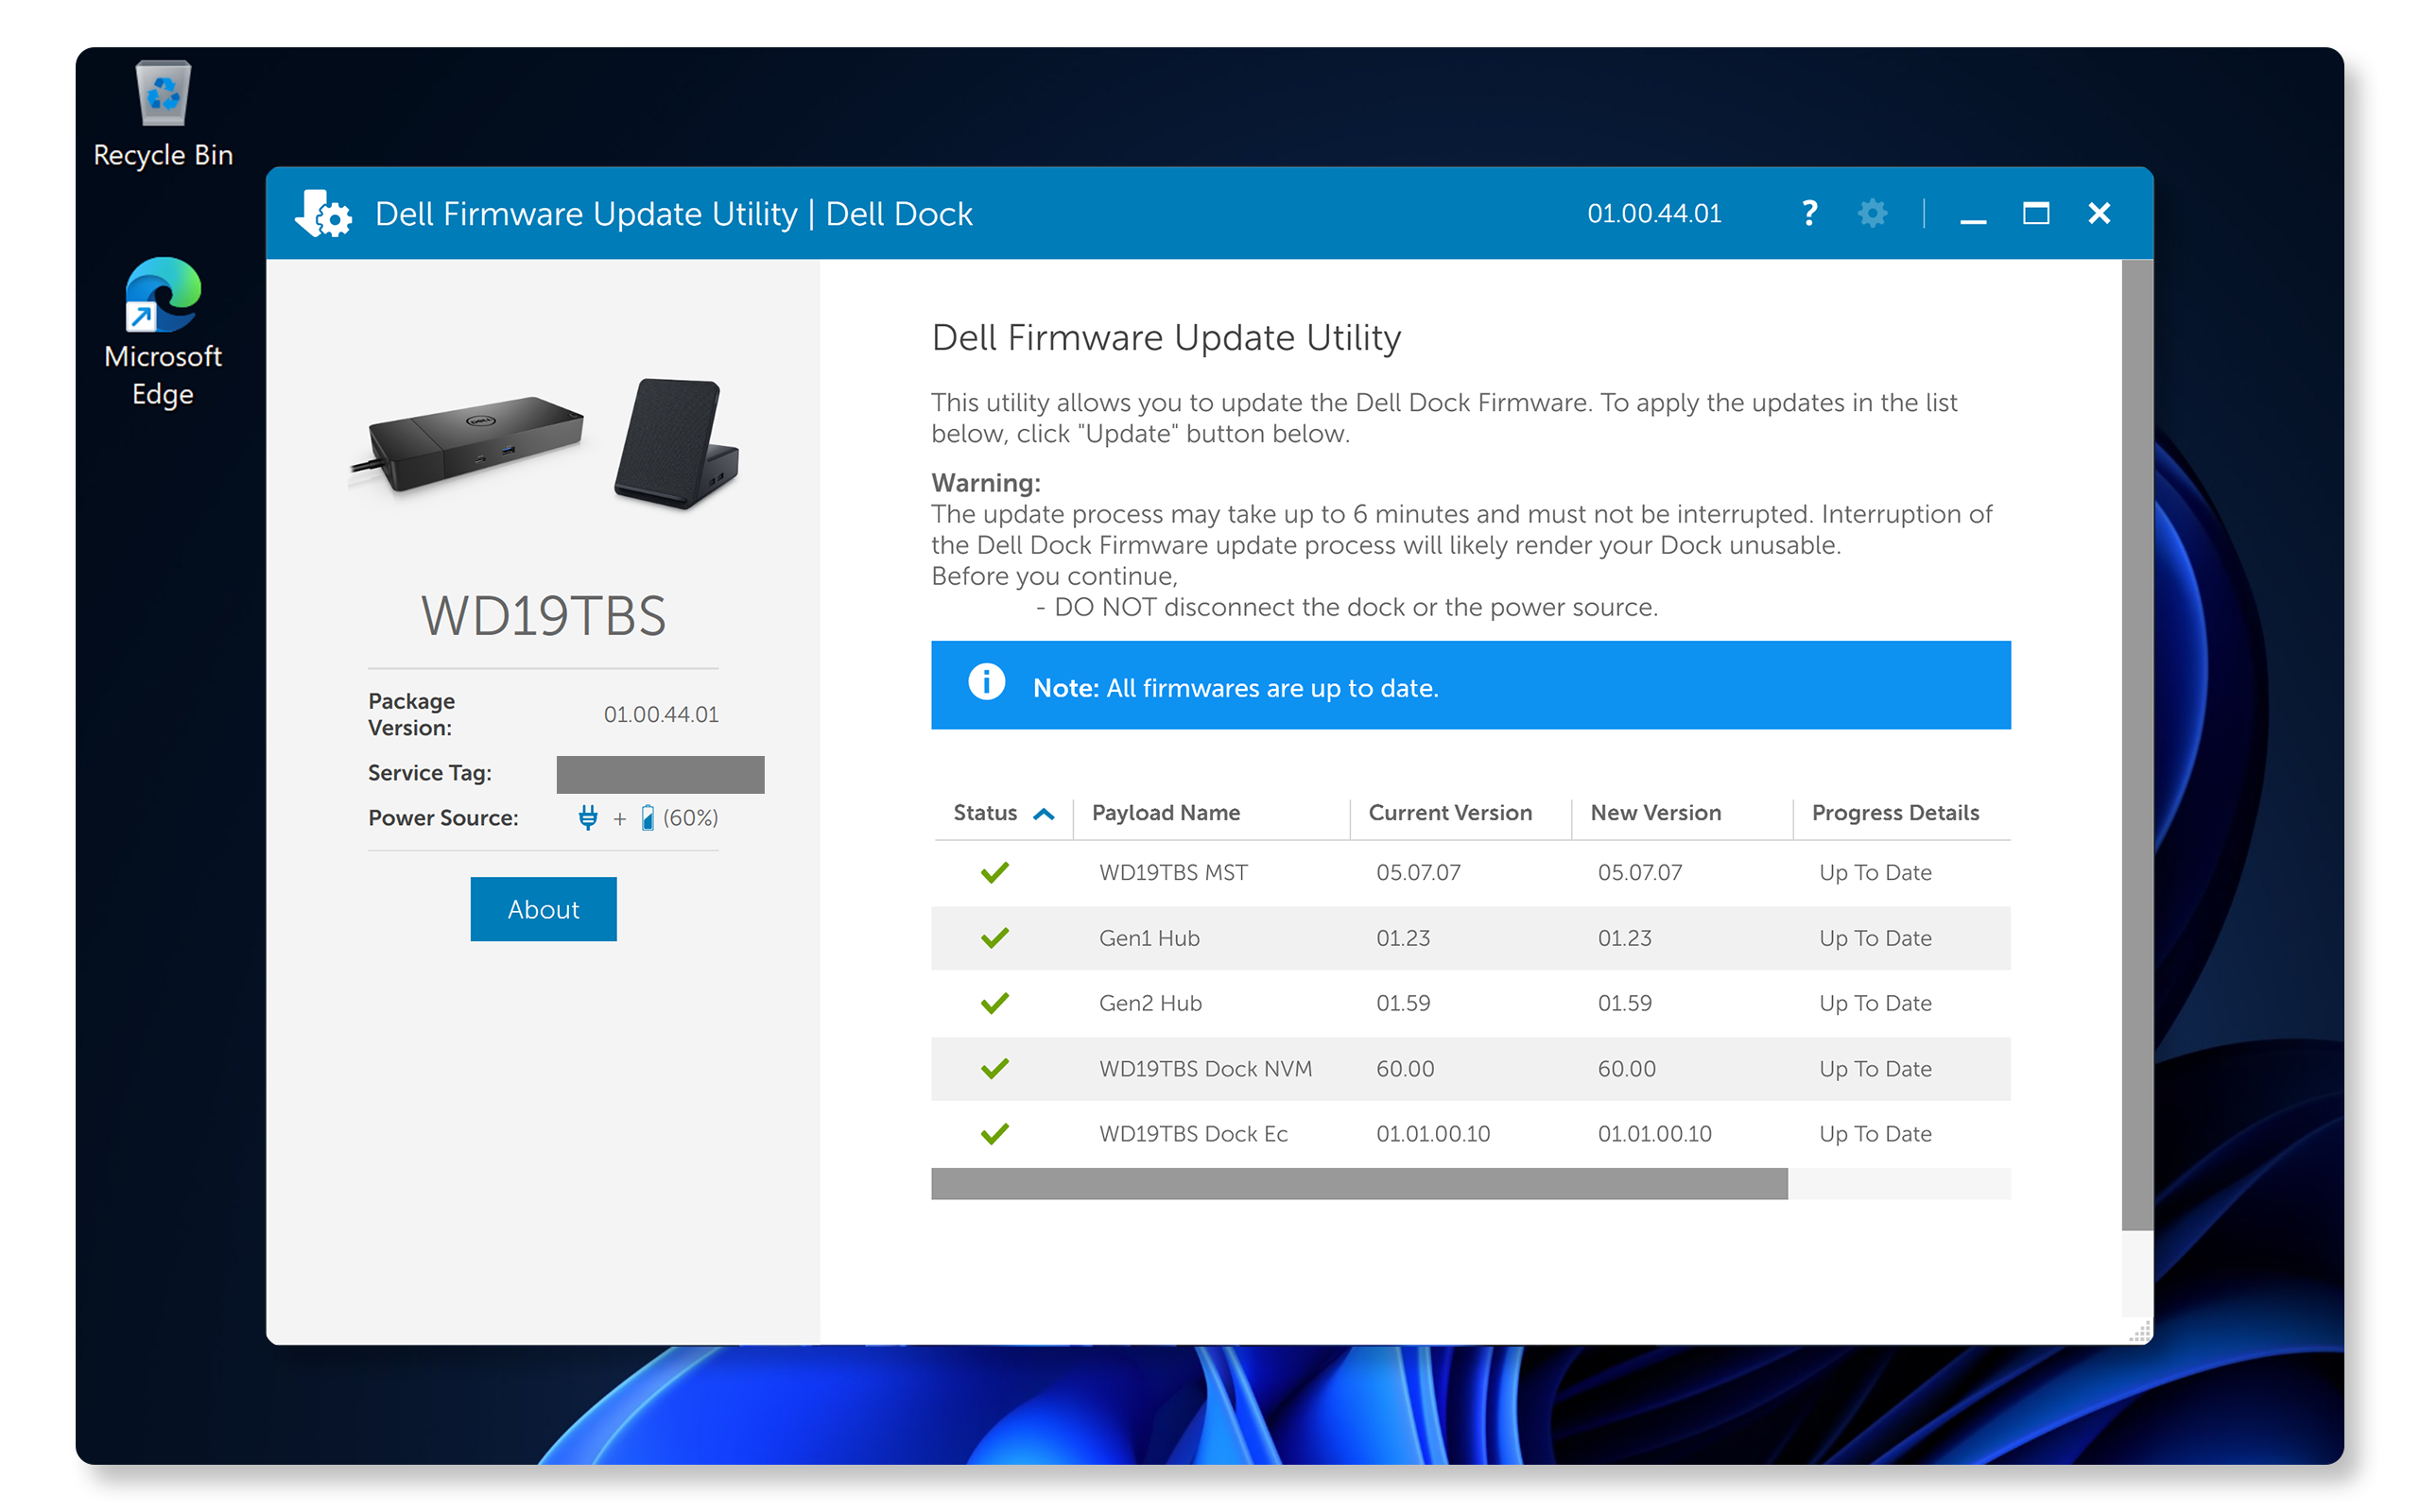
Step 9: Updating the Dock Firmware
- Go to the Dell Drivers & Downloads website.
- Identify your dock using its Service Tag, Express Service Code, or Model Number.
- Locate the Dell Dock Firmware Update Utility and click Download.
- After downloading, run the firmware update utility.
Step 10: Resetting the Docking Station
If problem persists, resetting the docking station might help:
- Disconnect all cables from the docking station.
- Unplug the AC adapter from both the dock and wall outlet.
- Press and hold the power button on the dock for at least 30 seconds.
- Connect the AC adapter to the dock. The docking station LED on the power button blinks three (3) times.
- Connect the docking station to the laptop and turn on the dock.
Frequently Asked Questions (FAQs)
Here are some answers to common questions that users ask about universal USB dock problems.
1. Why isn't my monitor displaying anything?
- Make sure the dock and monitor are properly connected.
- Check that your monitors are powered on.
- Verify the input settings on your monitors.
- Adjust the display settings in Windows.
2. Can I use multiple monitors with my dock?
- Yes, most Dell Thunderbolt docks support multiple monitors. Check your dock's user guide for limits on number of monitors supported based on your laptop's GPU capabilities.
3. What if my USB devices aren't recognized?
- Try connecting them directly to your laptop. If they work, try reset the dock, update the drivers, and update the dock's firmware.
4. Is there a limit to how many monitors I can connect?
- Yes, each dock has a limit based on its specifications, monitor's resolution and refresh rate, and the laptop's GPU capabilities. Refer to your dock's user guide for details.
5. What does it mean if my dock shows "undersized power adapter"?
- This message means the connected power adapter doesn't meet the required specifications. Use the original adapter that came with your docking station.
6. Why do my peripherals stop working after a power loss?
- Dell docks are designed to operate on AC power only and doesn't support power draw from the laptop. After a power loss, the dock needs to renegotiate power contracts with the devices. Unplugging and reconnecting cables often resolves this.
7. Can I charge my laptop through the docking station?
- Yes, Dell Universal USB docks provide power delivery (PD). Make sure the dock's power delivery matches your laptop's needs. For example, Dell Universal Dock UD22 provides up to 96 W with the supplied 130 W AC adapter to compatible laptops. Check your dock's power delivery specifications in the user guide.
8. Is it safe to use third-party adapters with my Dell dock?
- It's recommended to use Dell-approved adapters for optimal performance and safety.
9. Why do I hear fan noise when I plug in the dock's AC adapter?
- This is normal. The first time you plug in the dock's AC adapter, the fan will rotate, but it will turn off soon after.
10. Why is the fan not working after connecting to my laptop?
- The fan is triggered by the dock's temperature. It won't turn on until the dock gets hot enough to reach a thermal threshold. Similarly, if the dock isn't cool enough, the fan won't stop even when you disconnect it from your laptop.
11. Why does the F2 or F12 keys do not respond when the keyboard is connected to the dock?
- You need to enable USB Boot Support and External USB Port in the BIOS/UEFI settings.
13. What drivers do I need for my Dell USB dock?
- To keep your Dell USB dock running smoothly, make sure you have these key drivers and updates installed:
- BIOS: Update your laptop's BIOS.
- Graphics Driver: Install the latest graphics drivers for your laptop.
- DisplayLink Driver: Install the latest DisplayLink drivers.
- Realtek USB Audio Driver: If your dock supports a 3.5mm audio output port, install the Realtek Audio driver.
- Realtek USB Ethernet Controller Driver: For network connectivity, install the Realtek USB Ethernet Controller driver.
14. Is the Dell USB dock compatible with my computer?
- To find out if your Dell Universal USB dock is compatible with your Dell laptop, check out our Dell Docking Compatibility guide (document available in English only).
- For information on functional limitations with laptops from other manufacturers compared to Dell laptops, refer to our Dell knowledge base article on Industry Standard Compatibility with Dell USB-C and Thunderbolt Docks.