ProDeploy Data Migration Tool
Self-Guided Migration is included with ProDeploy Plus and is available to ProDeploy Essentials customers who choose to migrate their own data.
Preparing for migration
Set up the new PC in its final location with the old PC nearby. Both the old and new PCs must maintain power and internet/network connectivity throughout the migration process.
Note: Data migration can move slowly at times. As long as your PCs remain connected, the data will continue to migrate. Contact your engagement/project manager or use the support email or chat link if you have any problems. Do not disconnect your PCs or power them off during migration, this will require you to restart the migration process.
Self-Guided Data Migration Steps
- Open this guide on your Old PC and New PC.
- Download the DMTBackup.exe to the Old PC and download the DMTRestore.exe to the New PC. Once both are downloaded, run the exe on both PC's. For this process, the DMTBackup.exe and DMTRestore.exe need to be running simultaneously on the respective Old and New PC's.
- Select Network PC to PC when prompted on each PC.

Figure 1: Migration type screen - When prompted on the Old PC for the Name or IP Address of the New PC, enter the IP Address that is shown on the New PC, then click Next.
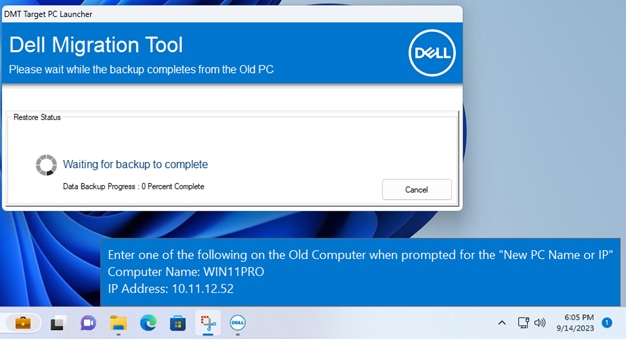
Figure 2: New PC - Displays the Computer Name and IP Address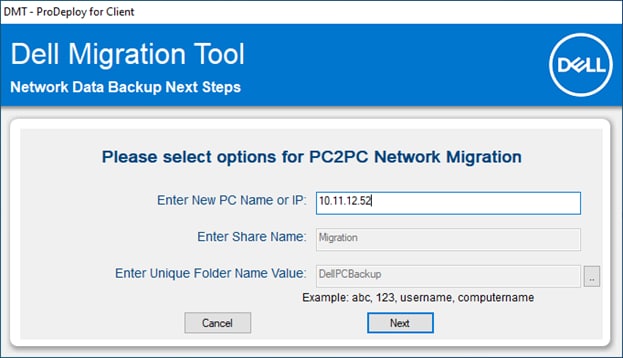
Figure 3: Old PC - Enter What is Displayed on New PC - Verify the information is correct. Click Start to start the data migration. The restore on the New PC should start automatically once the backup has completed on the Old PC.
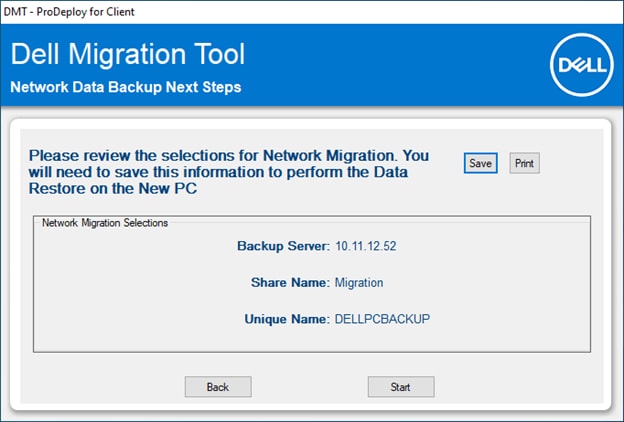
Figure 4: Review Selections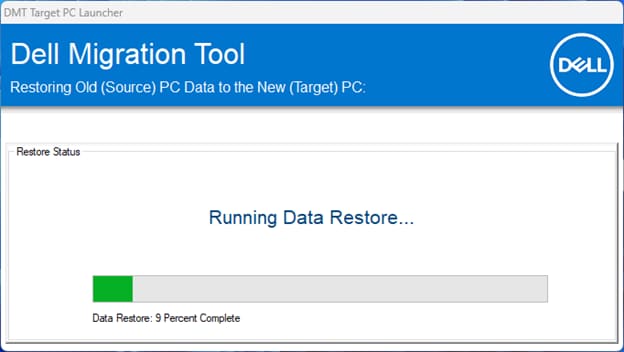
Figure 5: Data Migration Running - You will see a Summary screen on your New PC once the data migration has completed.
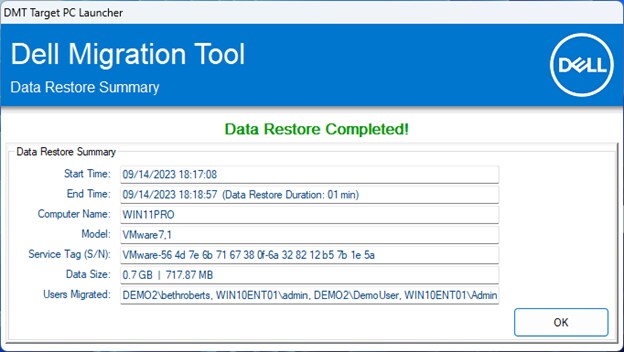
Figure 6: Summary Screen


Note: Data migration may take several hours depending on the amount of data there is to transfer.