Dell Rugged Docking Station Help and Support
A docking station or port replicator provides a way to connect your laptop to several devices like mouse, keyboard, speakers, monitor, Ethernet. Using a docking station that is connected to several devices helps gain the benefits of a desktop computer without sacrificing the portability of a laptop.
Dell rugged or E-port docking stations use a proprietary docking connector to dock a compatible Dell laptop.
Before you dock for the first time
Before you initially connect your laptop to the docking station, the operating system must complete its setup process.
- Ensure that the laptop is not connected to the docking station (docked).
- Turn on the laptop.
- Verify that the operating system has completed the setup process.
- Verify that the battery is installed before docking your laptop.
Docking your laptop
CAUTION: Always use the Dell AC adapter that came with the docking station. If you use any other commercially available AC adapter, you may damage the docking station or the laptop.
- Go to Dell.com/support/drivers and identify the Dell laptop using the Service Tag.
- Update your laptop's BIOS, graphics, Thunderbolt, and network drivers.
- Connect the AC adapter to a power outlet. Then, connect the AC adapter to the docking station.
- Dock and secure the laptop on the docking station. See user manual of the docking station for device-specific instructions.
- Connect the keyboard, mouse, monitors, and other devices to the docking station, as needed. To learn how many monitors are supported, see the user manual of the docking station.
- Turn on the docking station.
Video Resources

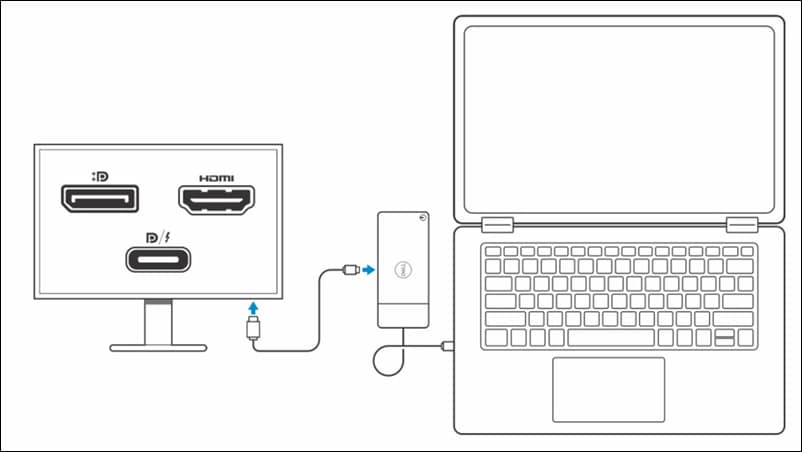
The WD19 dock has three connectivity options: USB-C, dual USB-C, and Thunderbolt 3. Before installing the dock
, ensure that your system is up to date and download the latest updates for the dock from Dell Support. Connect the dock's power adapter and run the firmware update. The maximum number of monitors and resolutions supported varies by model, and the rear USB-C multi-function display port and HDMI port share hardware. The rear Thunderbolt port on the WD19TB operates at USB 2.0 speeds when used with non-Thunderbolt devices.
...

To download Dell drivers, go to Dell Support Drivers and select your Dell computer or enter the Service Tag. C
lick "Check for Updates" and then "Show drivers" to review the list. Click "Download And Install" and restart the computer. Dell drivers are only available for tested operating systems. You can also manually download drivers by selecting the operating system, driver category, and clicking "Download". Follow the onscreen instructions to install.
...
Other Resources

Find Docking Station Service Tag
Learn how to find the Service Tag of your Dell docking station. Find Docking Station Service Tag
Docking Station Diagnostics
Learn how to use SupportAssist to run a hardware test on a Dell docking station. Docking Station Diagnostics
Setup Dual or Multiple Monitors
Learn how to setup dual monitors or multiple monitors. Setup Dual or Multiple Monitors