Windows Display Settings: Brightness, Color, Scaling,
Accessing Display Settings
To begin customizing your display settings, let's access the Display Settings menu. Here's how:
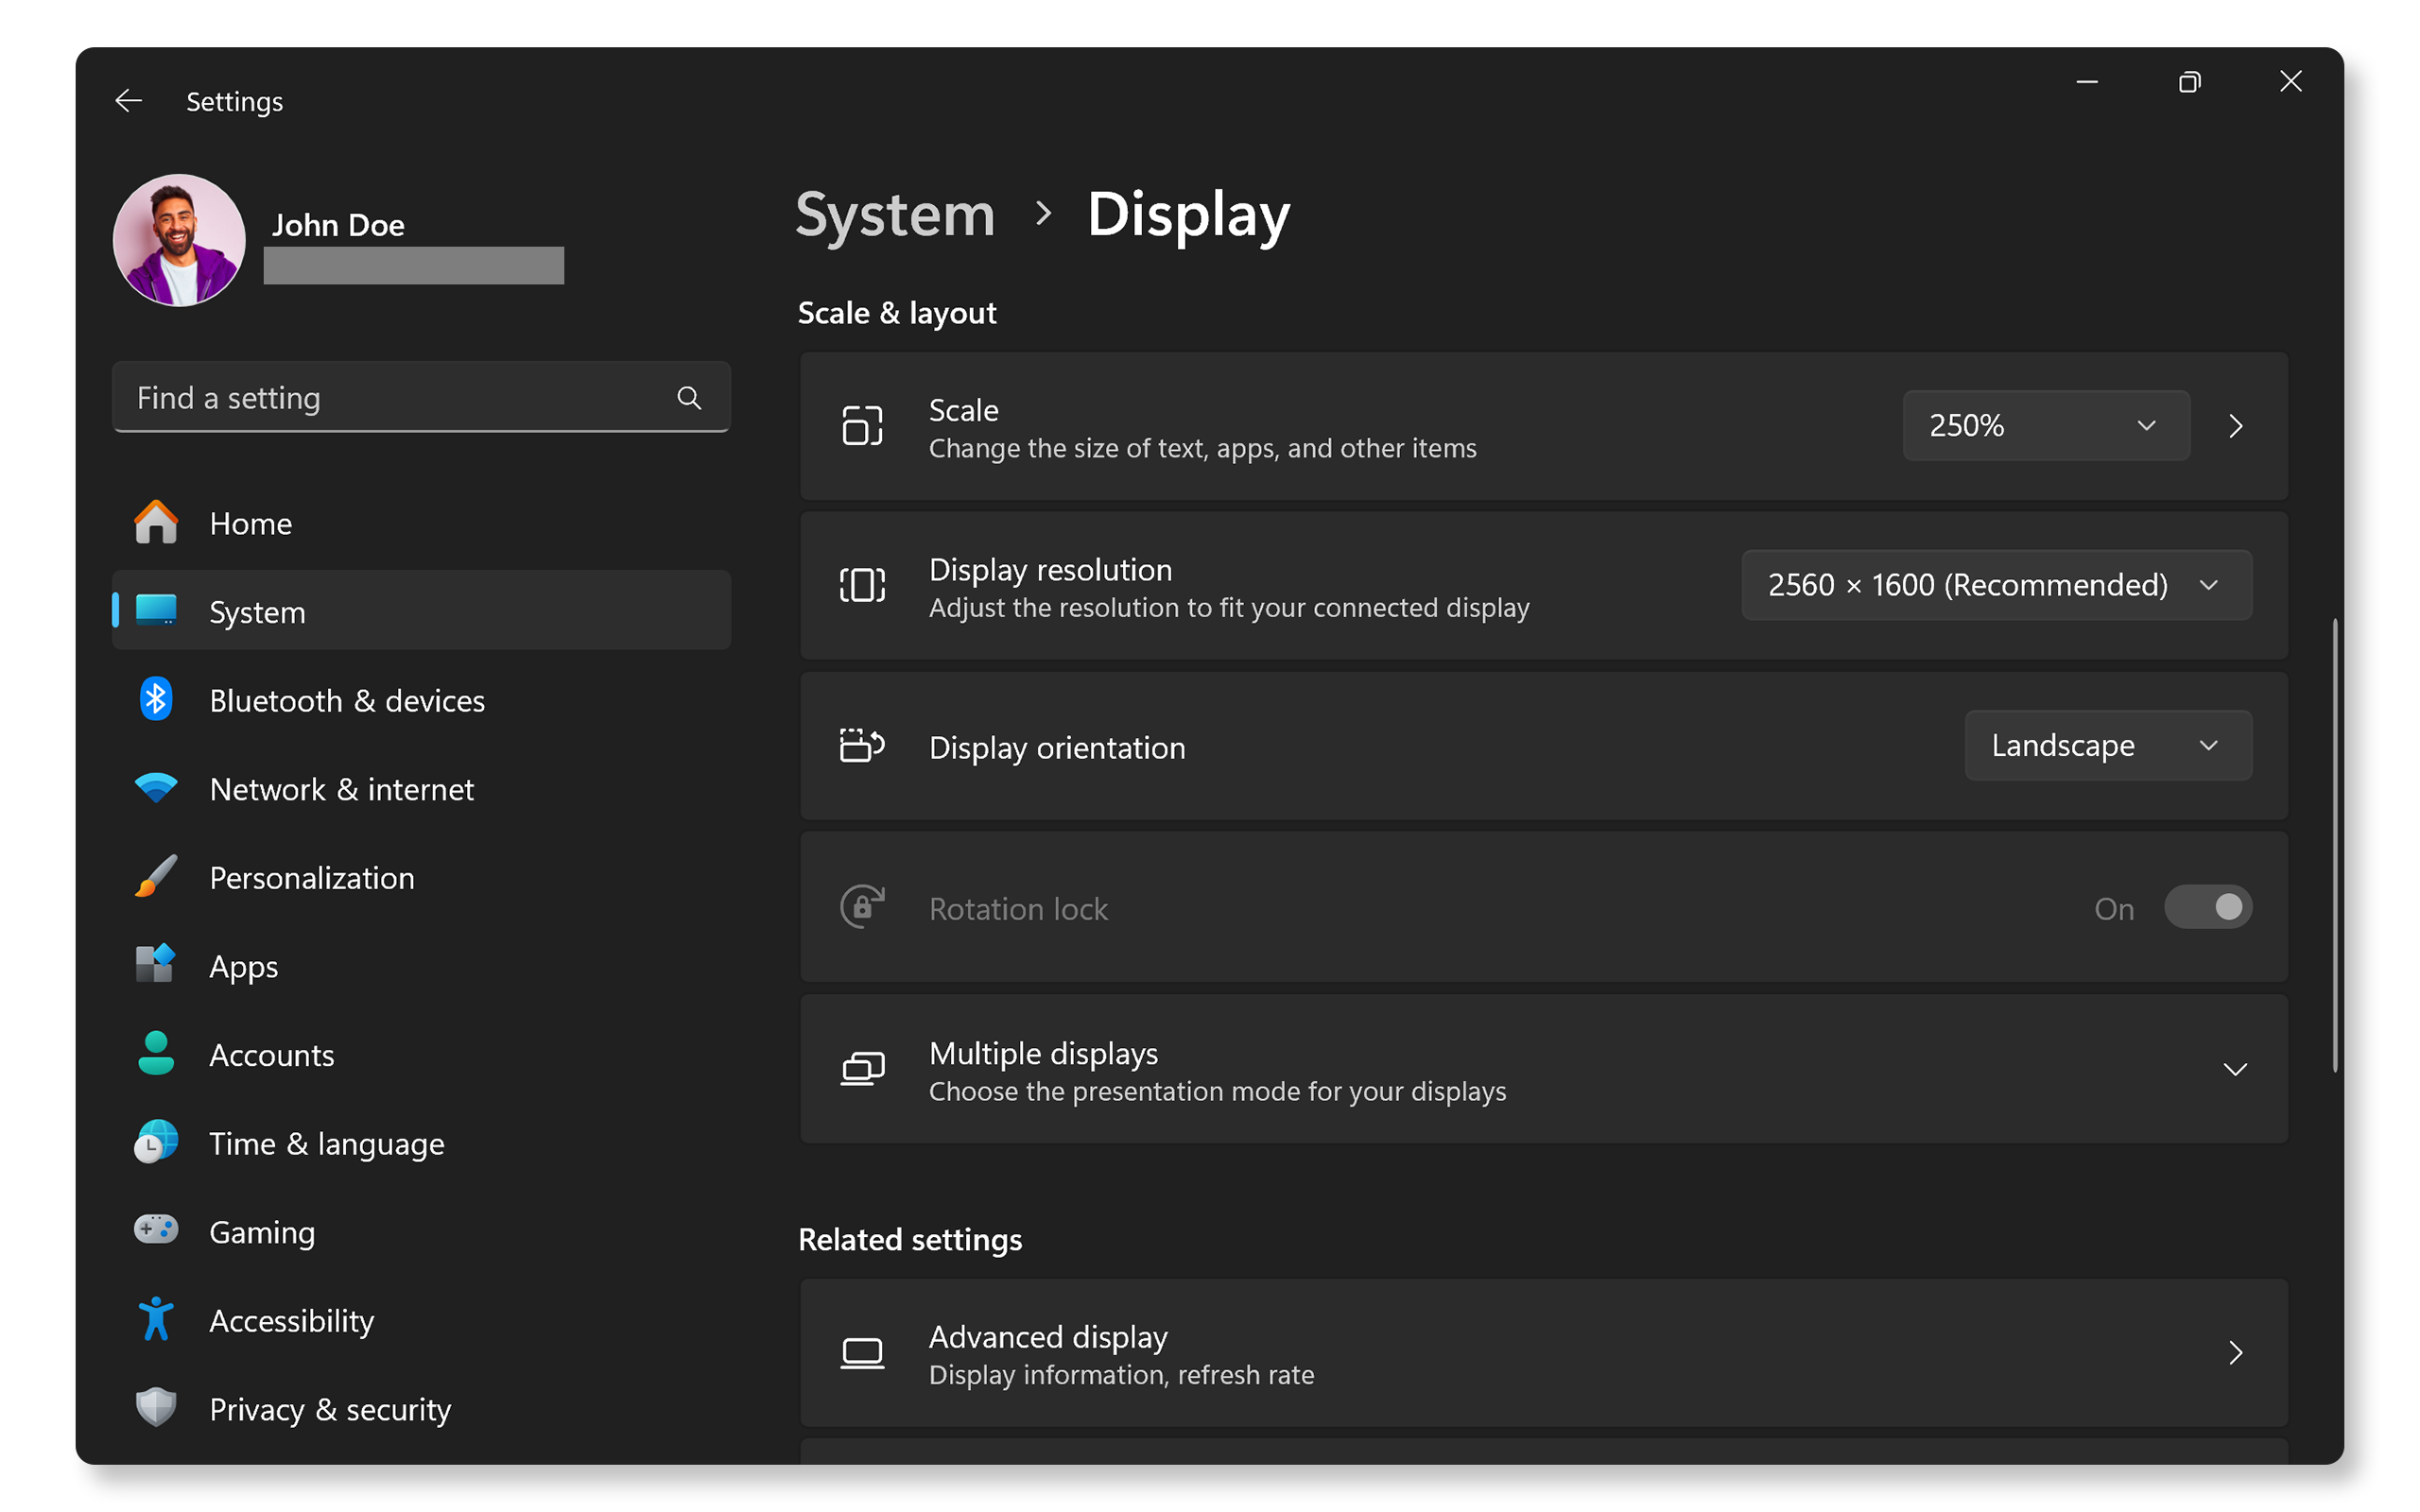
- Go to Start > Settings (gear icon) > System > Display. Open Windows display settings.
- Alternatively, use the Windows key + I shortcut key.
Adjusting Screen Resolution
Screen resolution determines how clear and sharp images appear on your screen. Here's how to change it:
- In the Display settings, scroll down to the Scale and layout section.
- Locate the Display resolution dropdown menu.
- Select your desired resolution from the list (the recommended resolution is usually marked).
- Click Keep changes if prompted.
Why Resolution Matters
Higher resolutions provide better clarity but may require more processing power from your graphics card and a display that supports higher resolutions. Adjust according to your needs and hardware capabilities.
Changing Display Orientation
If you prefer a different view, such as portrait mode for reading documents, follow these steps:
- In the Display settings, locate the Display orientation dropdown menu.
- Choose between Landscape, Portrait, Landscape (flipped), or Portrait (flipped).
- Confirm any prompts that appear.
Use Cases for Orientation
Portrait mode is particularly useful for coding or reading long documents, which landscape is ideal for gaming and video playback.
Configuring Multiple Displays
If you have more than one monitor connected, you can customize how they work together:
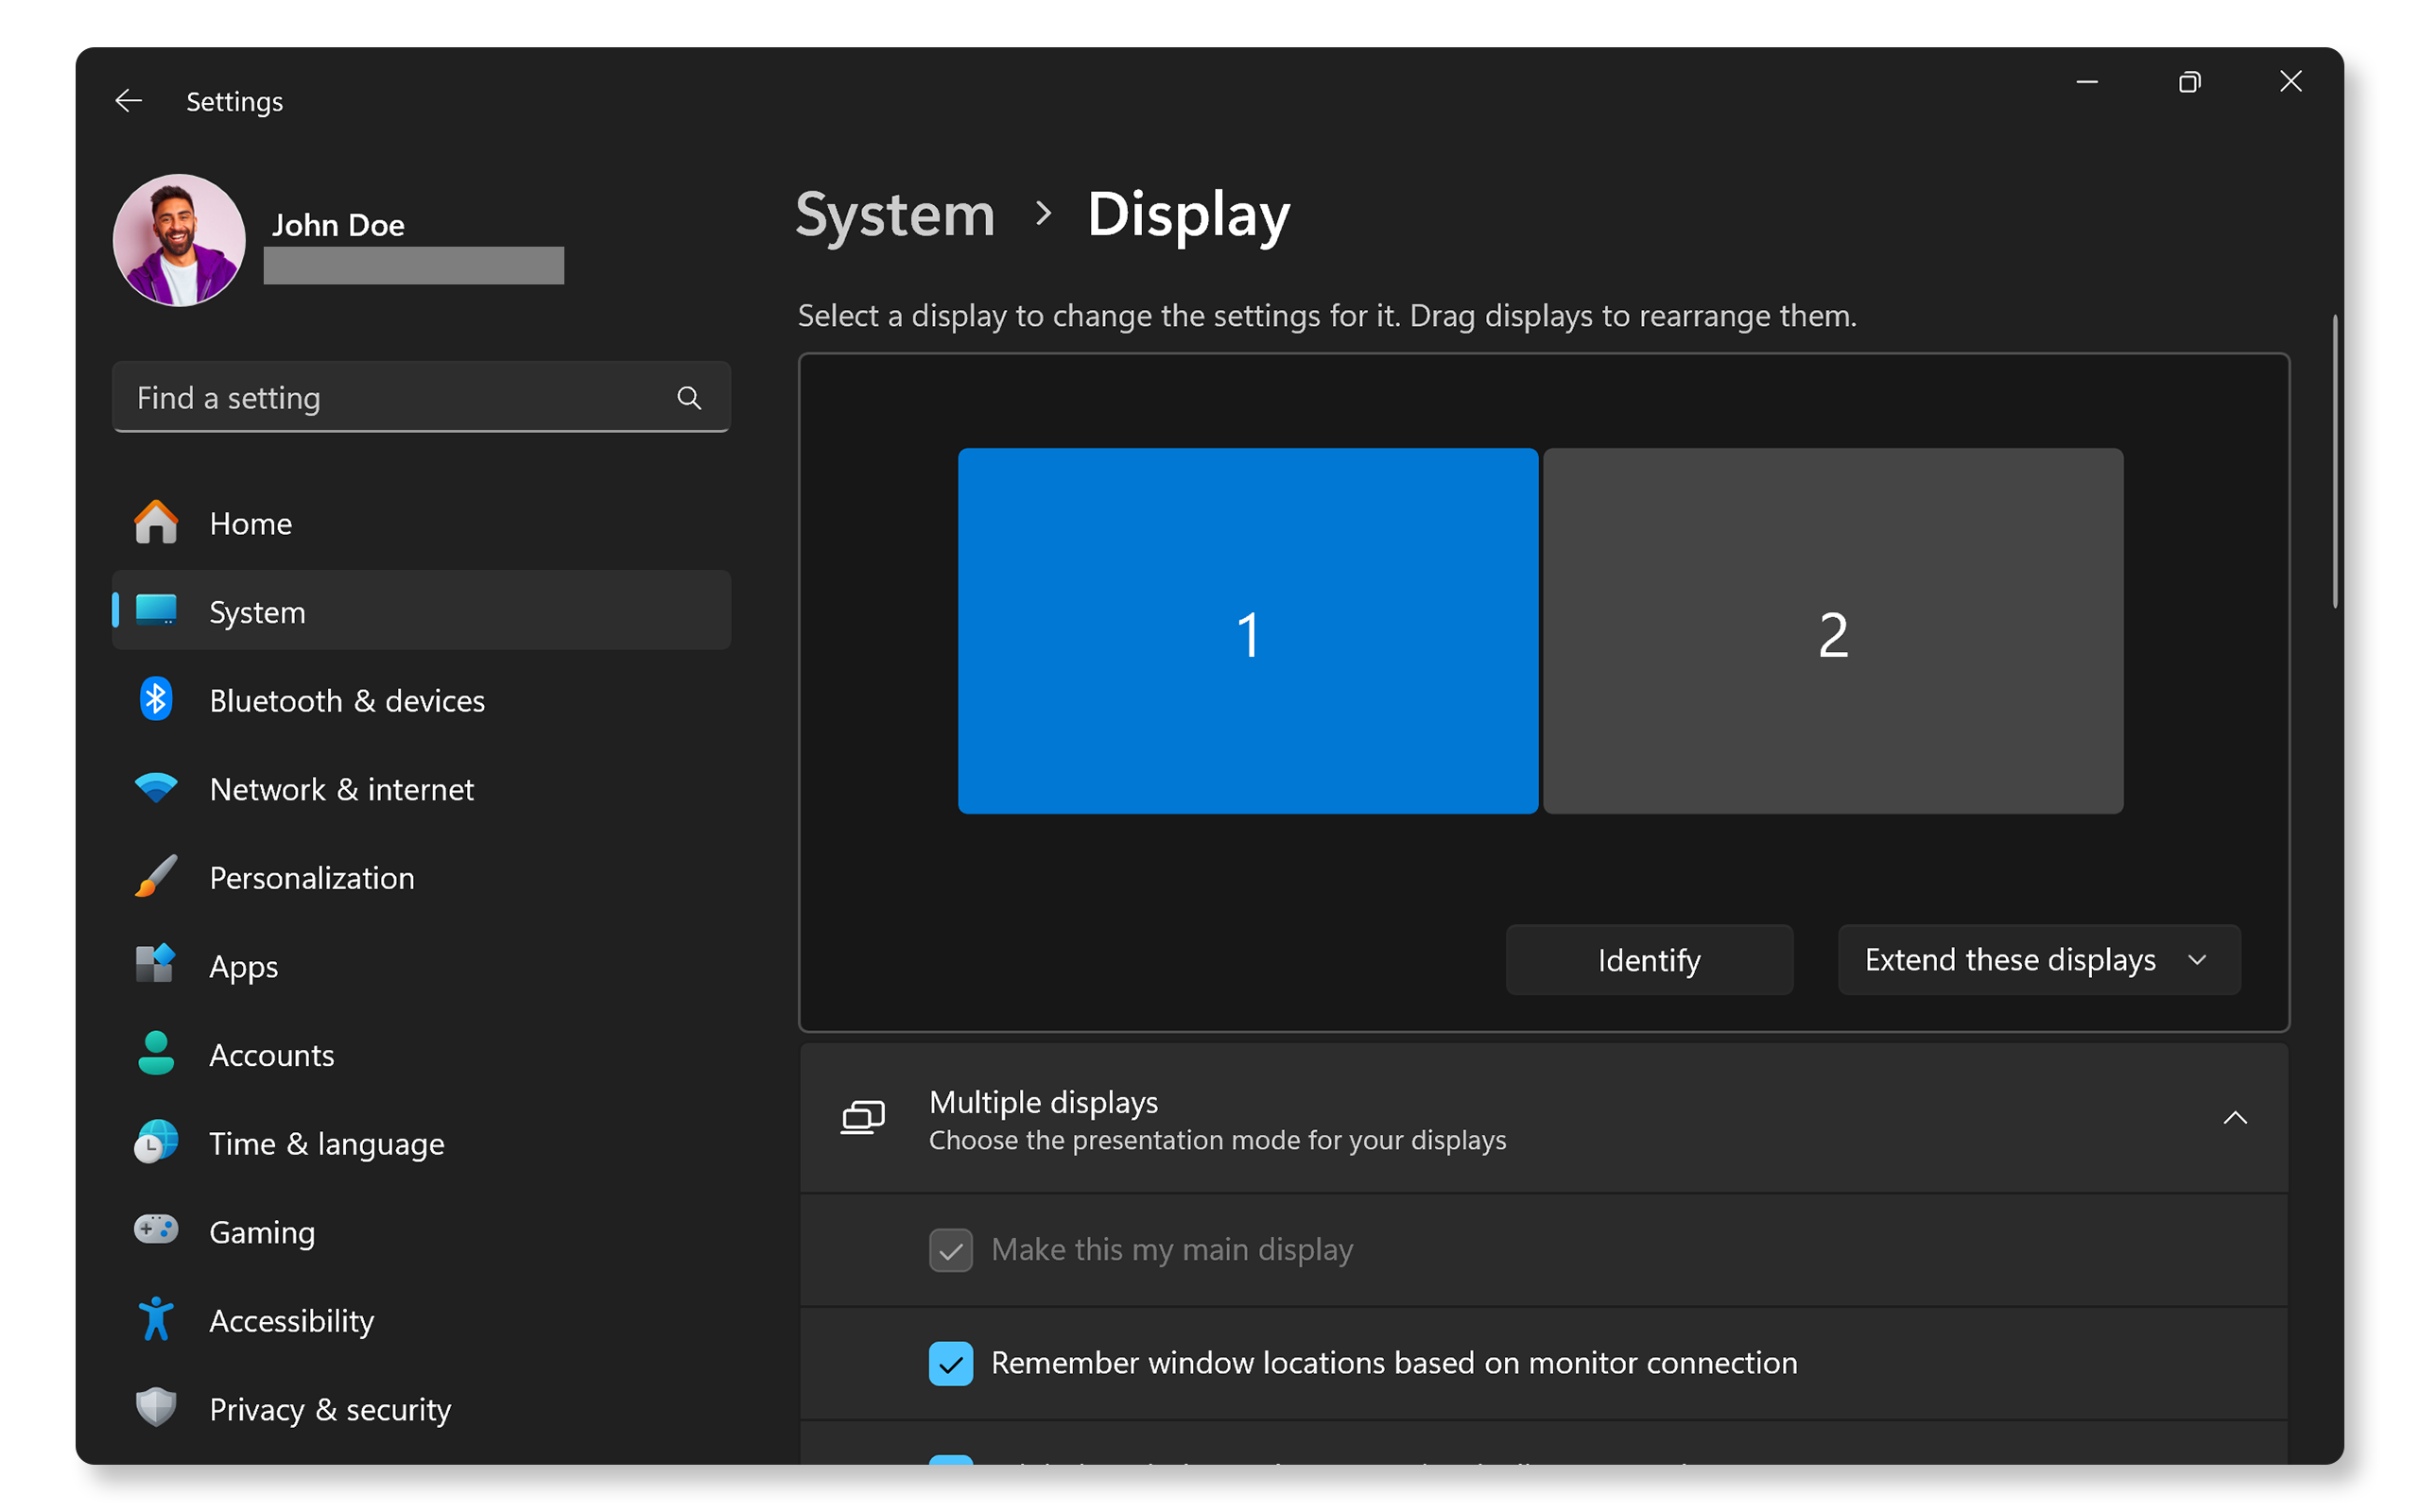
- In the Display settings, scroll to the Multiple displays section.
- Click on the dropdown menu to choose how you want your displays to function:
- Duplicate these displays: Show the same content on both screens.
- Extend these displays: Use both monitors as one large desktop area.
- Show only on 1/2. Use only one of the monitors.
- Click Apply to save changes.
Benefits of Multiple Displays
Using multiple displays can enhance productivity by allowing you to multitask more efficiently—viewing documents side by side or expanding your workspace.
Adjusting Brightness and Night Light Settings
To reduce eye strain, especially at night, adjusting brightness and enabling Night light can be beneficial:
- In Display settings, locate the brightness slider under the Brightness and color section.
- Move the slider left or right to adjust brightness as needed.

To enable Night light:
- In Display settings, locate the Night light option.
- Toggle it on by clicking on the switch.
- Click on Night light settings to adjust color temperature and schedule.
Why Use Night Light?
Night Light reduces blue light emission from your screen, making it easier on your eyes during nighttime use.
Customizing Text Size and Scaling
If text appears too small or too large, adjusting scaling can improve readability:
- In Display settings, under Scale & layout, locate the Scale dropdown menu.
- Choose a percentage (125%, 150%, etc.) that suits your preference.
- You may need to sign out and back in for change to take effect.
Scaling Considerations
Be cautious with scaling as overly large values can lead to blurry text or misaligned UI elements.
Color Calibration
For those who need precise color accuracy, calibrating your display is essential:
- Search for Calibrate display color in the Start menu and open the app.
- Follow the prompts in the calibration wizard to adjust gamma, brightness, contrast, and color balance.
Importance of Color Calibration
Proper calibration ensures that colors are displayed accurately, which is crucial for tasks that depend on visual fidelity.
Frequently Asked Questions
Here are some answers to common questions users ask about configuring display settings in Windows.
1. What is DPI scaling?
- DPI scaling adjusts how content is displayed based on screen resolution and physical size, improving visibility on high-resolution displays.
2. Can I use different resolutions for multiple monitors?
- Yes, each monitor can have its own resolution set independently within Display settings.
3. How do I enable HDR?
- In Display settings, under Windows HD Color settings, toggle HDR on if supported by your monitor.
4. Can I change my desktop background through display settings?
- No, desktop background changes are made under Personalization settings in Windows.
5. How do I know which monitor is which when using multiple displays?
- Click on Identify in Multiple displays section; numbers will appear on each screen indicating their order.
6. What does "Recommended" resolution mean?
- It's typically the native resolution of your monitor where images appear sharpest without distortion.
7. What is ClearType?
- ClearType is a font-smoothing technology that enhances text readability on LCD screens.
8. How do I change the font size without changing scaling?
- In Accessibility settings, under Text size, you can adjust text size independently from scaling options.
9. Can I adjust individual app sizes?
- Not directly through Windows. However, some applications allow custom size adjustments within their own settings.
10. Can I customize my mouse pointer appearance?
- Yes, go to Start > Settings > Accessibility > Mouse pointer & touch options. Open Windows accessibility settings.
- Adjust the pointer size and color.