How To Modify Policies on the Dell Data Protection Server
Summary: How to modify policies on the Dell Security Management Server (formerly Dell Data Protection | Enterprise Edition) and Dell Security Management Server Virtual (formerly Dell Data Protection | Virtual Edition). ...
This article applies to
This article does not apply to
This article is not tied to any specific product.
Not all product versions are identified in this article.
Instructions
Affected Product:
- Dell Security Management Server
- Dell Security Management Server Virtual
- Dell Data Protection | Enterprise Edition
- Dell Data Protection | Virtual Edition
Affected Version:
- v7.2 and Later
Table of Contents:
v9.4 and Later
Note: Internet Explorer is no longer supported in v10.2.10 and later.
Modifying a policy at the enterprise level for Dell Encryption affects all devices that do not have specific exclusions that are applied to them.
To modify a policy:
- Log in to the Dell Security Management Server's remote management console, accessible with https://server.domain.org:8443/webui.
- Expand Populations on the left pane:
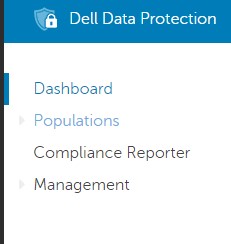
- Select the Enterprise option under the Populations heading:
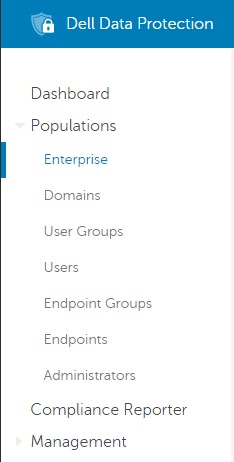
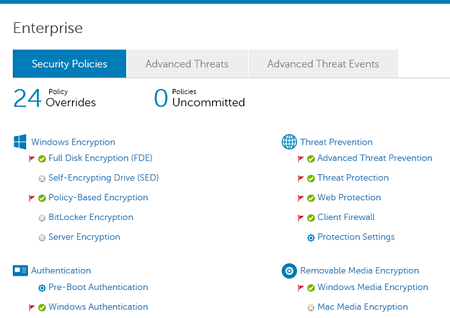
- Select the Policy category that you want to modify. In this instance, we modify the Policy-Based Encryption policy globally.
- Find the policy that you want to modify:
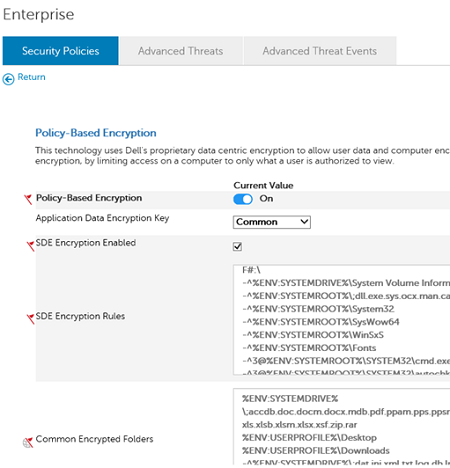
- Change the value to what you want to be applied to all endpoints in your environment. (We are changing the Policy Proxy Polling Interval policy in this example to 359.
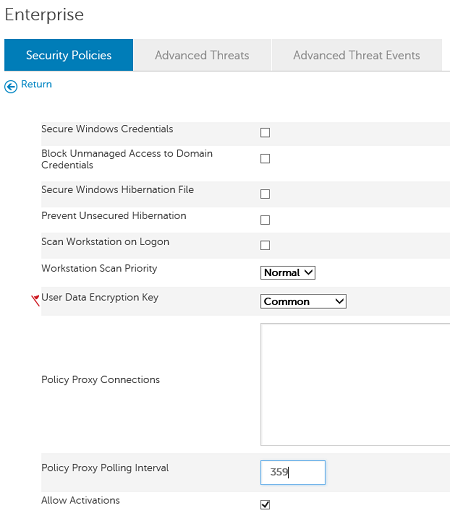
- Click Save in the upper right to ready the policy for deployment.

Once this saves successfully, you see a green bar appear to indicate it is ready to be Committed to the database and deployed to the environment:

- To Commit to the database and deploy to the environment, Expand management on the right pane:
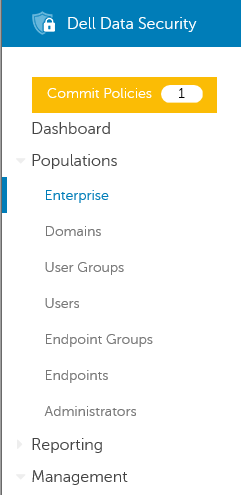
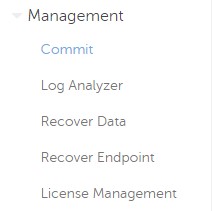
- Select Commit
- Modify the Comment to indicate what was changed to help other administrators to know what has changed:
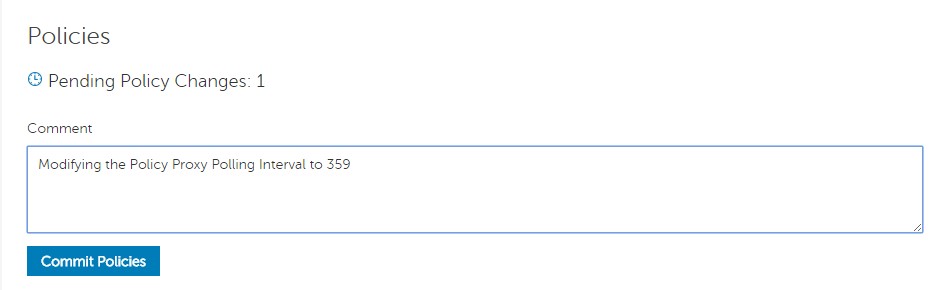
- Click Commit Policies to push this change to the environment. A Green box appears to indicate that the save was successful, and the comment box disappears. A new comment of No Policy Commit Needed appears.

You start seeing devices pull this updated policy and apply it as the Policy Proxy Polling Interval elapses, or users log in to their computers.
v9.2 - 9.3
To modify a policy at the enterprise level in Dell Encryption that affects all devices that do not have specific exclusions that are applied to them.
To modify a policy:
- Log in to the Dell Security Management Server's remote management console, accessible with https://server.domain.org:8443/webui
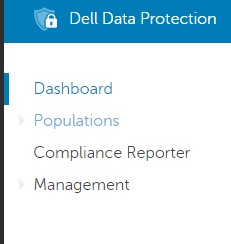
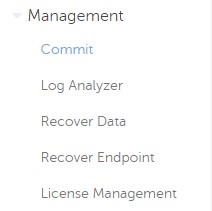
- Expand Populations on the left pane:
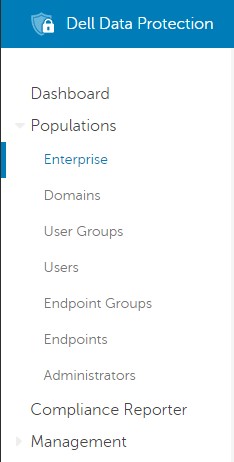
- Select the Enterprise option under the Populations heading:
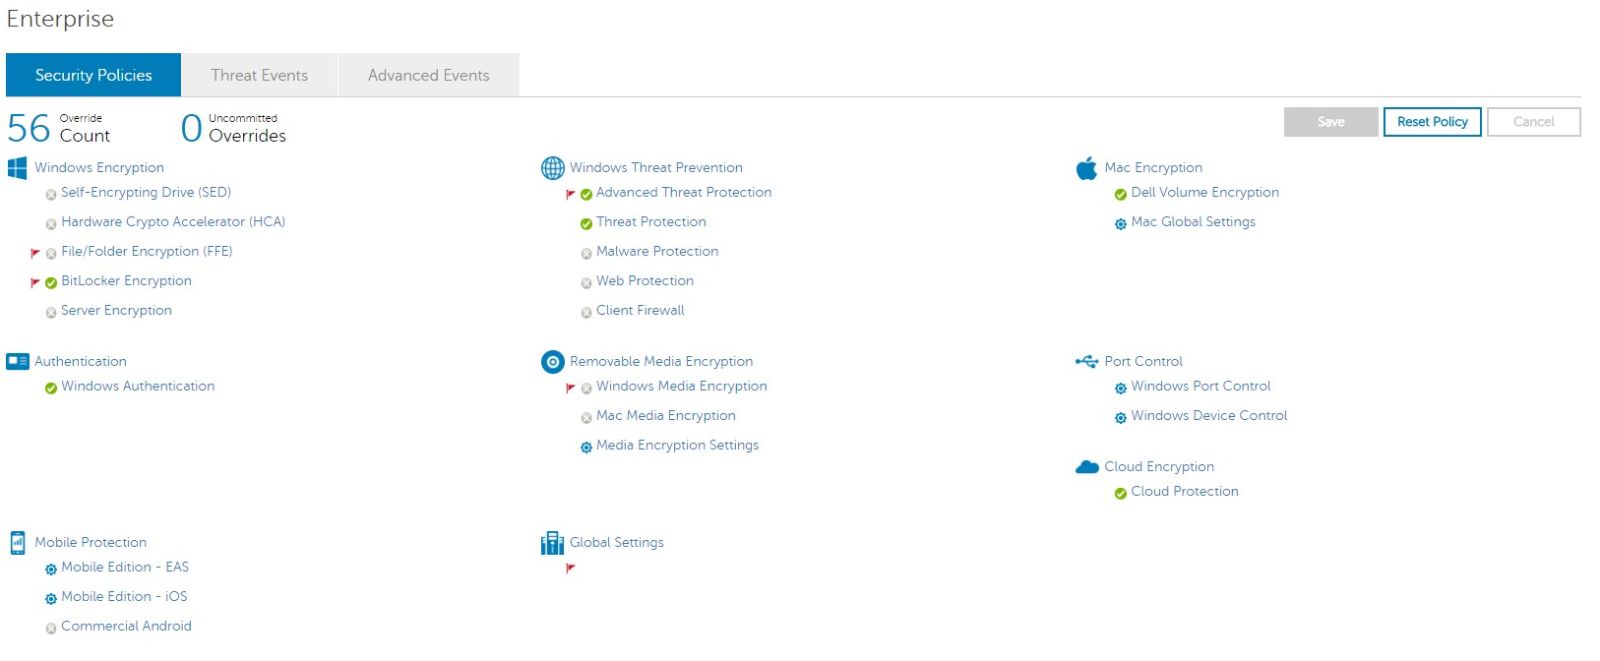
- Select the Policy category that you want to modify. In this instance, we modify the File/Folder Encryption (FFE) policy globally.
- Find the policy that you want to modify:
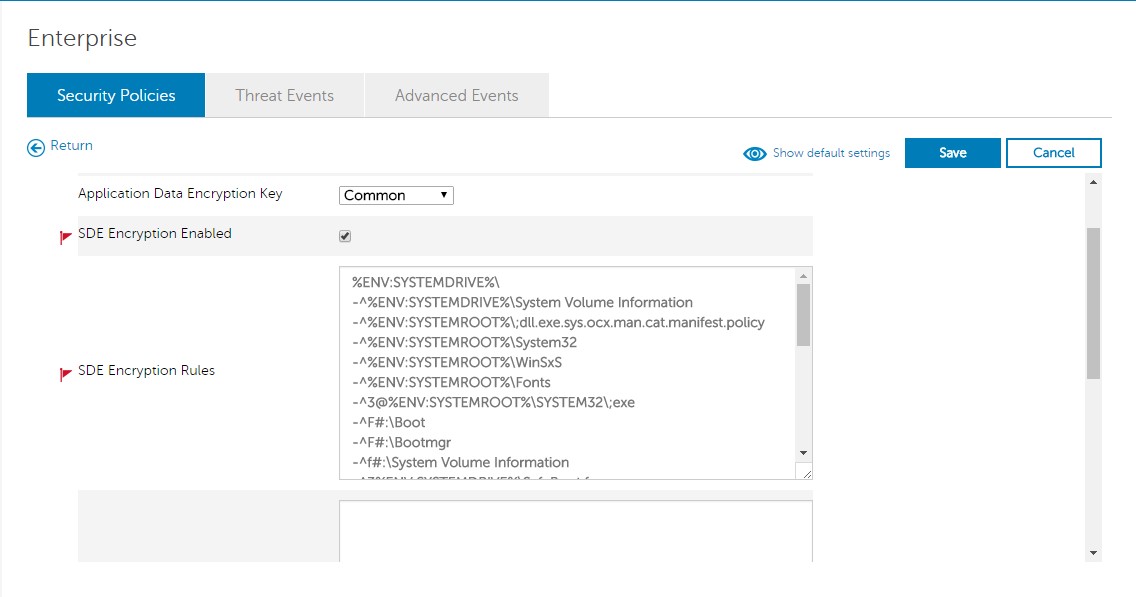
- Change the value to what you want to be applied to all endpoints in your environment. (We are changing the Policy Proxy Polling Interval policy in this example to 359.)
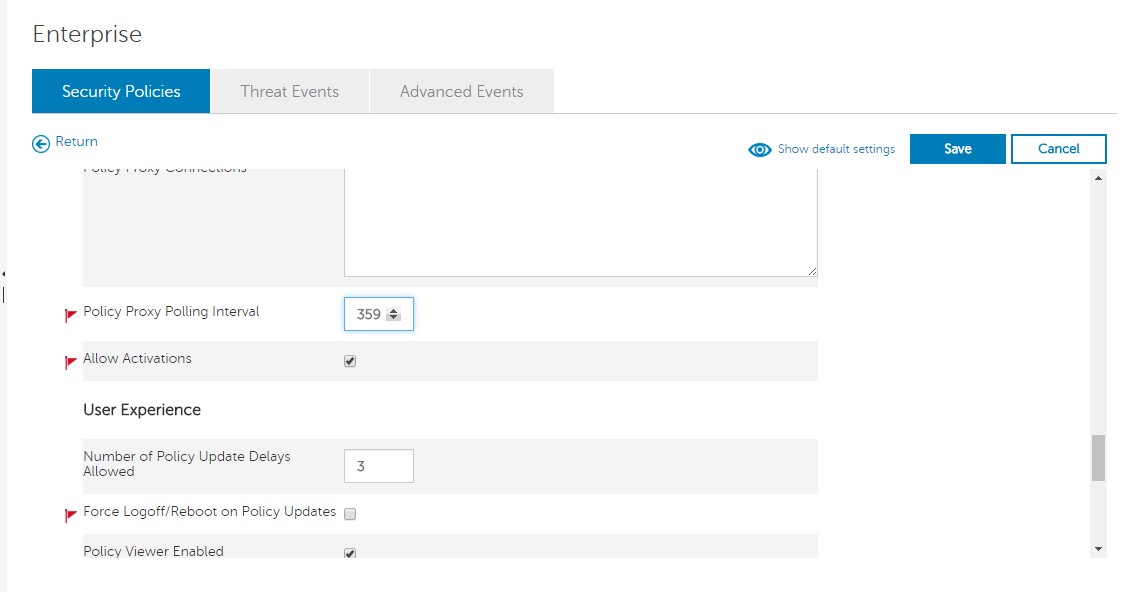
- Click Save in the upper right to ready the policy for deployment.

- Once this saves successfully, you see a green bar appear to indicate it is ready to be Committed to the database and deployed to the environment:

- To Commit to the database and deploy to the environment, Expand management on the right pane:
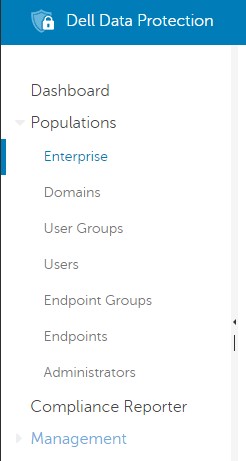
- Select Commit
- Modify the Comment to indicate what was changed to help other administrators to know what has changed:
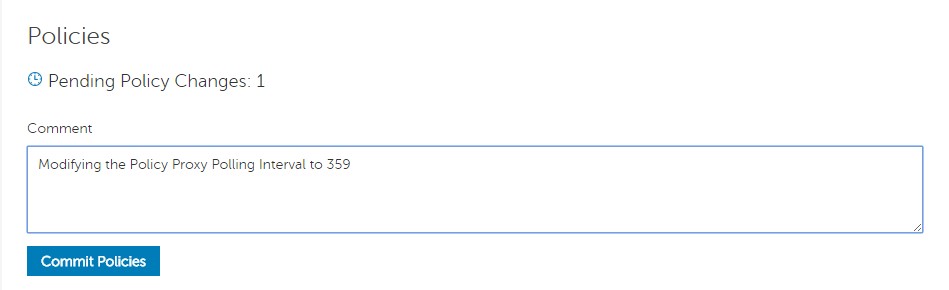
- Click Commit Policies to push this change to the environment. A Green box appears to indicate that the save was successful, and the comment box disappears. A new comment of No Policy Commit Needed appears.

You start seeing devices pull this updated policy and apply it as the Policy Proxy Polling Interval elapses, or users log in to their computers.
v7.2 - 9.1.5
To Modify a Policy at the Enterprise level for Dell Data Protection, affect all devices that do not have specific exclusions that are applied to them.
To modify a policy:
- Log in to the Dell Data Protection Server's remote management console:
- Accessible by the application on the server (Dell Security Management Server only)
- The Silverlight Console (Dell Security Management Server only)
- The Remote Management Console application (Dell Security Management Server Virtual only)
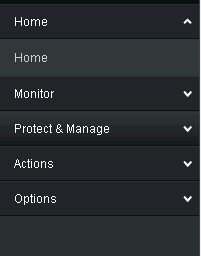
- Expand, Protect & Manage on the left pane:
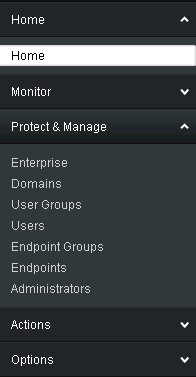
- Select the Enterprise option under the Protect & Manage heading:
- Select the Security Policies tab at the top of the screen:


- Modify the Policy Category: To the product that you would like to modify the policies of. In this guide, we modify the Shield for Windows or Windows Encryption policies.

- Expand the Policy subcategory (in this instance the Fixed Storage policies are modified):
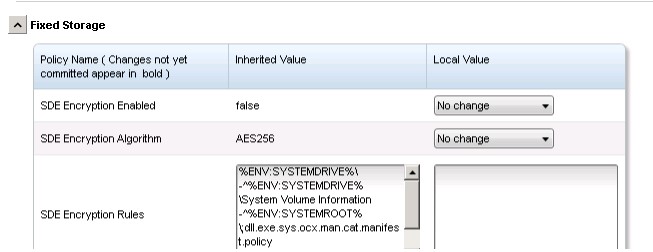
- Find the policy that you want to modify (we are modifying the SDE Encryption Rules):
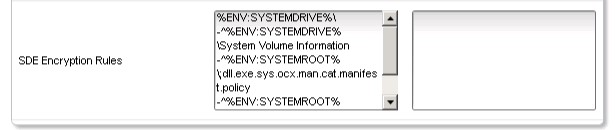
- For policies with an Inherited Value such as this SDE Encryption Rules policy, copy the Inherited Value to the local Value to ensure that we do not decrypt or encrypt any data with previously held inclusions and exclusions:
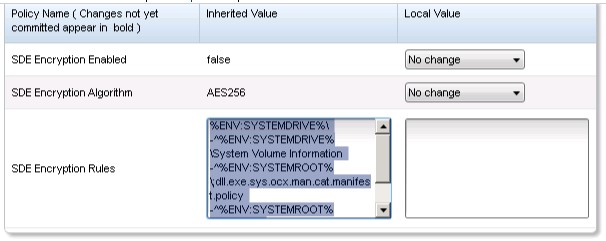
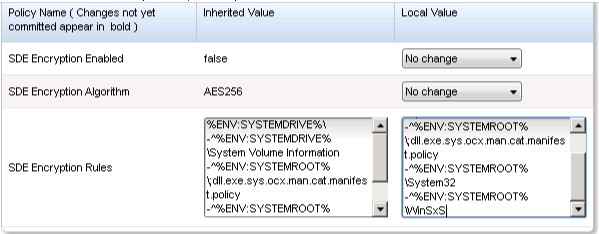
- Add the modifications to the policy to include, exclude the files or folders you want to change:
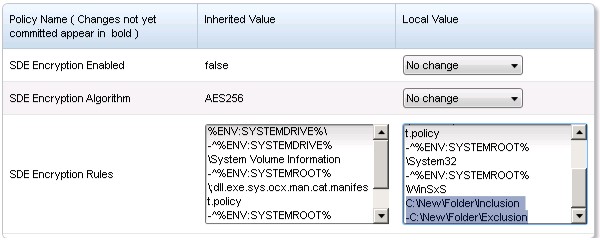
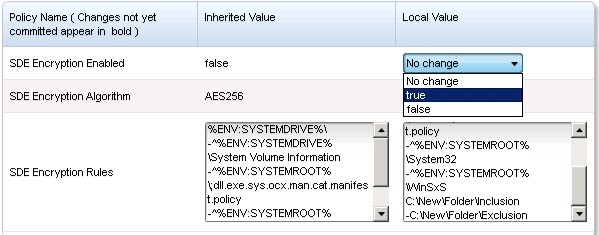
- For policies with a drop-down option, change the drop-down selection to the wanted setting:
- Click Save in the lower right to ready the policy for deployment.
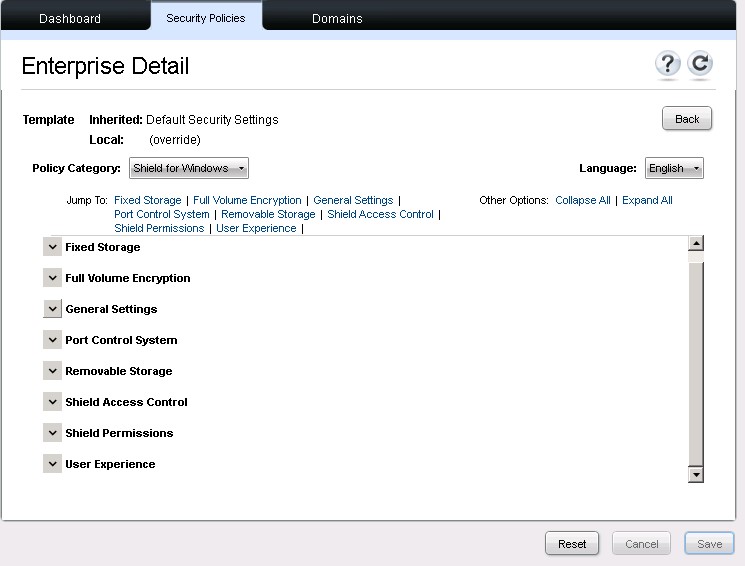
- Once this saves successfully, you see the save button gray out, the Policy Category reset to Shield for Windows and any open subcategories collapse:
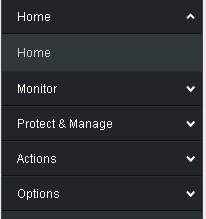
- To Commit to the database and deploy to the environment, Expand Actions on the right pane:
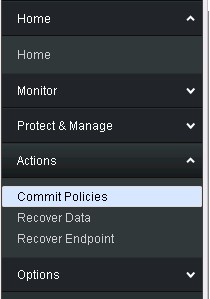
- Select Commit Policies
- Modify the Comment to indicate what was changed to help other administrators to know what has changed:
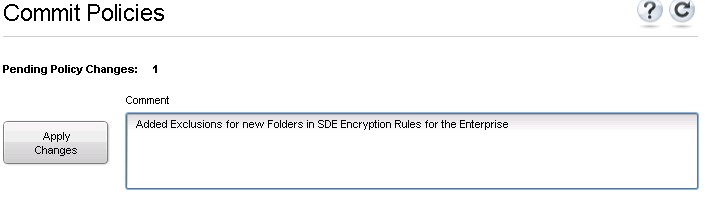
- Click Apply Changes to push this change to the environment. The Comments box empties, the Apply Changes button will gray out, and you see a new line showing the commit that you performed:
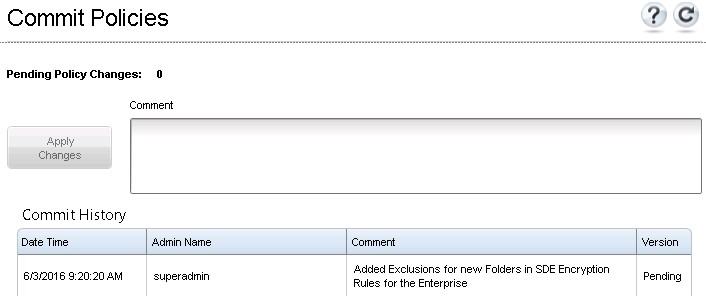
You start seeing devices pull this updated policy and apply it as the Policy Proxy Polling Interval elapses, or users log in to their computers.
To contact support, reference Dell Data Security International Support Phone Numbers.
Go to TechDirect to generate a technical support request online.
For additional insights and resources, join the Dell Security Community Forum.
Affected Products
Dell EncryptionArticle Properties
Article Number: 000126696
Article Type: How To
Last Modified: 19 Jun 2026
Version: 13
Find answers to your questions from other Dell users
Support Services
Check if your device is covered by Support Services.