Microsoft Windows: Using Windows Task Scheduler for Scheduled RAID Consistency Checks
Zusammenfassung: This article shows how to use Windows Task Scheduler to perform consistency checks on a RAID array at regular intervals.
Dieser Artikel gilt für
Dieser Artikel gilt nicht für
Dieser Artikel ist nicht an ein bestimmtes Produkt gebunden.
In diesem Artikel werden nicht alle Produktversionen aufgeführt.
Weisungen
A highly recommended routine maintenance operation is to perform a "Check Consistency" in Dell OpenManage Server Administrator every 30 days.
A consistency check is a manual operation which consumes a portion of the overall available bandwidth of the RAID controller. However, the consistency check can be scheduled for a time when it has the least impact on performance.
Note: Consistency Check can only be performed on a healthy RAID array or virtual disk. Schedule the task during an allowed maintenance period for minimal user impact.
For more information, see PowerEdge: How to fix Double Faults and Punctures in RAID Arrays.
Prerequisites:
- Dell OpenManage Server Administrator 7.x or later with Storage Management option installed
- Administrative privileges to create scheduled tasks in Windows
Create Windows Scheduled Task:
- At the Windows desktop, click Start -> All Programs -> Accessories -> System Tools, then Task Scheduler.
Note: There are several methods of launching the Task Scheduler snap-in console; the above example is one of the methods. For other methods, see the Microsoft Technet Topic Start Task Scheduler .
.
- In the Task Scheduler console: Right-click Task Scheduler (Local), then click Create Task.
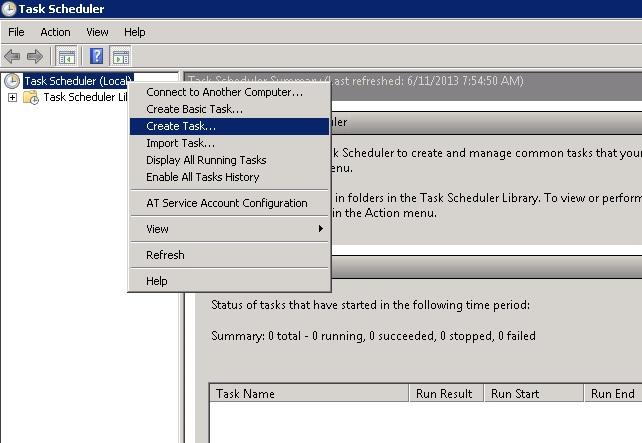
Figure 1: Click Create Task in the Task Scheduler console.
- In the "Create Task" panel, enter the pertinent information in the General tab. Be sure and select Run whether user is logged on or not.
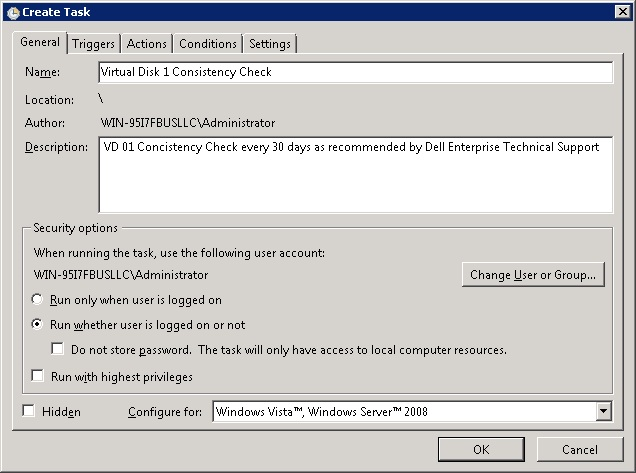
Figure 2: Set the appropriate options for the task.
- Next, click the Triggers tab, then click New to create a new trigger schedule. At the New Trigger panel, select all the pertinent options and click OK to continue.
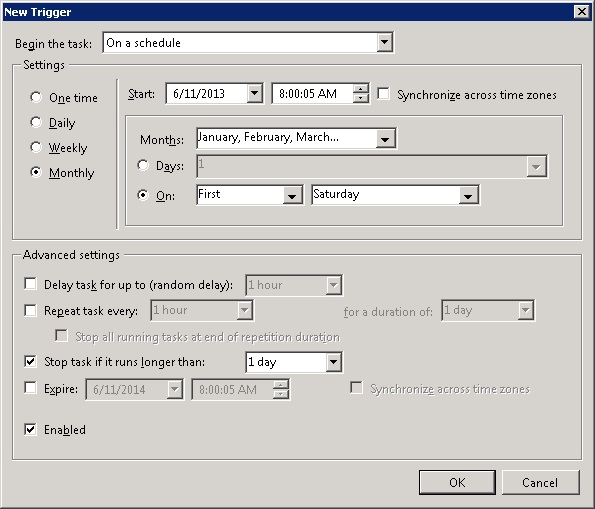
Figure 3: Configure the trigger for the task.
- Next, click the Actions tab and click New to create a new action. In the New Action panel, enter the "Program/Script" and "arguments," then click OK. For our intended purpose, use the following command and switch. When ready, click OK to continue.
Program/script: C:\Program Files\Dell\SysMgt\oma\bin\omconfig.exe
Arguments: omconfig storage vdisk action=checkconsistency controller=x vdisk=x
x = Component ID (Controller=0, vdisk=1)
Note: For other Command-Line Interface (CLI) options, see Dell OpenManage Server Administrator Command-Line Interface Guide.
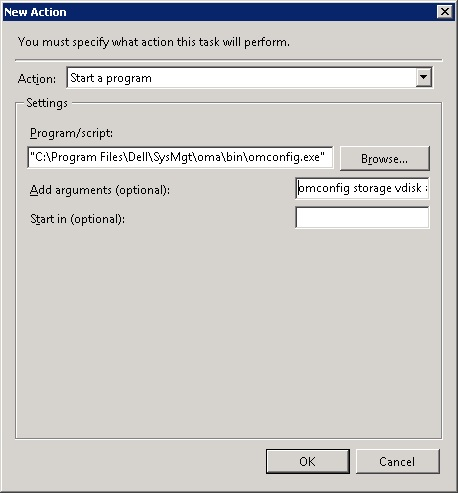
Figure 4: Specify the program or script and optional arguments.
- In the "Create Task" panel, click OK to save the newly created task. If prompted, enter a user account with enough administrative privileges to run the program or script that was entered above.
- When feasible, test the new scheduled task to ensure that it starts the Consistency Check task. You can view the Consistency Check operation using OpenManage Server Administrator - Storage Management.
For more references, see the Server Administrator Storage Management Guide.
Betroffene Produkte
Microsoft Windows Server 2016, Microsoft Windows Server 2019, Microsoft Windows Server 2022, Microsoft Windows Server 2025Artikeleigenschaften
Artikelnummer: 000104417
Artikeltyp: How To
Zuletzt geändert: 02 Apr. 2026
Version: 8
Antworten auf Ihre Fragen erhalten Sie von anderen Dell NutzerInnen
Support Services
Prüfen Sie, ob Ihr Gerät durch Support Services abgedeckt ist.