Ghost Imaging on Skylake Thunderbolt Systems
Summary: Learn the steps for imaging with Ghost Skylake/Thunderbolt computers.
This article applies to
This article does not apply to
This article is not tied to any specific product.
Not all product versions are identified in this article.
Symptoms
Not applicable
Cause
Not applicable
Resolution
Note: This process requires a good working knowledge of the Ghost imaging process. If you require information about how to use Ghost products, contact Symantec support  for additional information. This information is provided for your convenience and does not imply that Dell provides support for this imaging process.
Prepare the Windows 10 Ghost PE
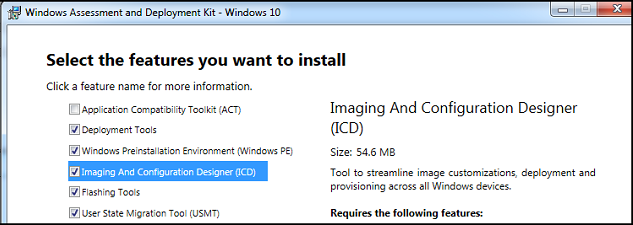
- Download Windows 10 Assessment and Deployment Kit (ADK) 1511
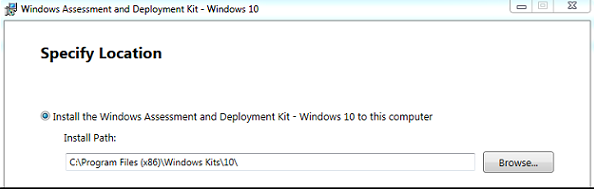
- Select Deployment Tools and Windows PE from the list of features to install:
- Download and install the 7-Zip utility from the following location: 7-Zip Utility
- Download the Windows 10 PE CAB file from the following location at the Dell Techcenter: Windows 10 PE CAB.
- Extract the Windows 10 PE CAB file to a temp directory such as
C:\DC\temp\Win10PECAB. - Download the ASBmedia USB 3.0 Drivers.
- Extract to
c:\dc\temp\pws5510\usba - Download the Thunderbolt Controller Drivers.
- Extract to
c:\dc\temp\pws5510\TBT - Download the Realtek USB Thunderbolt Ethernet Driver.
- Extract to
c:\dc\temp\pws5510\RTLUSB. - Make a new directory
c:\dc\temp - Make a new directory
c:\dc\temp\pe10 - Make a new directory
c:\dc\temp\mount - Open the Deployment and Imaging Tools Environment as Administrator.
 Note: Use a clean version of Windows 10 PE x86 located here:
C:\Program Files (x86)\Windows Kits\10\Assessment and Deployment Kit\Windows Preinstallation Environment\x86\en-us - Copy the
winpe.wimto a temp directory such asc:\dc\temp - Use
dismto mount thewinpe.wimin a temp directory:dism /mount-wim /wimfile:c:\dc\temp\pe10\winpe.wim /index:1 /mountdir:c:\dc\temp\mountdism /image:c:\dc\temp\mount /add-driver:c:\dc\temp\win10pecab\x86 /recurse /forceunsigneddism /image:c:\dc\temp\mount /add-driver:c:\dc\temp\pws5510\usba\Driver_Win10 /recurse /forceunsigneddism /image: c:\dc\temp\mount /add-driver:c:\dc\temp\pws5510\TBT /recurse /forceunsigneddism /image: c:\dc\temp\mount /add-driver:c:\dc\temp\pws5510\RTLUSB\Windows\WIN10\32 /recurse /forceunsigned- Copy
Ghost32.exe 11.5.1(build 2269 or later) toc:\dc\temp\mount\GHOST dism /unmount-image /mountdir:c:\dc\temp\mount /commit
- Import the
winpe.wimfile atc:\dc\temp\pe10to WDS or your USB key assources\boot.wim.
Prepare the operating system for Ghosting
On the target machine:
- Install the Windows operating system and all updates and drivers.
- Shrink the partition of the Windows drive but leave 2048 MB for the Sysprep OOBE process when you restore the image:

- Right-click the C: Partition
- Choose Shrink Volume.
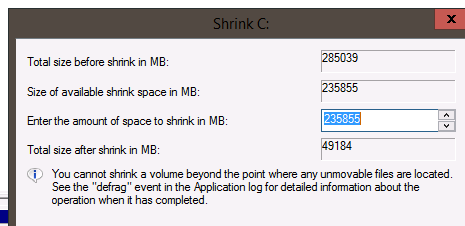
- Subtract 2048 from the amount of space to shrink:
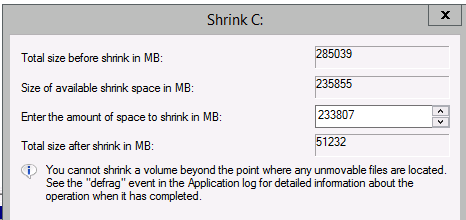
- Subtract 2048 from the amount of space to shrink:
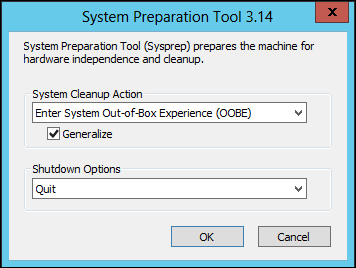
- Run Sysprep with Generalize, OOBE, and Quit.
 Note: Some drivers may not Sysprep properly and should be uninstalled prior to sysprepping.If you receive errors in the Sysprep process, a
setuperr.logis inWindows\System32\Sysprep\Panther - Restart the computer and start the PXE/USB process.
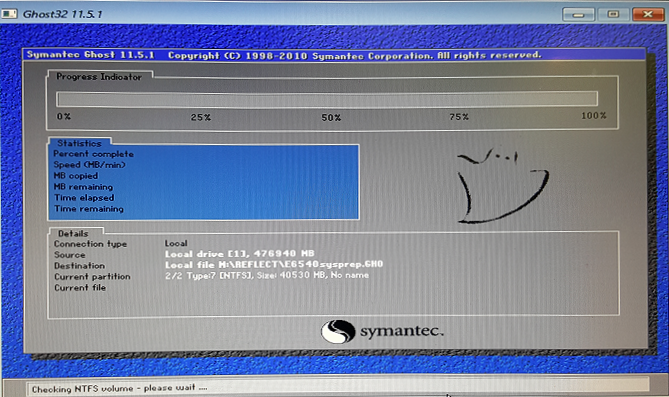
Note: If you do not see Ghost32 start up when you issue the .
X:\ghost\Ghost32.exe command in PE: Ghost32.exe stops responding in a WinPE Pre-OS on machines with Intel AHCI Mass Storage Devices https://techdocs.broadcom.com/Article Properties
Article Number: 000134910
Article Type: Solution
Last Modified: 30 Apr 2026
Version: 8
Find answers to your questions from other Dell users
Support Services
Check if your device is covered by Support Services.