Dell Endpoint Security Suite Enterprise 버전을 식별하는 방법
Summary: 다음 지침에 따라 Dell Endpoint Security Suite Enterprise의 버전을 확인할 수 있습니다.
This article applies to
This article does not apply to
This article is not tied to any specific product.
Not all product versions are identified in this article.
Symptoms
참고:
- 2022년 5월부터 Dell Endpoint Security Suite Enterprise 유지 보수가 종료됩니다. 이 문서는 더 이상 Dell에서 업데이트하지 않습니다. 자세한 내용은 Dell Data Security에 대한 제품 수명주기(지원 종료 및 EOL) 정책을 참조하십시오. 다른 문서에 대한 질문이 있는 경우 영업 팀에 문의하거나 endpointsecurity@dell.com으로 문의하십시오.
- 최신 제품에 대한 자세한 내용은 엔드포인트 보안을 참조하십시오.
Dell Endpoint Security Suite Enterprise 버전을 사용하면 다음을 수행할 수 있습니다.
- 알려진 문제 식별
- UI 차이점 확인
- 워크플로 변경 이해
- 시스템 요구 사항
영향을 받는 제품:
- Dell Endpoint Security Suite Enterprise
영향을 받는 버전:
- v1.0 이상
영향을 받는 운영 체제:
- Windows
- Mac
- Linux
Cause
해당 사항 없음
Resolution
버전 정보를 보려면 Windows, Mac 또는 Linux 를 클릭합니다.
Windows
버전은 다음을 통해 확인할 수 있습니다.
자세한 내용을 확인하려면 해당 방법을 클릭하십시오.
UI
참고: UI를 통해 버전을 확인하기 전에 Dell Endpoint Security Suite Enterprise를 설치해야 합니다. 자세한 내용은 Windows용 Dell Endpoint Security Suite Enterprise를 설치하는 방법을 참조하십시오.
- 바탕 화면에서 DDP 콘솔 아이콘을 두 번 클릭합니다.

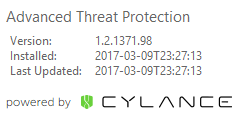
- Advanced Threat Protection 타일을 클릭합니다.
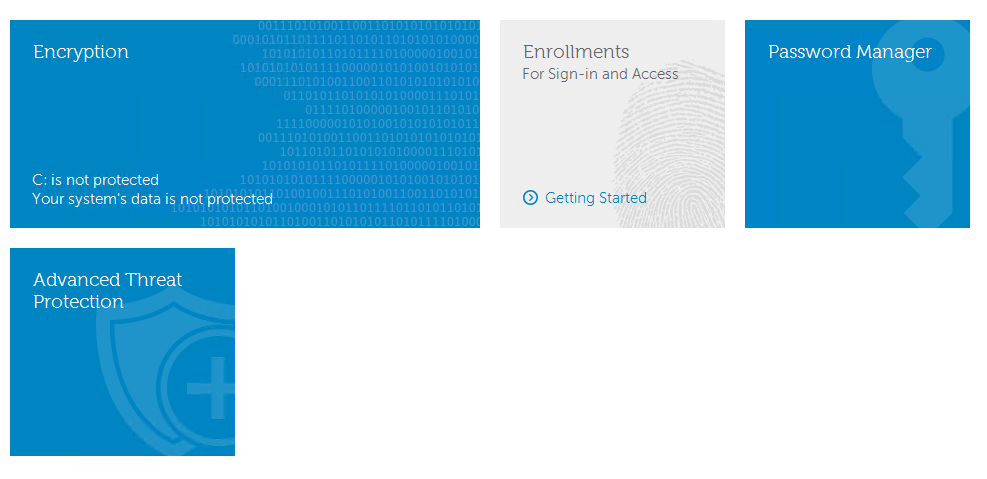
- UI의 왼쪽 아래 모서리에서 Version을 기록합니다.
참고:
- 가장 중요한 숫자는 세 번째 숫자입니다. 이 예에서 세 번째 숫자는 1371입니다.
- 예시에 나온 버전은 사용자 환경에 따라 다를 수 있습니다.
설치 프로그램
참고: 설치 프로그램을 다운로드하는 방법에 대한 자세한 내용은 Dell Endpoint Security Suite Enterprise를 다운로드하는 방법을 참조하십시오.
- 마스터 제품군에서 ATP 구성 요소의 압축을 풉니다.
참고: 압축 풀기 단계는 Dell Data Security 마스터 설치 프로그램에서 하위 설치 프로그램의 압축을 푸는 방법을 참조하십시오.
- 압축을 푼 ATP 구성 요소의 위치로 이동합니다.
- DDSSuite.exe에서 압축을 푼 경우:
[EXTRACTION PATH]\ Advanced Threat Prevention\WinNtAll\ATP_AgentSetup.exe
- DDPSuite.exe에서 압축을 푼 경우:
- 64비트: [추출 경로]
\ Advanced Threat Protection\Win64R\AdvancedThreatProtectionAgentSetup.exe - 32비트: [추출 경로]
\ Advanced Threat Protection\WinNtR\AdvancedThreatProtectionAgentSetup.exe
- 64비트: [추출 경로]
- DDSSuite.exe에서 압축을 푼 경우:

참고: [EXTRACTION PATH]는 최종 사용자가 선택한 디렉토리를 기반으로 합니다. 스크린샷
C:\Extracted 에는 [EXTRACTION PATH]가 있습니다.
- ATP 구성 요소(
ATP_AgentSetup또는AdvancedThreatProtectionAgentSetup)를 마우스 오른쪽 버튼으로 클릭한 다음 속성을 선택합니다.
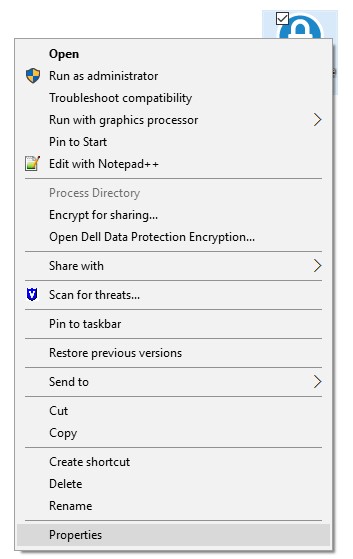
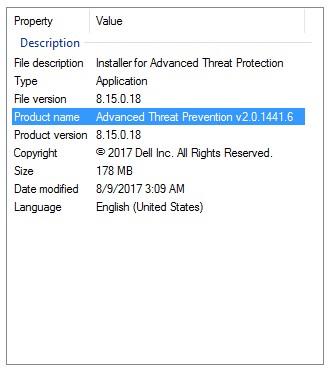
- Details 탭을 클릭합니다.

- Product Name 아래의 번호를 기록합니다.
참고:
- 가장 중요한 숫자는 세 번째 숫자입니다. 이 예에서 세 번째 숫자는 1441입니다.
- 예시에 나온 버전은 사용자 환경에 따라 다를 수 있습니다.
Mac
참고: UI를 통해 버전을 확인하기 전에 Dell Endpoint Security Suite Enterprise를 설치해야 합니다. 자세한 내용은 Mac용 Dell Endpoint Security Suite Enterprise를 설치하는 방법을 참조하십시오.
- Status 메뉴(화면 상단)에서 Dell Data Protection | Endpoint Security Suite Enterprise 아이콘을 오른쪽 버튼으로 클릭한 다음 About을 선택합니다.
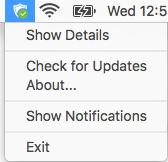
- Version을 기록합니다.
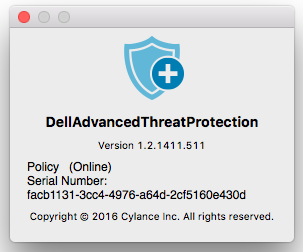
참고:
- 가장 중요한 숫자는 세 번째 숫자입니다. 이 예에서 세 번째 숫자는 1411입니다.
- 예시에 나온 버전은 사용자 환경에 따라 다를 수 있습니다.
Linux
참고: 버전을 확인하기 전에 Dell Endpoint Security Suite Enterprise를 설치해야 합니다. 자세한 내용은 Linux용 Dell Endpoint Security Suite Enterprise를 설치하는 방법을 참조하십시오.
- 타겟 엔드포인트에서 Terminal을 엽니다.

- 터미널에
atp –v를 입력한 다음 키를 누릅니다.

- version을 기록합니다.
참고:
- 가장 중요한 숫자는 세 번째 숫자입니다. 이 예에서 세 번째 숫자는 1471입니다.
- 예시에 나온 버전은 사용자 환경에 따라 다를 수 있습니다.
지원 부서에 문의하려면 Dell Data Security 국제 지원 전화번호를 참조하십시오.
온라인으로 기술 지원 요청을 생성하려면 TechDirect로 이동하십시오.
추가 정보 및 리소스를 보려면 Dell 보안 커뮤니티 포럼에 참여하십시오.
Additional Information
Videos
Affected Products
Dell Endpoint Security Suite EnterpriseArticle Properties
Article Number: 000124632
Article Type: Solution
Last Modified: 26 Oct 2023
Version: 14
Find answers to your questions from other Dell users
Support Services
Check if your device is covered by Support Services.