Dell WiGig Wireless Docking Station (WLD15) Visual Guide to your Dock
Summary: This article is a visual guide to the external ports and features of your Dell Latitude WLD15 WiGig Wireless Docking Station.
Symptoms
 Note: For a more detailed description of each location, go to the system manuals at Dell WiGig WLD15 Documents and Manuals.
The following article provides a visual guide to your Latitude (WLD15) WiGig Wireless Dock.
Table of Contents:
- Front View
- Rear View
- Left-Hand Side View
- Right-Hand Side View
- Top View
- Bottom View
- Dock Specifications
- Docking to Portable Device
Front View
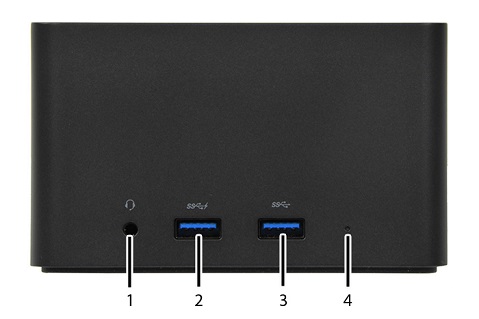
(Figure.1 Front View)
| 1 | Headset Connector | 2 | USB 3.0 Connector with PowerShare |
| 3 | USB 3.0 Connector | 4 | Power LED |
Rear View
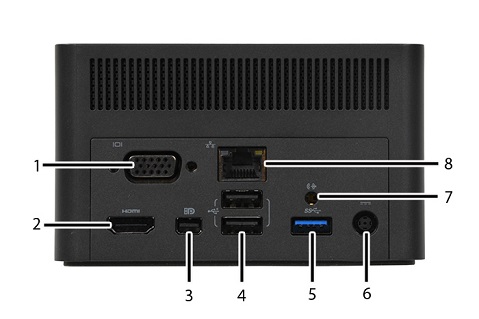
(Figure.2 Rear View)
| 1 | VGA Connector | 2 | HDMI Connector |
| 3 | Mini DisplayPort Connector | 4 | USB 2.0 Connector x2 |
| 5 | USB 3.0 Connector | 6 | DC-In Connector |
| 7 | Speaker Out | 8 | LAN Ethernet Connector (RJ45) |
Left-Hand Side View
(Figure.3 Left-Hand Side View)
Right-Hand Side View
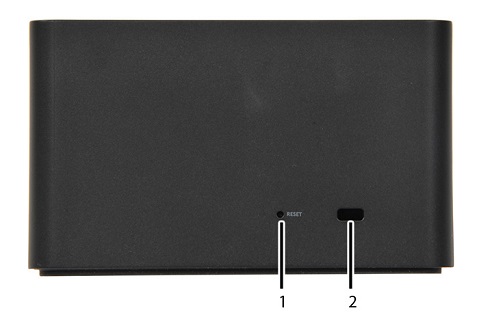
(Figure.4 Right-Hand Side View)
| 1 | Reset Button | 2 | Kensington Lock Slot |
Top View

(Figure.5 Top View)
| 1 | Pairing/Connect / Disconnect/Sleep / Wake-up Button |
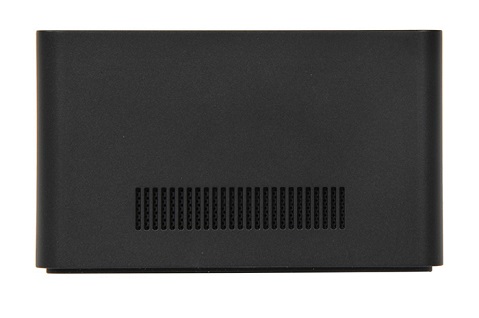
Bottom View
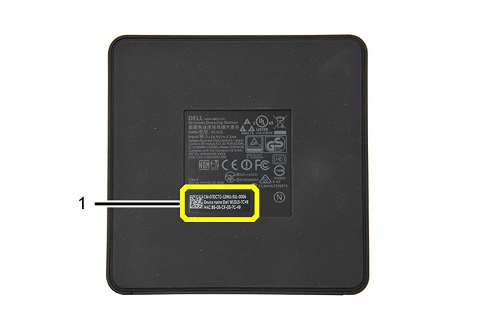
(Figure.6 Bottom View)
| 1 | Wireless Dock PPID and Device Name |
Dock Specifications
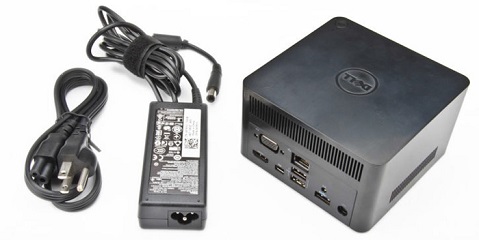
(Figure.7 Box Contents)
| Power | |
|---|---|
| AC Adapter | 65W |
| Input Voltage | AC 100-240 V |
| Output Voltage | 19.5 V |
| Output Current | 3.34 A |
Docking to Portable Device
Connecting the laptop to the Docking Station
 Note: The Dell WiGig Wireless Docking Station (WLD15) is compatible with these computers: Latitude E7250/7250, E7450, E5250/5250, E5450/5450, E5550/5550, and the Latitude 13 2 in 1 (7350) when they are equipped with the Intel 17265 802.11ad WLAN adapter.
-
Launch the Intel Wireless Dock Manager.
(Figure.8.1 Intel Wireless Dock Manager)
-
If it is disabled, press the button to enable WiGig.
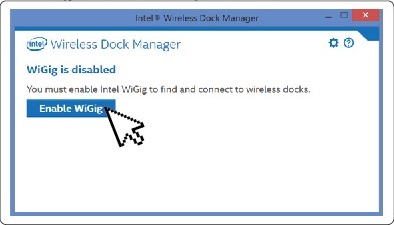
(Figure.8.2 Enable WiGig)
-
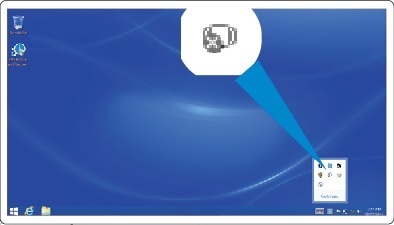
Tap or click the icon in your taskbar to connect to your wireless dock.

(Figure.8.3 Wireless Dock Taskbar Icon)
-
Select the dock that you want to connect to from the list.
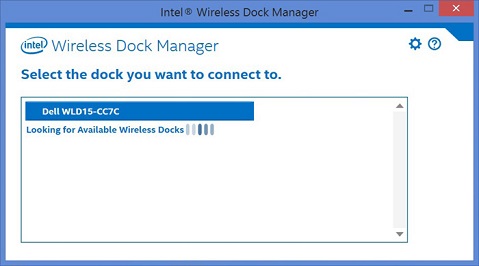
(Figure.8.4 Select your Dock)
-
Press the connection button on the Wireless Docking Station to confirm pairing.
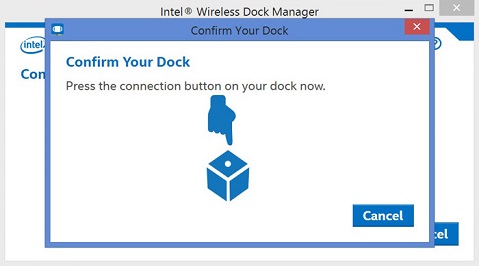
(Figure.8.5 Confirm your Dock)
-
Once you're successfully connected, you can enable or disable the option to Automatically connect to this dock by using the slider switch.
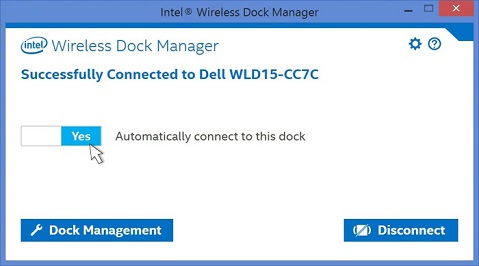
(Figure.8.6 Enable Automatically Connect to Dock)
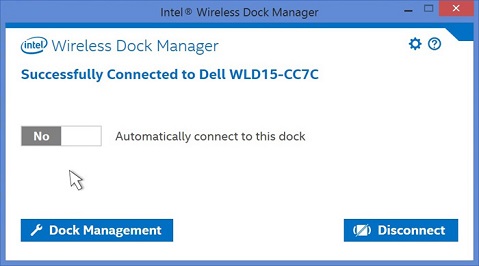
(Figure.8.7 Disable Automatically Connect to Dock)
-
If you tap or click, on the Dock Management Tab you can configure the Intel Wireless Dock Manager application. There are three types of configuration possible, choose the one that best suits you:
-
Individual - allows automatic connections. After the initial pairing, every subsequent connection will use the stored profile.
-
Shared - will require you to manually select the target dock from the scan list to connect.
-
Public - will always require the WPS pairing.
-
 Note: You can set a password to protect the dock settings, however, if you forget your password then you have to do a rollback to the factory default settings.