Dell Unity: Connectivity Services (previously SupportAssist) Failed During Health Check
Summary: The system encountered an unexpected error when running health checks. After upgrading to UnityOS 5.5.2 or 5.5.3, Unity Connectivity Services failed.
Symptoms
- Unity Connectivity Services failed.
- Connectivity Services unreachable.
- Connectivity Services failed during a health check.
Error code: 0x6000cbbError code: 0x6400c1f
Cause
This issue has been identified after upgrades to both UnityOS 5.5.2 and 5.5.3.
The established root cause pattern for /hostmnt being full is as follows:
- During or related to an upgrade, a
SQLitedatabase upgrade fails. - The
ESEcontainer's/dev/loop0file system fills up (100% at/opt/ese/var). - The database upgrade gets stuck applying "
sql upgrade 52". - The
ESEcontainer cannot start due to no disk space. SupportAssistconfiguration fails with error0x6400c1f.
Resolution
The Resolution will be different depending on which error message you receive.
Check the 'Alerts' tab in Unisphere or by running a health check.
In Unisphere:
In the CLI, you may see one of the following errors following a Health Check:
Data Movers : Checking Status............................................Fatal Error detected No NAS server configured.OR
Data Movers    : Checking filesystems health...............................Fatal error detected
Perl exited with active threads:
        1 running and unjoined
        3 finished and unjoined
        0 running and detached
- If your error code is Error code 0x6400c1f, please Contact Dell Technical Support or your Authorized Service Provider and reference this Knowledgebase article.
- If your error code is Error code 0x6000cbb or any other error:
- Run the following command in using SSH:
df -Th /EMC/backend/CEM/ese/hostmnt-
-
- If the /hostmnt directory DOES NOT show 100% full, run the Clean-Up Steps in the Additional Info field of this article.
- If the /hostmnt directory IS 100% FULL, contact Dell Technical Support or your Authorized Service Provider and quote this Knowledgebase article.
- If the /hostmnt directory DOES NOT show 100% full, run the Clean-Up Steps in the Additional Info field of this article.
-
For additional information, see: https://dl.dell.com/content/manual40912271-dell-unity-family-configuring-supportassist.pdf?language=en-us
Additional Information
Clean-Up Steps:
-
Log in to Unity CLI as service.
-
Get
ConnectivityServicesstatus.svc_connectivityservices -s -
Restart the
ConnectivityServicesservice.svc_connectivityservices -r
Note: Check theConnectivityServicesstatus, if the issue still persists go to next step. -
Back up the
ConnectivityServicesconfiguration and make a note of the IP addresses or FQDNs used for the existingConnectivityServicesenvironment. This is a precautionary step.svc_connectivityservices --backup /home/service/user
-
Clean up the
ConnectivityServicesconfiguration.svc_connectivityservices -c
-
Reconfigure
ConnectivityServicesfrom Unisphere manually as a new configuration.Reconfigure
ConnectivityServices:Note: Anaccesskeymay be required to reenable. This is obtained from the product support portal.- Select the Settings icon. The Settings window appears.
- Select Support Configuration.
- From the drop-down list under Support Configuration, select
ConnectivityServices.
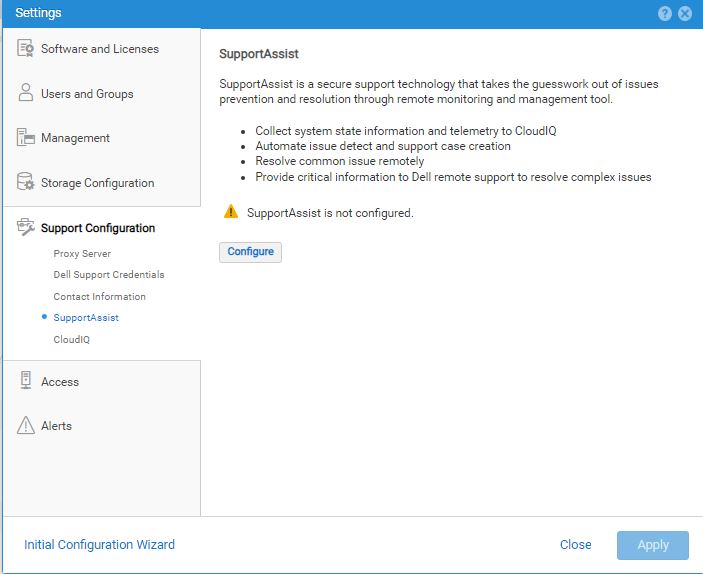
- Click Configure. The Configure
SupportAssistwizard appears to show theSupportAssistLicense Agreement information. - Select Accept license agreement, to accept the terms of the
SupportAssistEnd User License Agreement (EULA) then click Next. TheSupportAssistEULA must be accepted to enable and configureSupportAssist.NOTE: Once the license agreement is accepted, it does not appear again. Connection Type information appears. - Specify the appropriate
SupportAssistconnectivity options that are preferred. - Click Next to continue. Network Check information appears.
- Do one of the following:
- Leave the "Use Global Proxy Settings" checkbox cleared. It is not selected by default.
- Select Use Global Proxy Settings.
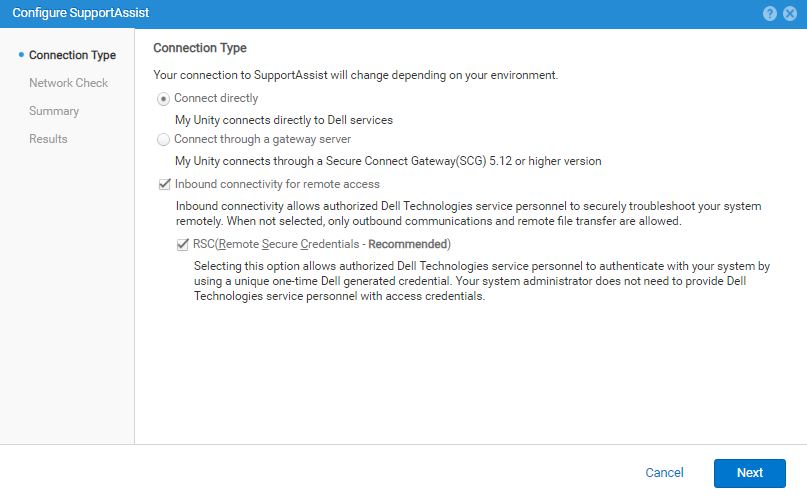 NOTE: If selected, the currently configured global proxy server settings display under the checkbox and are used for the
SupportAssistconnection. However, if the current global proxy server type is SOCKS, an error appears.SupportAssistdoes not support a SOCKS proxy server.
To proceed, the global proxy server should be configured for HTTP instead or not used if possible. - Click Next to run a Network check to validate the network readiness for the
SupportAssistconfiguration. When the network check passes successfully, Review Configuration information appears. - Check that the
SupportAssistselections and the previous related operation results are correct.
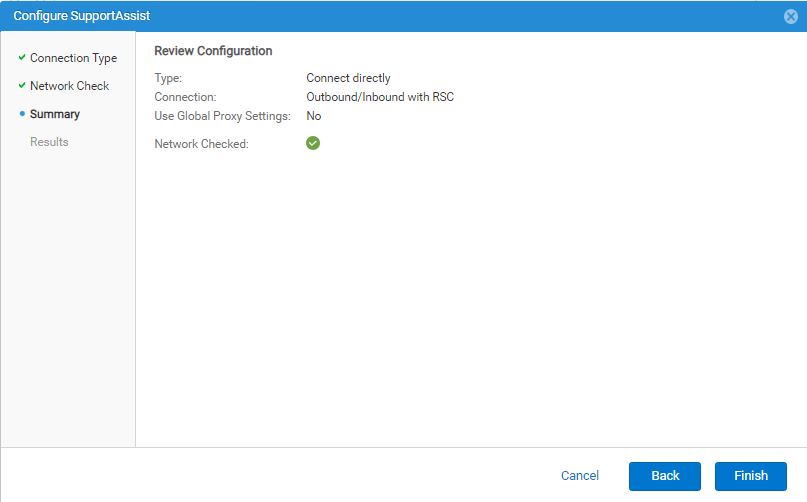
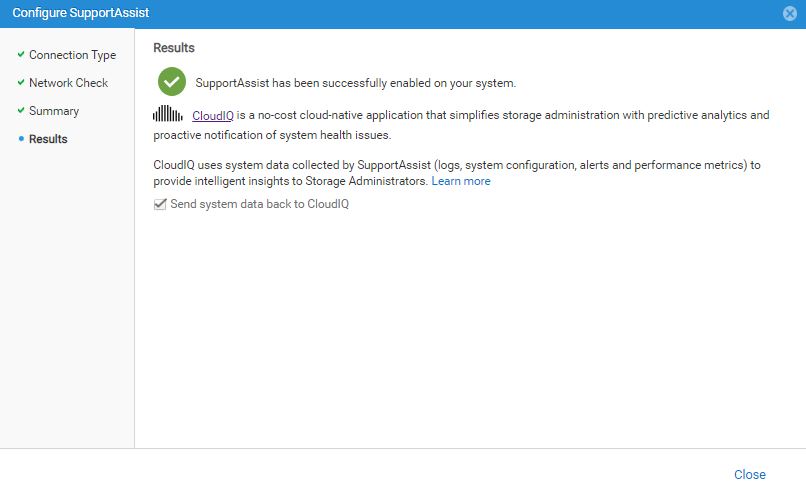
- If the Review Configuration information is correct, click Finish.
TheSupportAssistconnectivity should be enabled after a few minutes and Results information appears to show a success message.
The "Send system data back to CloudIQ" checkbox is selected (enabled) by default. - Do one of the following:
- Leave the "Send system data back to CloudIQ" checkbox selected.
- Clear the checkbox to disable sending data to CloudIQ (not recommended).
NOTE: CloudIQ can be enabled or disabled after completing theSupportAssistconfiguration from Settings > Support Configuration > CloudIQ. - Click Close to close the wizard.
Next Steps if required: Always test the connectivity after configuring SupportAssist.
This process checks that the connection is working and allows Dell to recognize the system.
Click Test in one of the following locations:
- System > Service under
SupportAssist - Settings > Support Configuration >
SupportAssist
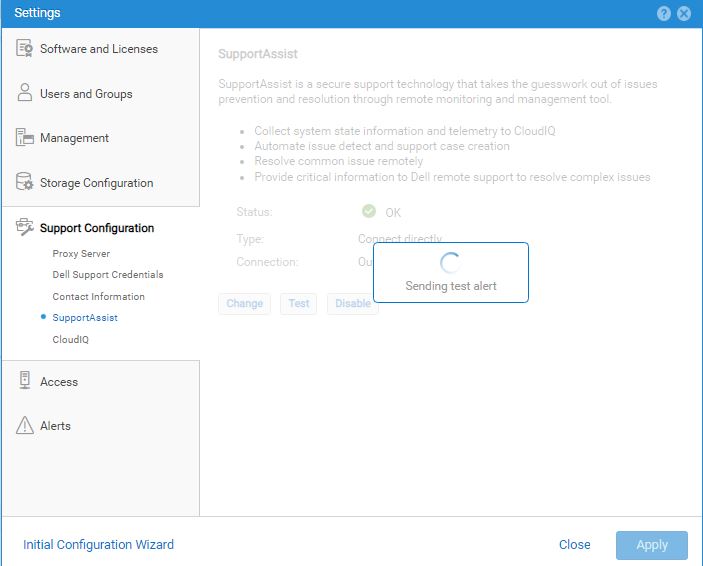

To update status from Unknown, click Refresh.
To change the SupportAssist configuration information, select Change.
The Configure SupportAssist wizard appears in which you can make changes.