Data Domain - Configure VLAN and IP Alias using UI and CLI
Summary: Create a new Virtual Local Area Network (VLAN) interface from either a physical interface or a bonded interface. An IP alias assigns an additional IP address to a physical interface, a bonded interface, or a VLAN. ...
Instructions
Create a new VLAN interface from either a physical interface or a bonded interface.
About this task
The recommended total VLAN count is 80. You can create up to 100 interfaces (minus the number of aliases, physical and bonded interfaces) before the Data Domain prevents you from creating anymore.
Steps
-
Select Hardware > Ethernet > Interfaces.
-
In the interfaces table, select the interface to which you want to add the VLAN.
-
Click Create and select VLAN.
-
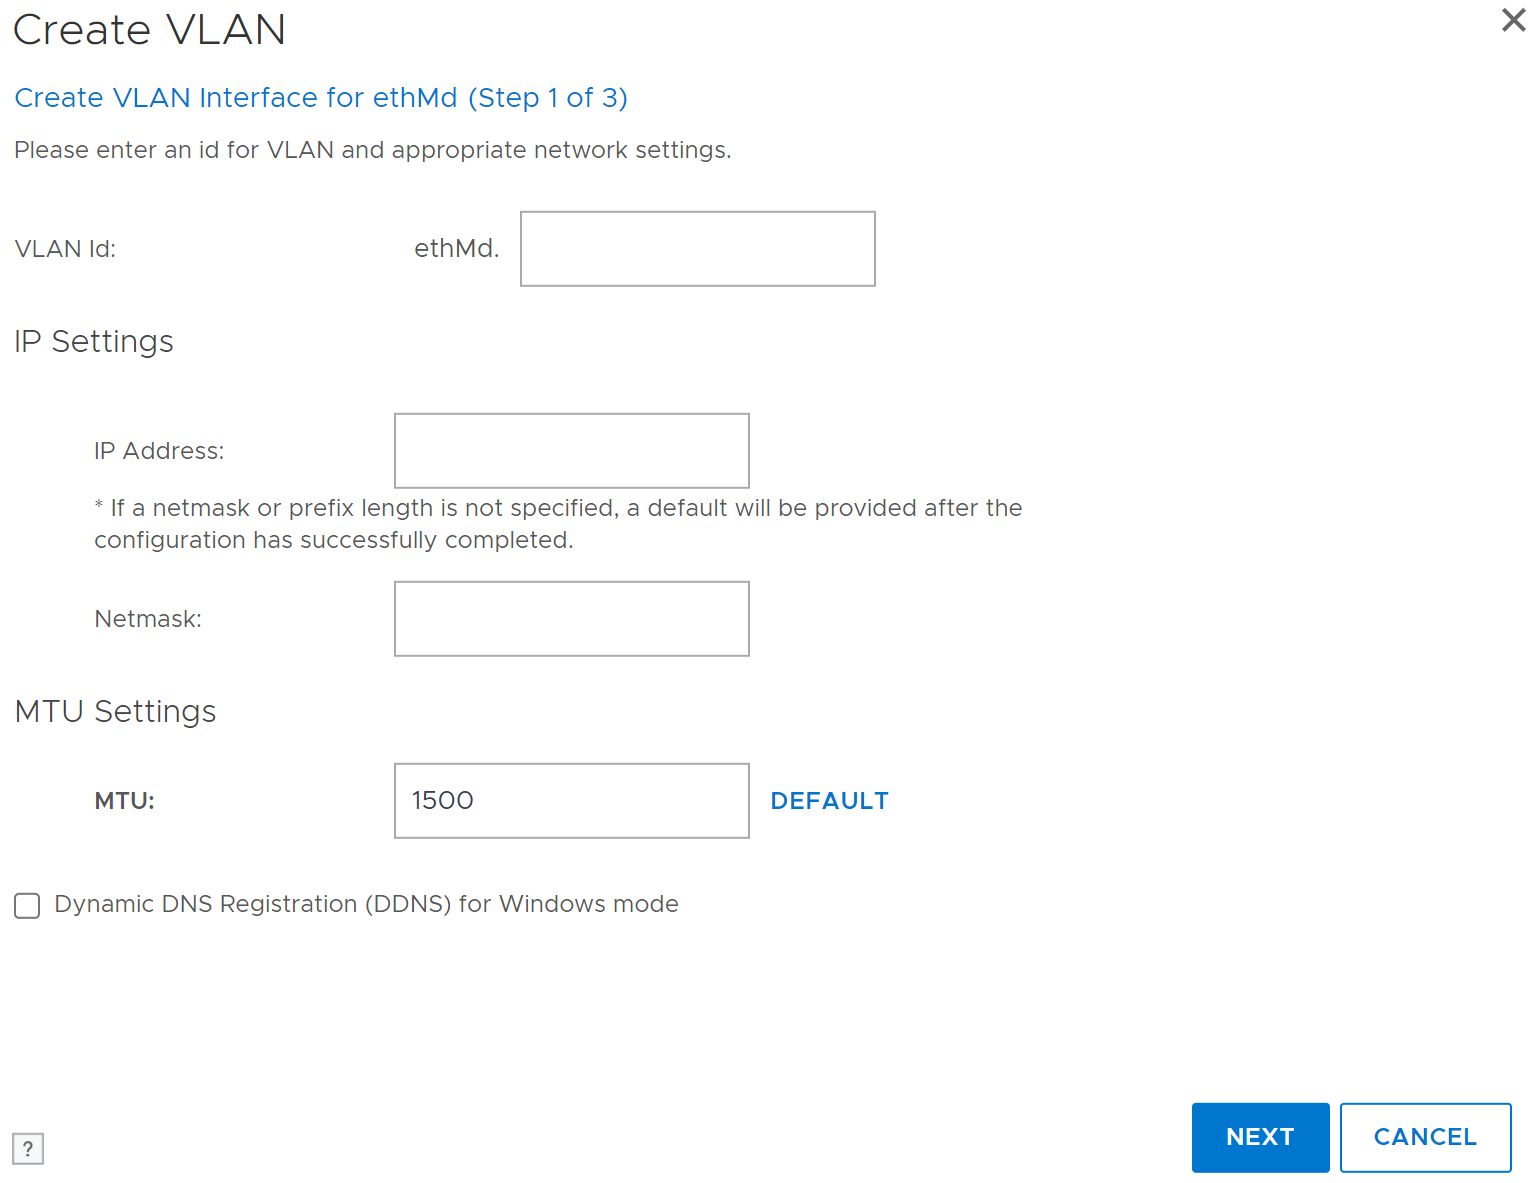
In the Create VLAN dialog box, specify a VLAN ID by entering a number in the VLAN ID box. This is the tag that the VLAN uses on the network. The range of a VLAN ID is between 1 and 4094 inclusive.
-
Enter an IP address or enter 0 to specify no IP address.
The Internet Protocol (IP) address is the numerical label assigned to the interface. For example, 192.168.10.23 -
Enter a netmask or prefix.
-
Specify the Maximum Transmission Unit (MTU) setting.
The VLAN MTU must be less than or equal to the MTU defined for the physical or bonded interface to which it is assigned.
If the MTU on the physical or bonded interface is lower than the VLAN setting, the VLAN MTU automatically adjusts to match the interface.If the MTU value for the supporting interface is increased above the configured VLAN value, the VLAN value is unchanged.
To select the default value (1500), click Default.
To select a different setting, enter the setting in the MTU box. DD System Manager does not accept an MTU size that is larger than that defined for the physical or bonded interface to which the VLAN is assigned. -
Specify a Dynamic Domain Name System (DNS) Registration option.
Dynamic DNS (DDNS) is a protocol that registers local IP addresses on a Domain Name (DNS) server. In this release, DD System Manager supports Windows mode DDNS. To use UNIX mode DDNS, use thenet ddnsCLI command.
The DDNS must be registered to enable this option. -
Click Next.
The Create VLAN summary page appears. -
Review the configuration settings, click Finish, and click OK.
Example UI screenshots


Modifying a VLAN interface
After creating a VLAN interface, then update the settings to respond to network changes or resolve issues.
Steps
- Select Hardware > Ethernet > Interfaces.
- In the Interfaces column, select the checkbox of the interface and disable the VLAN interface by clicking No in the Enabled column. Click OK in the warning dialog box.
- In the Interfaces column, select the checkbox of the interface and click Configure.
- In the Configure VLAN Interface dialog box, change the settings.
- Click Next and Finish.
Configuring an IP alias
An IP alias assigns an additional IP address to a physical interface, a bonded interface, or a VLAN.
About this task
The recommended total number of IP aliases, VLAN, physical, and bonded interfaces that can exist on the Data Domain is 80. Although up to 100 interfaces are supported, as the maximum number is approached, you might notice slowness in the display.
Aliases cannot be created on the standby node when a High Availability (HA) pair is in use. Create the alias on the active node first and then configure it on the standby node.
Steps
- Select Hardware > Ethernet > Interfaces.
- Click Create and select IP Alias.
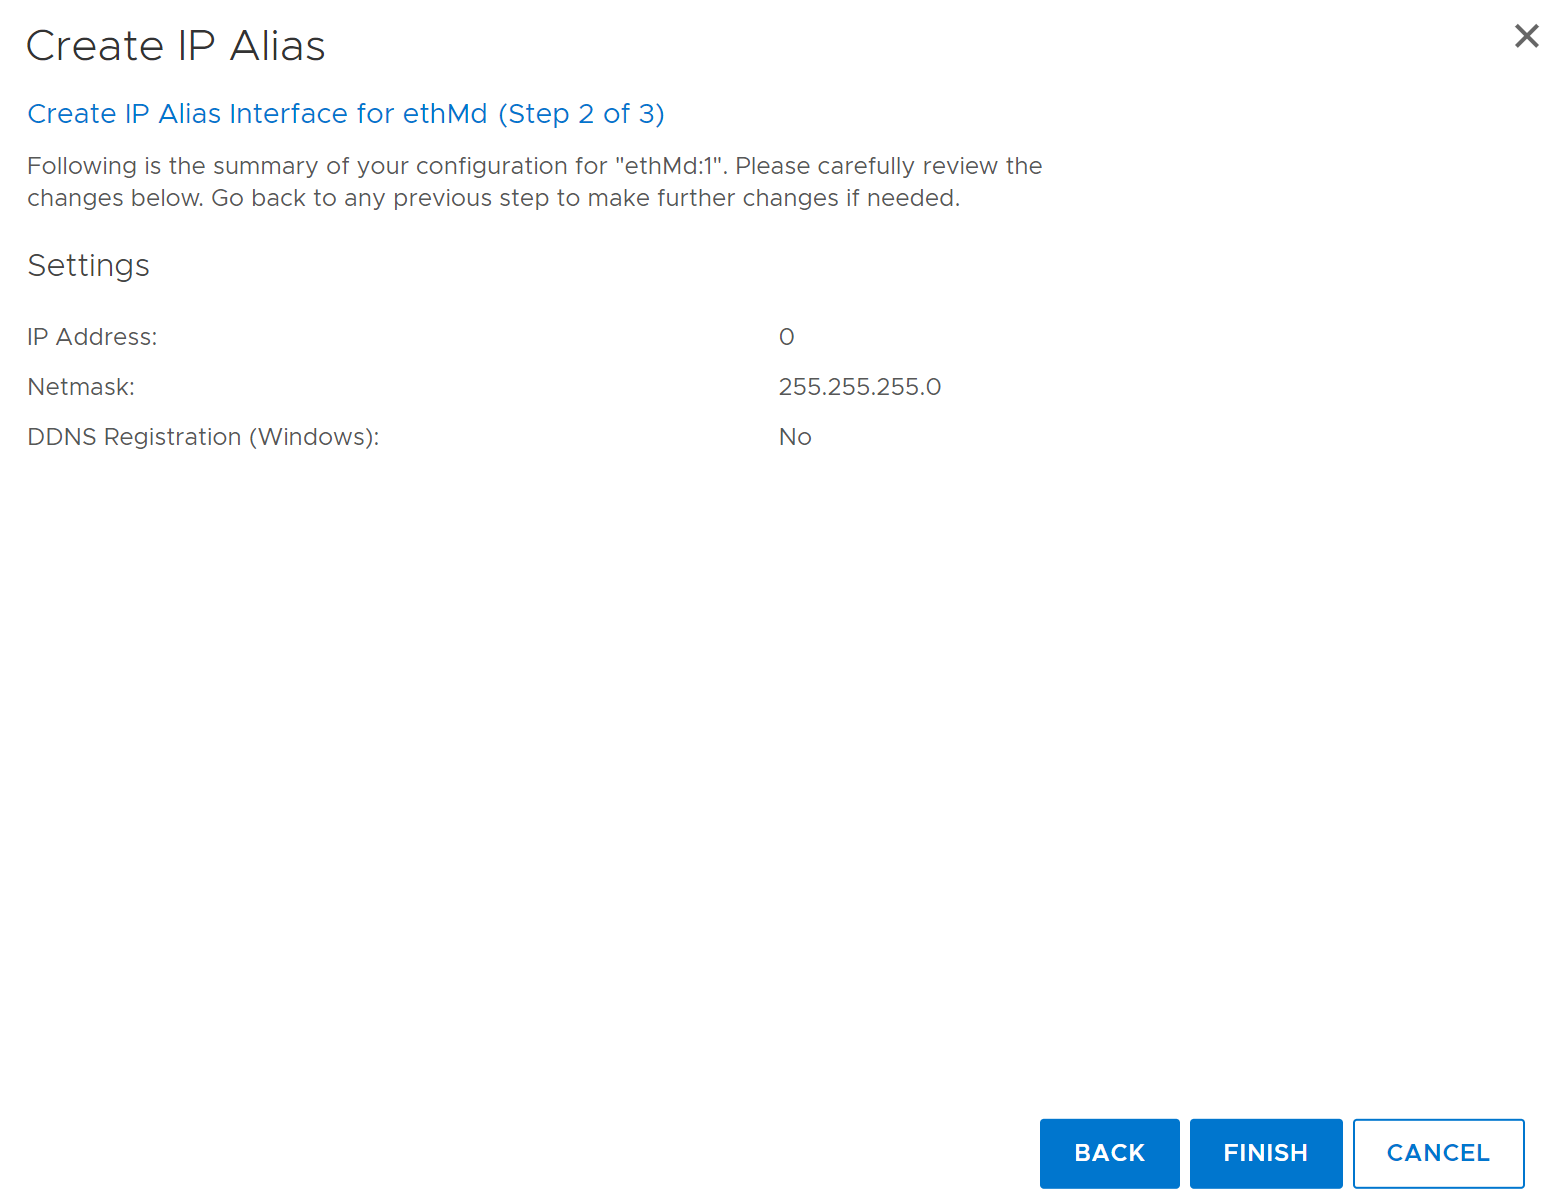
The Create IP Alias dialog box appears. - Specify an IP alias ID by entering a number in the IP ALIAS Id box.
The range is 1 to 4094 inclusive. - Enter an IPv4 or IPv6 address.
- If a user entered an IPv4 address, enter a netmask address.
- Specify a Dynamic DNS Registration option.
Dynamic DNS (DDNS) is a protocol that registers local IP addresses on a Domain Name System (DNS) server. In this release, DD System Manager supports Windows mode DDNS. To use UNIX mode DDNS, use thenet ddnsCLI command.
The DDNS must be registered to enable this option. - Click Next.
The Create IP Alias summary page appears. - Review the configuration settings, click Finish, and click OK.
Example Screenshots Below


Modifying an IP alias interface
After you create an IP alias, you can update the settings to respond to network changes or resolve issues.
Steps
- Select Hardware > Ethernet > Interfaces.
- In the Interfaces column, select the checkbox of the interface and disable the IP alias interface by clicking No in the Enabled column. Click OK in the warning dialog box.
- In the Interfaces column, select the checkbox of the interface and click Configure.
- In the Configure IP Alias dialog box, change the settings as described in the procedure to create an IP Alias.
- Click Next and Finish.
Configuring a VLAN in the Data Domain Command-Line Interface
The following are examples of configuring VLAN interfaces:
The following creates a VLAN on top of the physical interface eth0b. The interface eth0b must be present and up.
- Access the Data Domain using the Command-Line Interface (CLI).
- Verify
eth0bis present and enabled. Type the following at the Data Domain system prompt:
net show hardware
net show settings
- If the physical interface has not been given an address, set the address to zero:
net config eth0b 0
This ensures that there is no address in the registry when the physical interface is associated with a VLAN.
- Bring up the interface:
net config eth0b up
interface eth0b is enabled, but the IP address is not configured. This displays a warning message; however, the interface should still be up. To verify the type:
net show settings
net config eth0b
Do not use net enable eth0b, it fails if interface does not have an IP address.
- Add the VLAN to the physical interface.
net create interface eth0b vlan 63
The physical interface, eth0b, is now configured to send and receive packets from or to VLAN 63. With the interface configured, the VLAN interface ID is eth0b.63.
- An address must be assigned to use the VLAN an address.
net config eth0b.63 10.50.10.10 netmask 255.xxx.xxx.x
net config eth0b:63 10.60.10.10 netmask 255.xxx.xxx.x
The following creates a VLAN on top of the virtual interface, veth21.
- Create the virtual interface.
net create virtual veth21
- The virtual interface must define the type of bonding and the children:
net config eth5a down
net config eth5b down
net failover add veth21 interfaces eth5a eth5b
If aggregation is required:
net aggregate add virtual-ifname interfaces physical-ifname-list [mode
{roundrobin | balanced hash {xor-L2 | xor-L3L4| xor-L2L3} | lacp hash
{xor-L2 | xor-L3L4 | xor-L2L3} [ rate {fast | slow} ]
Example: net aggregate add veth21 interfaces eth5a eth5b mode LACP hash xor-L2L3- Configure an IP Address to the virtual interface.
net config veth21 10.10.10.11 netmask 255.xxx.xxx.x
If you do not want to even assign a dummy IP to veth21, bring the virtual interface UP by running the following command before proceeding further:
net config up veth21
- Add the VLAN to the virtual interface.
net create interface veth21 vlan 57
The veth21 interface now has a VLAN interface, veth21.57.
- Assign an IP address to the VLAN.
net config veth21.57 10.100.10.10 netmask 255.xxx.xxx.x
Configuring IP aliases in the Data Domain Command-Line Interface
IP aliases can be added to physical interfaces and virtual interfaces. IP alias can be added to a VLAN interface. The configuration of an IP alias on top of a physical interface is the same as the configuration on the virtual interface except for one difference. The virtual interface must always have an IP address whenever it is brought up, and the IP address must be on the virtual interface itself.
The following are examples of configuring IP alias interfaces:
The following creates an IP alias on top of the physical interface eth0b. The interface eth0b must be present and up.
net config eth0b.63 10.50.10.10 netmask 255.255.252.0
net config eth0b:63 10.60.10.10 netmask 255.255.252.0
- Access the Data Domain system using the Command-Line Interface (CLI).
- Verify that
eth0bis present and enabled. Type the following at the Data Domain system prompt:
net show hardware
net show settings
- Open the interface.
net config eth0b up
interface eth0b is enabled, but the IP address is not configured.
This displays a warning message; however, the interface should still be up. To verify the type:
net show settings
net config eth0b
Do not use net enable eth0b, it fails if the interface does not have an IP address.
- Add the IP alias to the physical interface.
net create interface eth0b alias 63
The physical interface, eth0b now has an IP alias, eth0b:63.
- An address must be assigned to use the IP alias.
The following creates an IP alias on top of the virtual interface, veth21.
- Create the virtual interface.
net create virtual veth21
- The virtual interface must define the type of bonding and the children:
net config eth5a down
net config eth5b down
net failover add veth21 interfaces eth5a eth5b
- Configure an IP Address to the virtual interface.
net config veth21 10.10.10.11 netmask 255.255.252.0
- Add the IP alias to the virtual interface.
net create interface veth21 alias 57
The veth21 interface now has an IP alias, veth21:57.
- Assign an IP address to the IP alias.
net config veth21.57 10.100.10.10 netmask 255.255.252.0
- Alternately, an IP alias can be added to VLAN interfaces.
net create interface eth0b.63 alias 121
net create interface veth21.57 alias 2333