Steps for Updating the Firmware for Your Dell Monitor
Summary: Steps for updating a Dell monitor's firmware and measures to take before installing the firmware update.
Instructions
Table of Contents:
Firmware Update
Firmware updates are released to resolve issues or improve the functionality of Dell monitors.
Incorrect application of a firmware update can damage the Dell monitor.
Monitor Firmware Update Process
There are specific requirements that must be met to successfully apply a firmware update to your Dell monitor.
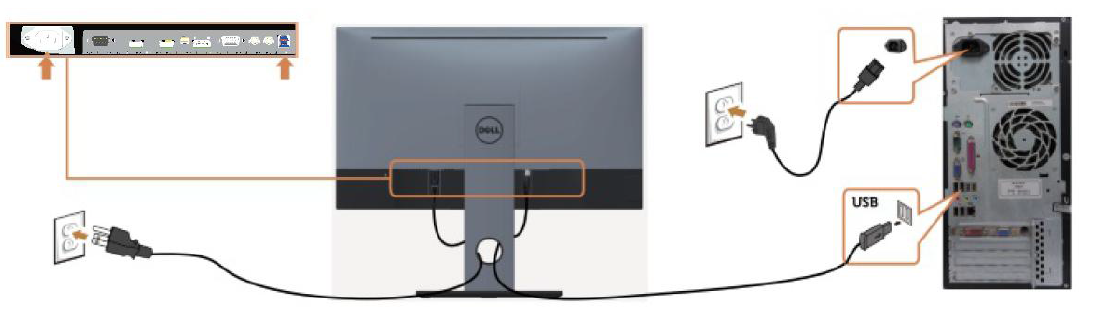
- Connect the USB upstream cable between the monitor and your computer. Do not use a docking station or any other device between this connection.
- Disconnect all other video and USB cables from the monitor before updating firmware.
- Disconnect all other monitors from the laptop or desktop. This ensures that only one display is connected while conducting a firmware update.
- Do not unplug the USB upstream cable or turn off the power during the update process.
- Update your monitors one at a time. Do not conduct firmware update on multiple monitors at a given time.
- Disable both the monitor and computers power save features.
When using a Desktop computer, you can have another monitor with video that is only connected to view the download instructions. Do Not have any USB cables connected to this monitor.
The best method is to use a laptop to conduct the firmware upgrade as it has its own display to view the instructions.
- The monitor must be connected to a power source during the firmware update process.
- The USB upstream cable must be connected between the monitor and the computer you are using to install the firmware update.
After the Firmware process is complete, you will receive the following message towards the bottom: "To complete update, turn off monitor, replug power cord, turn on monitor."
Turn the monitor off, disconnect the power cable, wait 2-5 seconds, reconnect the power cable, and turn the monitor back on.
The firmware for your monitor (if available) can be found on the Dell Drivers & Downloads page.
Instructions For Installing the Monitor Firmware
- Browse to Dell Drivers & Downloads.
- Identify your Dell product.
- Enter the Service Tag, Express Service Code, or the Serial number of the Dell monitor and click Search.
- Or, click Browse all products to manually select your Dell monitor from the catalog.
- Click Find Drivers.
- Select the Operating System.
- Under Category, select Application.
- Locate the latest Firmware Update Package.
- Click Download and save the file to your computer.
- Open File Explorer (also known as Windows Explorer), and browse to the location where the downloaded file is saved.
- Right-click the Firmware Update Package .zip file and click Extract all.
- Click Extract.
This instruction extracts files from the .zip into a folder named the same as the downloaded .zip file. - Double-click the folder to open.
- Double-click the Dell Monitor Firmware Update Utility setup file and follow the on-screen instructions to complete the installation process.
Steps for a silent installation:
- After Step 11, Type CMD in the address bar of the folder and press Enter. This step opens the Command Prompt window from this folder.

- Type the following code and press Enter:
Start /wait Dell_MonitorFirmwareUpdateUtility_XXXXXXX_XXXXXX.exe -s

- The computer will then install the firmware on the monitor in silent mode.