VMware: How to replace vSAN capacity disk
Summary: This article provides how to replace vSAN capacity disk. In the vSAN environment using SSD and hard disk drives together, the SSD used as the cache memory is called the Cache Disk, the hard drive used as the data space is called the Capacity Disk. ...
Instructions
VMware vSAN: How to replace a cache disk using vSphere Web Client
How To Replace The Capacity Disk:
As an example, this article proceeds with the situation where the second capacity disk has a failure in the configuration of one cache disk and two capacity disks.
-
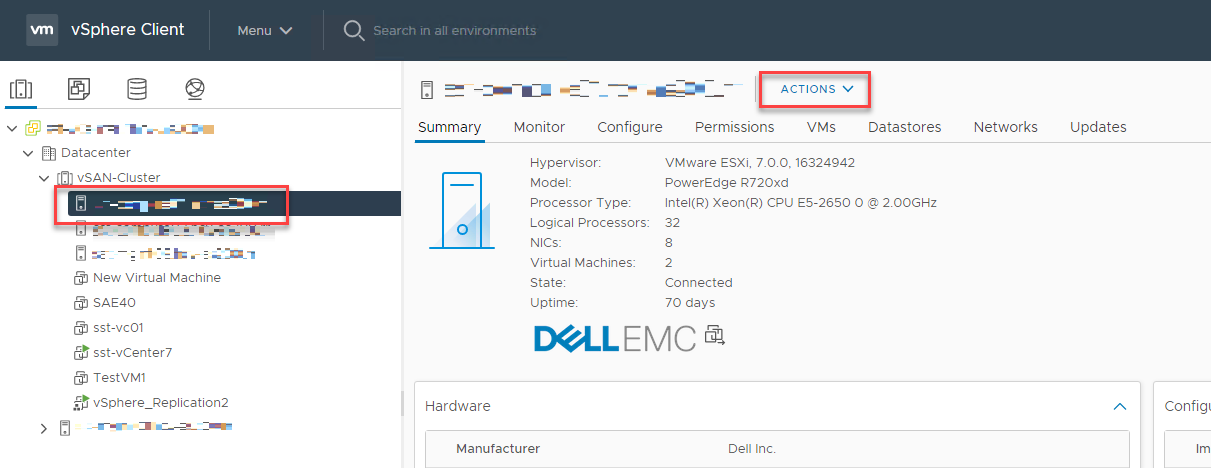
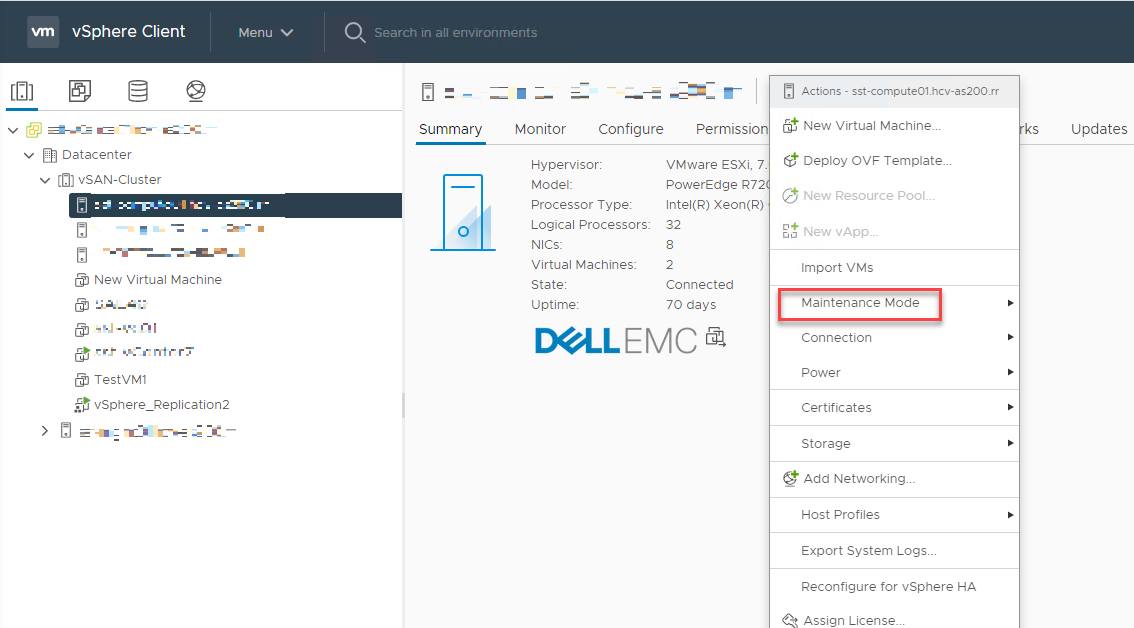
Switch to the maintenance mode from the Actions drop-down menu at the top of the vSphere Web Client.
It is recommended to switch to the maintenance mode before the replacement as long as there is any specific reason.
For more details of switching to the maintenance mode and its types, please refer to the Place a Member of vSAN Cluster in Maintenance Mode.
-
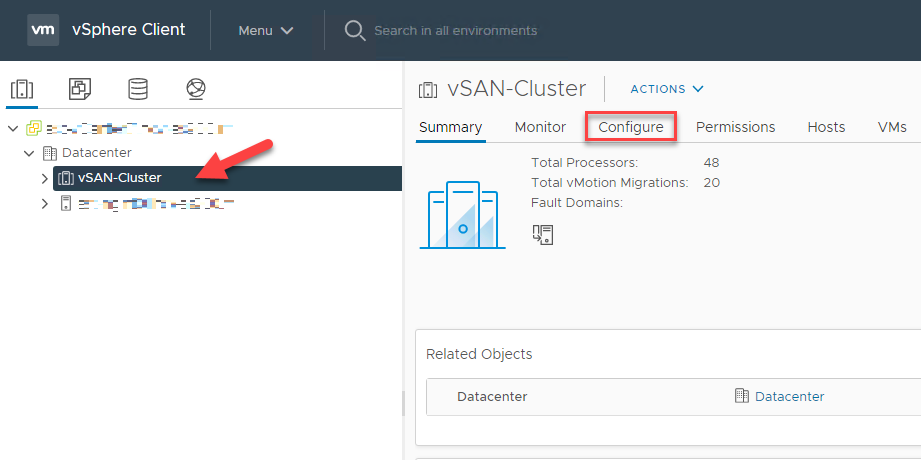
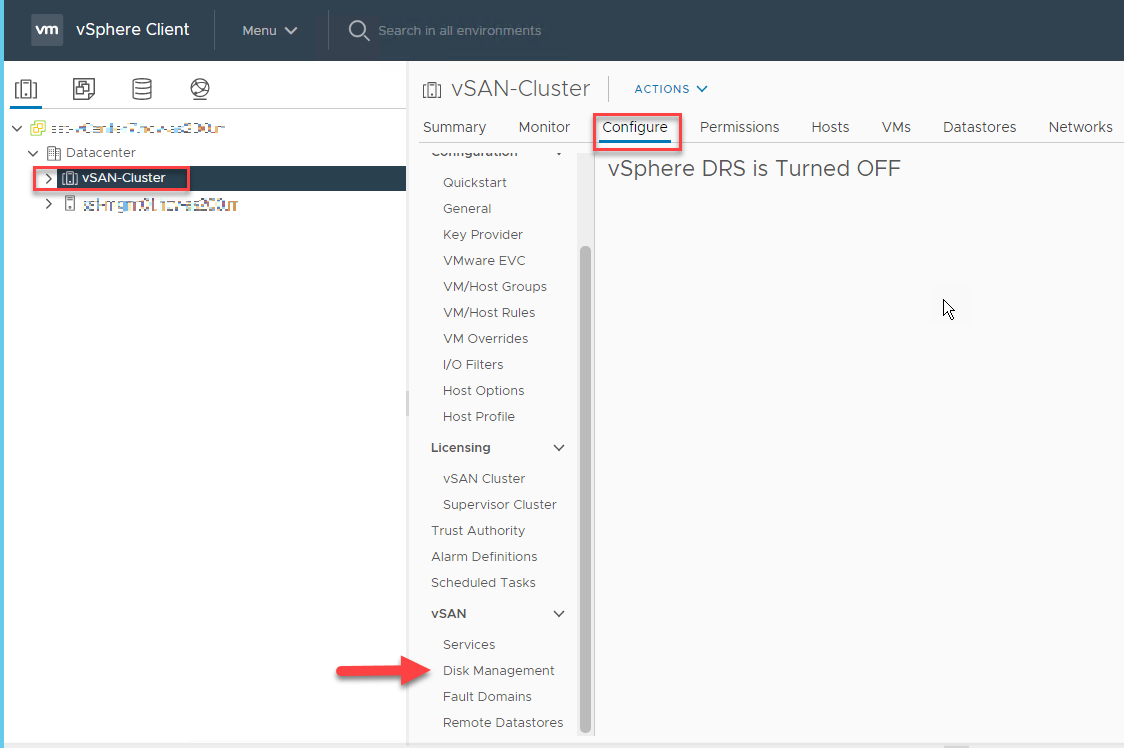
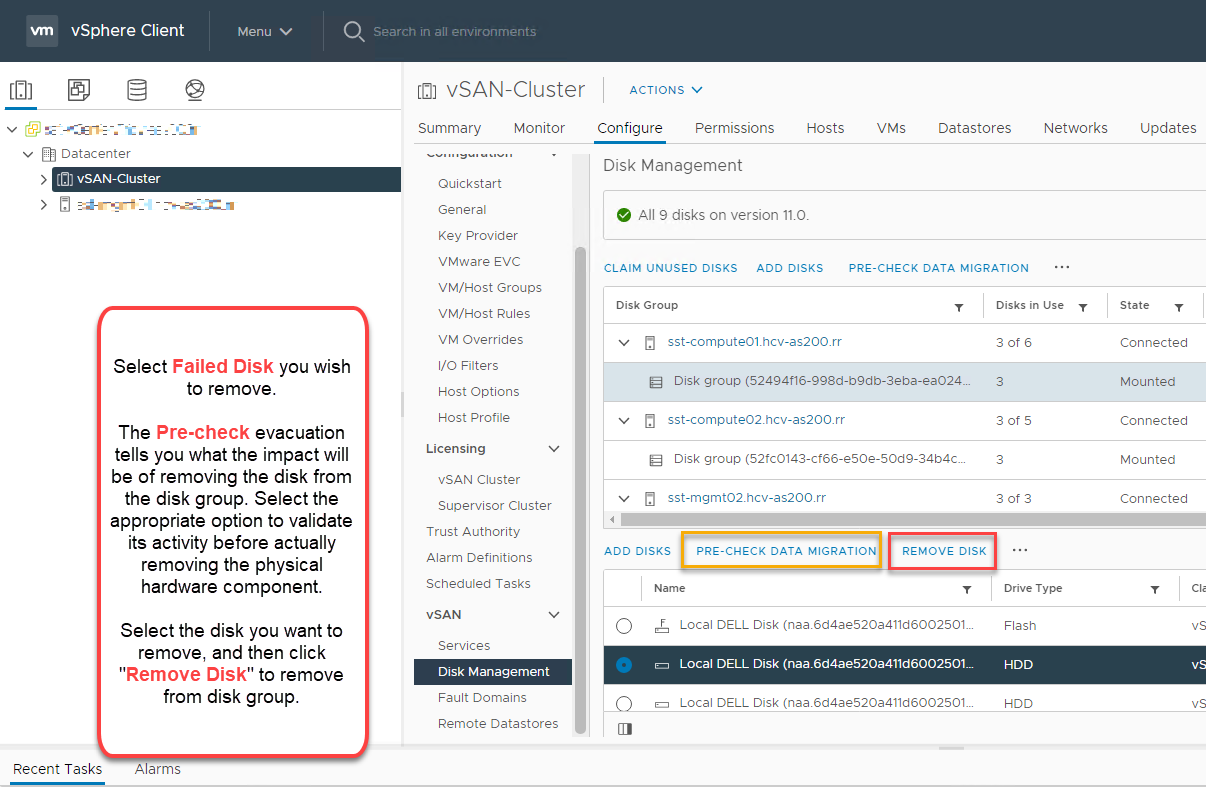
Delete the applicable hard drive from the Configure menu.
After a while, that disk will not be displayed.Note: The following migration option must be selected when deleting the applicable disk.
For more details, please refer to the Remove Disk Groups or Devices from vSAN- Save all data to another host.
- Verify the ability to access the data from another host.
- Do not save the data.
-
Physically replace the applicable disk.
-
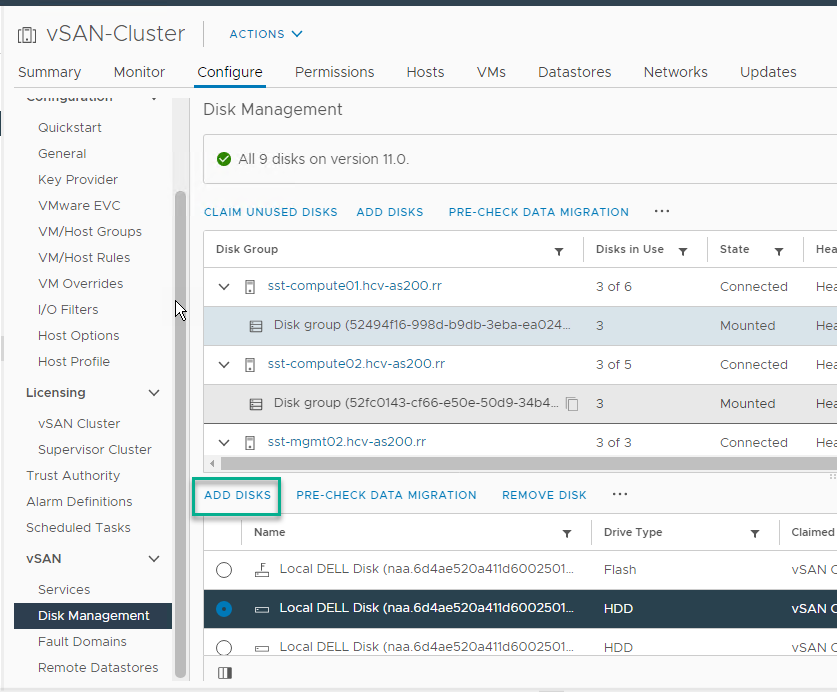
Click the ADD DISKS.
-
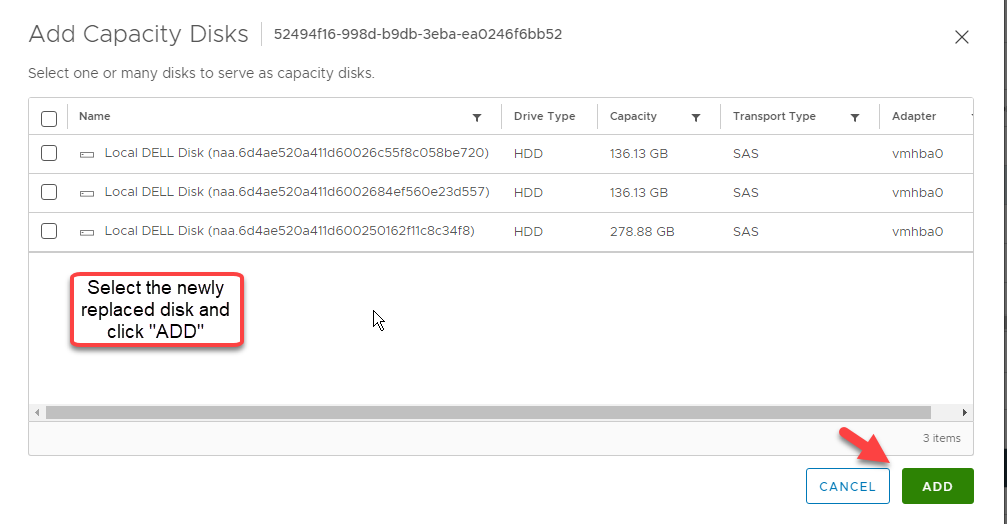
Select the newly replaced disk and click ADD.
-
Verify that the capacity is correctly recognized on the vSphere Web Client recognize, release the maintenance mode.
-
Since the alert remains, delete it manually.