CloudIQ: How to schedule a report in CloudIQ
Summary: The following steps is an example on how to schedule a report from within CloudIQ.
This article applies to
This article does not apply to
This article is not tied to any specific product.
Not all product versions are identified in this article.
Instructions
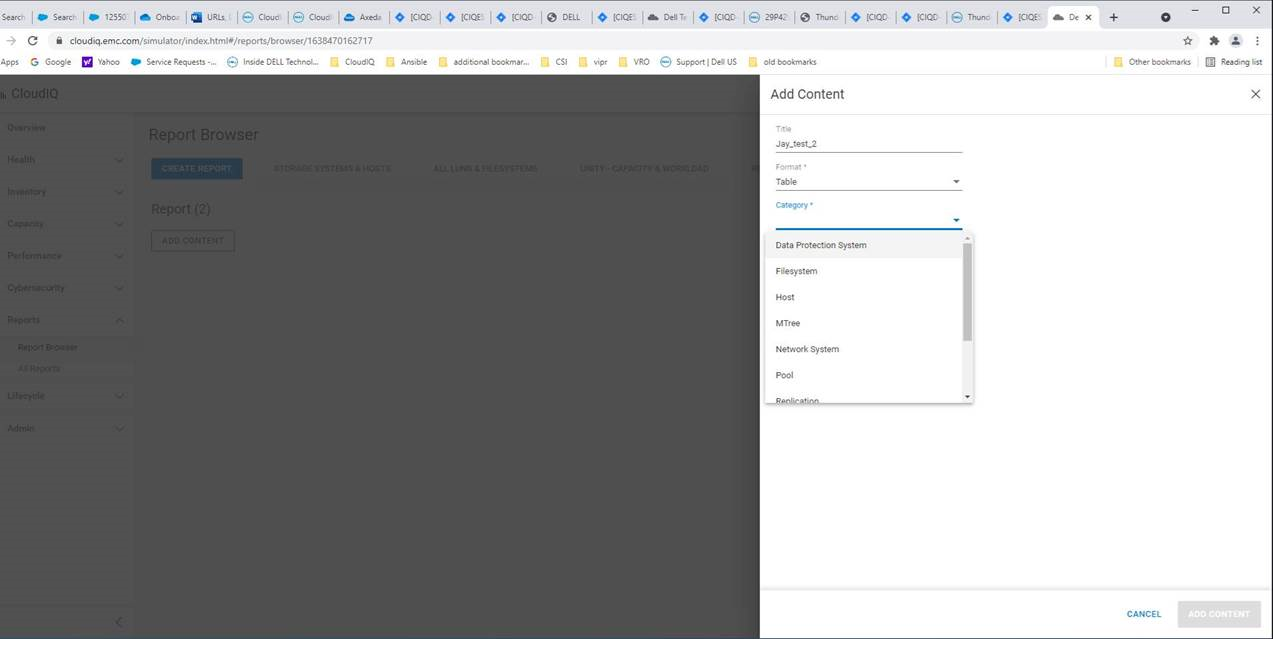
1) Create a report.
Go to Reports -> Report Browser and select "Add Content".
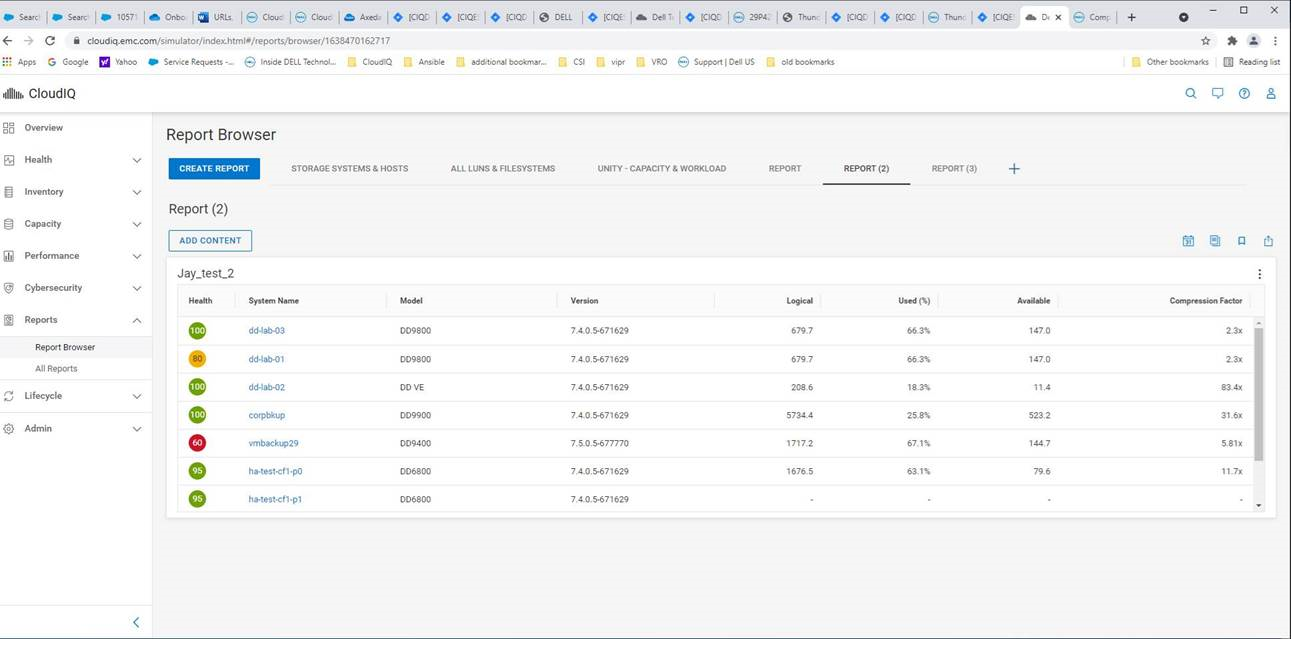
2) Select a report.
Go to Reports -> All Reports and select a report
3) On the right hand side, click the icon that looks like a calendar that says “schedule” when you mouse over it, and you get:
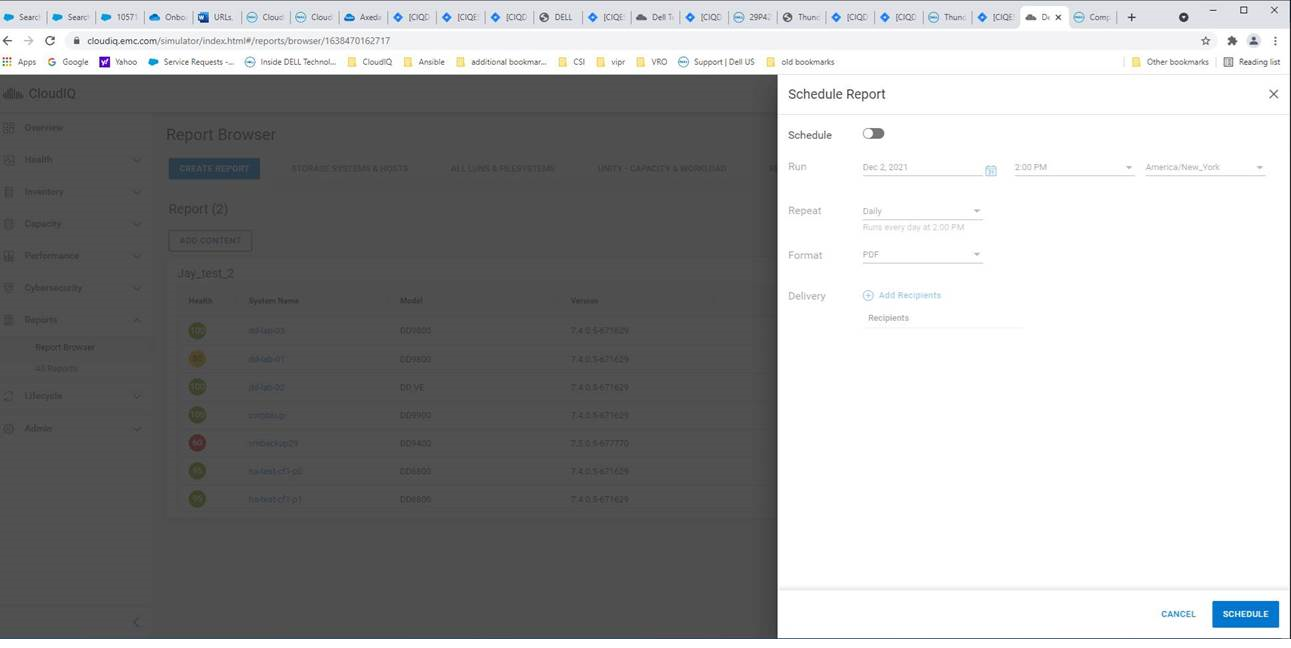
4) Fill in the schedule you want, and make sure you add an email address to the delivery field.
Go to Reports -> Report Browser and select "Add Content".
2) Select a report.
Go to Reports -> All Reports and select a report
3) On the right hand side, click the icon that looks like a calendar that says “schedule” when you mouse over it, and you get:
4) Fill in the schedule you want, and make sure you add an email address to the delivery field.
Affected Products
CloudIQ, CloudIQArticle Properties
Article Number: 000194585
Article Type: How To
Last Modified: 27 Aug 2025
Version: 4
Find answers to your questions from other Dell users
Support Services
Check if your device is covered by Support Services.