Linux용 Dell Endpoint Security Suite Enterprise를 설치하는 방법
Summary: 다음 지침에 따라 터미널 CLI(Command Line Interface)를 통해 Linux용 Dell Data Security Endpoint Security Suite Enterprise를 설치하는 방법에 대해 알아보십시오.
This article applies to
This article does not apply to
This article is not tied to any specific product.
Not all product versions are identified in this article.
Instructions
Linux용 Dell Data Security Endpoint Security Suite Enterprise의 설치 프로세스는 명령줄을 사용하여 처리됩니다.
지원되는 Linux 버전을 포함한 제품 시스템 요구 사항에 대한 자세한 내용은 Dell Endpoint Security Suite Enterprise 시스템 요구 사항을 참조하십시오.
- Terminal을 엽니다.

- 터미널에서 다음 명령을 입력하고 Enter 키를 누릅니다.
sudo tar –xvf '/FilePathA/DellESSE.tar.gz' –C /FilePathB 참고:
참고:- 위의 예를 살펴보겠습니다.
FilePathA은 TAR 파일이 있는 경로입니다.FilePathA예:/home/admin/Desktop/Downloads/
FilePathB은 TAR 파일이 추출되는 경로입니다.FilePathB예:/home/admin/Desktop/ESSE
- 명령은 대소문자를 구분합니다.
- 예시의 경로는 사용자의 환경과 다를 수 있습니다.
- 위의 예를 살펴보겠습니다.
- 유형
sudo 'filepath/install.sh'압축을 푼 설치 프로그램 패키지에서 를 터미널에 입력한 다음 <Enter> 키를 누릅니다.

- 사용 중인 계정의 암호를 입력한 다음 <Enter> 키를 누릅니다.

- Dell Security Management Server의 IP 또는 DNS를 입력한 다음 <Enter> 키를 누릅니다.

- Dell Security Management Server의 핵심 서버 서비스 포트를 입력한 다음 <Enter> 키를 누릅니다.
 기본적으로 핵심 서버 서비스는 8888에서 실행됩니다.
 - DellESSE 패키지 및 해당 종속성을 설치하라는 메시지가 나타나면 Y를 누른 다음 <Enter> 키를 누릅니다.
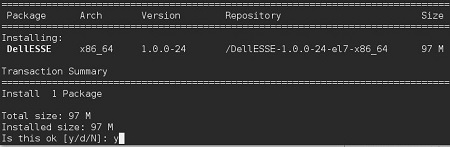
- 지문 승인 메시지가 나타나면 Y를 누릅니다. 그렇지 않으면 9단계로 이동합니다.

- Y를 눌러 CylanceDellATPPlugin 패키지를 설치한 다음 <Enter> 키를 누릅니다.
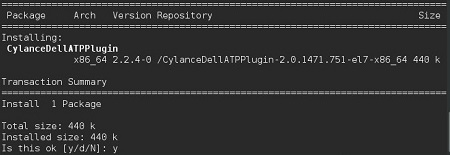
- Y를 눌러 DellAdvancedThreatProtection 패키지를 설치한 다음 <Enter> 키를 누릅니다.
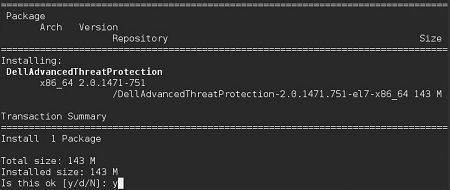
- 설치가 완료되면 다음 명령을 입력하고 Enter 키를 누릅니다.
exit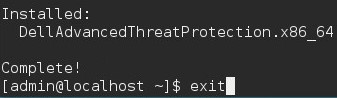
Additional Information
Videos
Affected Products
Dell Endpoint Security Suite EnterpriseArticle Properties
Article Number: 000124563
Article Type: How To
Last Modified: 05 Aug 2026
Version: 17
Find answers to your questions from other Dell users
Support Services
Check if your device is covered by Support Services.