How to Install and Register PPBS-Phoenix Server Agent
Summary: Steps to install and register a Windows or Linux server agent with the PPBS Phoenix Cloud.
Instructions
- Log in to the Phoenix Management Console.
- On the menu bar, click All Organizations, and select the required organization from the drop-down list.
- On the menu bar, click Protect > Windows/Linux Servers.
- Click Register New Server.
- On the Register Server page, under the Download and Install Agent on the Server section, do one of the following:
- If you have not yet downloaded the Phoenix agent installer, click Check Pre-requisite to check the Phoenix agent prerequisites. In the Select OS dropdown, select the operating system of the server where you install the Phoenix agent, and then click Download. The agent download starts on the same browser page. The agent is not downloaded on the destination server unless you click Download through the Phoenix Management Console on the destination server.
- If the Phoenix agent has already been downloaded, go to the Activate Server for Backup section.
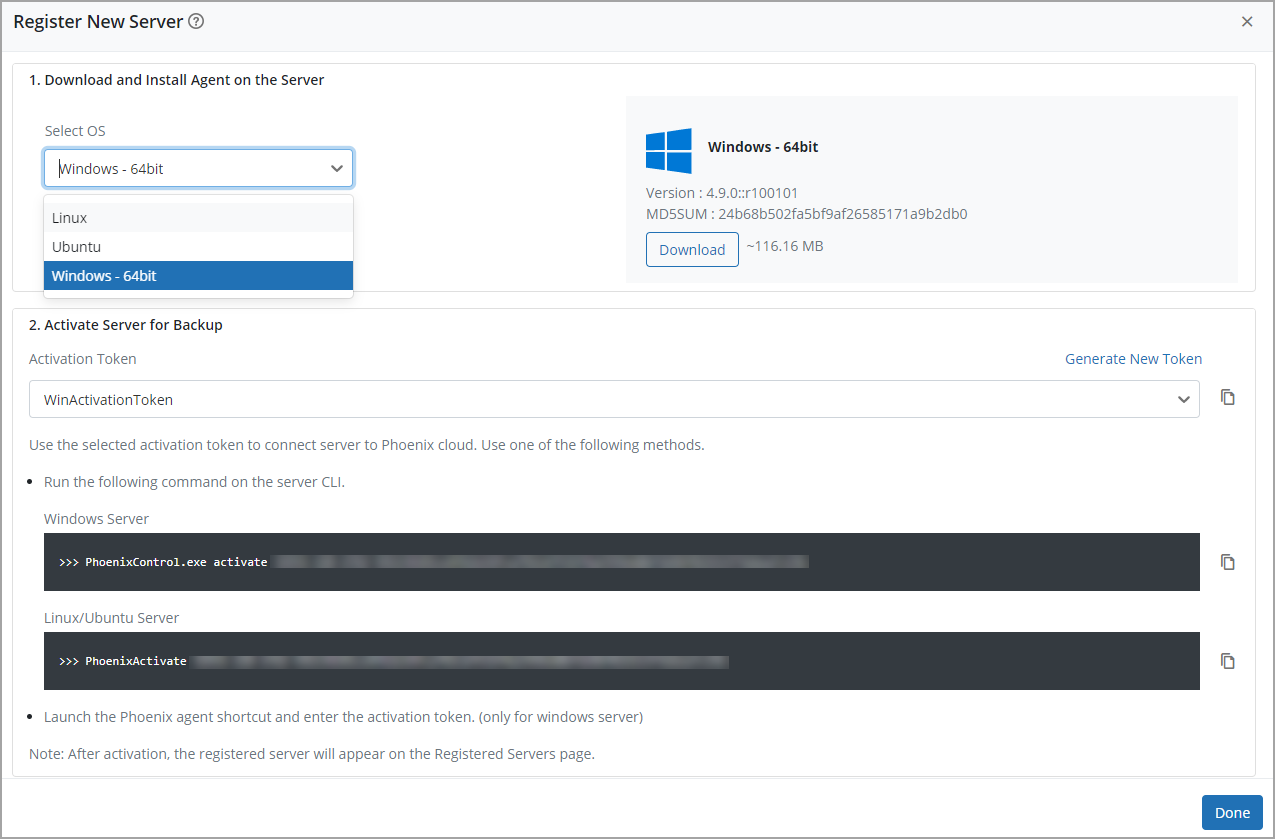
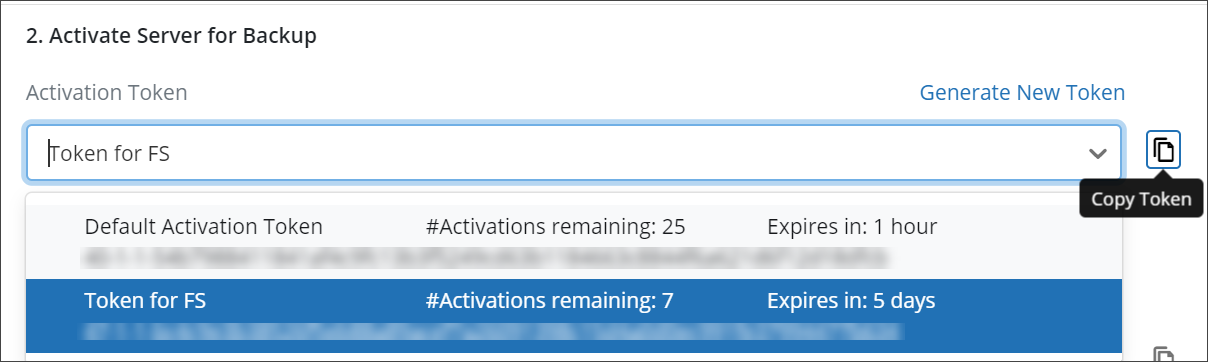
- Under the Activation Token section, if there are not any existing tokens, a Default Activation Token is generated. This token is valid for 25 servers and for 7 days. If this token has expired, click Generate New Token. In the Generate Token dialog box, enter the following details, and then click Generate.
| Field |
Description |
|---|---|
| Token Label |
A short description of the activation token: Note: You cannot leave this field empty. |
| This token can activate. |
The number of servers that the activation token can activate. The default value is 25 servers. |
| The token expires in. |
The number of days after which the activation token expires. The default value is 7 days. |
- In the Generate Token window, you can copy the generated token by clicking the Copy Token icon. Click Done.

Note: Druva Phoenix lists the activation token under Manage > Activation Tokens. For more information about managing activation tokens, see Manage activation tokens
- To use a preexisting activation token, click the drop-down under the Activation Token field.
- On the server where the Phoenix agent must be activated, double-click the Phoenix agent shortcut. The Druva Phoenix window is displayed:

- Enter the following details:
Field Description Enter Activation Token
Paste the copied activation.
Server Name
A unique server name:
Note: The server name should not contain any special characters.
Note: If you are activating the Phoenix agent for Druva Cloud, do not select the GovCloud check box.
- Click Activate.
Command-line activation
If you choose to mass deploy Phoenix agents using third-party tools, you can use the command-line method to activate the Phoenix agent. By default, PhoenixControl.exe is at the C:\Program Files\Druva\Phoenix Agent location. To activate the client, you can run PhoenixControl.exe from any location.
From the command prompt, run the following command:
PhoenixControl.exe activate <token> --ServerName <ServerName>
Where <token> represents the activation token that Druva Phoenix generated at the time of registering server.
For GovCloud:PhoenixControl.exe activate govcloud <token> --ServerName <ServerName>