Dell Data Protection Virtual Edition 無法更新並顯示 SSL 錯誤
Summary: 出現錯誤,並顯示訊息「WGET 錯誤:程式代碼 5,說明:SSL 驗證失敗」,在嘗試更新 Dell Data Protection 時 |虛擬版。
Symptoms
受影響的產品:
- Dell Data Protection | Virtual Edition
受影響的版本:
- v9.10 和更舊版本

圖 1:(僅限英文)WGET 錯誤:程序代碼 5
由於憑證處理方式有變更,因此業界已棄置 SHA1 憑證,因此 Dell 必須更新為代管 Dell 數據保護之伺服器上的 SHA256 憑證 |Virtual Edition 更新。這些新機關已簽署但未獲 Dell 數據保護下方操作系統認可的憑證 |虛擬版。若要支持這些新的簽章機關,必須更新具有經驗證且受信任的根機關的當地憑證存放區。
基礎操作系統套件更新儲存庫的其他變更也需要先更新這些儲存庫,才能更新本機憑證存放區。
Cause
不適用
Resolution
若要更新憑證存放區:
- 登入 Dell Enterprise Server Virtual 管理主控台。

圖 2:(僅限英文)登入管理主控台
- Dell Data Protection Enterprise Server Virtual Edition 的預設登入資料為:
- 使用者名稱:
ddpuser - 密碼:
ddpuser
- 使用者名稱:
- 系統管理員可以變更在產品的虛擬裝置選單中的預設密碼。
如需啟用 SSH 的相關信息,請參閱 「如何在 Dell Security Management Server Virtual/Dell Data Protection Virtual Edition 中啟用 SSH」。
- 從主功能表中,選取啟動 Shell,然後按下 Enter 鍵。
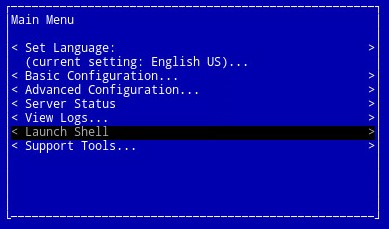
圖 3:(僅限英文版) 啟動 Shell
- 類型
su ddpsupport然後按下 Enter 鍵。

圖 4:(僅限英文)類型 su ddpsupport
- 輸入密碼
ddpsupport然後按下 Enter 鍵。

圖 5:(僅限英文)輸入密碼 ddpsupport
- Dell Data Protection Enterprise Server Virtual Edition 的預設登入資料為:
- 使用者名稱:
ddpsupport - 密碼:
ddpsupport
- 使用者名稱:
- 系統管理員可以變更在產品的虛擬裝置選單中的預設密碼。
- 執行下列命令,重新命名現有來源檔案:
sudo mv /etc/apt/sources.list /etc/apt/sources.list.bak
- 產生新的 來源.list 檔案,並使用命令加以開啟:
sudo nano /etc/apt/sources.list
- 複製並貼上以下儲存庫至新檔案:
deb http://old-releases.ubuntu.com/ubuntu precise main restricted universe multiverse
deb-src http://old-releases.ubuntu.com/ubuntu precise main restricted universe multiverse
deb http://old-releases.ubuntu.com/ubuntu precise-updates main restricted universe multiverse
deb-src http://old-releases.ubuntu.com/ubuntu precise-updates main restricted universe multiverse
- 產生的輸出應類似:

圖 6:(僅限英文)新增儲存庫的結果輸出
- 按住左側 CTRL 並按下 X,以儲存並關閉檔案。
- 出現提示以確認變更,按 下 Y 鍵以確認。

圖 7:(僅限英文)儲存並關閉檔案
- 按 Enter 鍵以確認檔名。

圖 8:(僅限英文)確認檔名
- 請更新作業系統,並輸入下列命令,確認有最新的憑證。
sudo apt-get update && sudo apt-get upgrade -y && sudo apt-get install --only-upgrade ca-certificates -y

圖 9:(僅限英文)類型 sudo apt-get update && sudo apt-get upgrade -y && sudo apt-get install --only-upgrade ca-certificates -y
sudo apt-get update然後按下 Enter 鍵。sudo apt-get install --only-upgrade ca-certificates and then press Enter
- 數個數據行會出現 (直到 完成) 會顯示兩次,且內容為
ddpsupport再次出現。

圖 10:(僅限英文)出現數條數據行

圖 11:(僅限英文)等待完成後再顯示兩次
- 類型
exit然後按 下 Enter 以註銷ddpsupport。

圖 12:(僅限英文)類型結束
- 類型
exit然後按 下 Enter 鍵,將 Shell 註銷至 UI

圖 13:(僅限英文)類型結束
- 更新現在已順利執行。
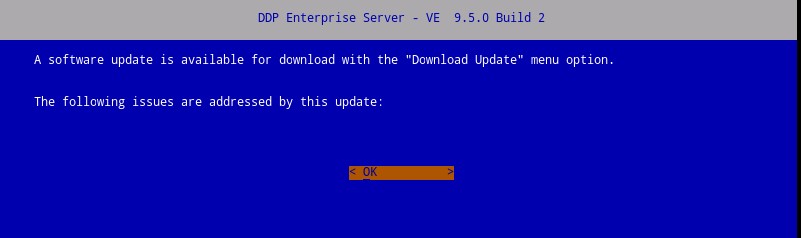
圖 14:(僅限英文)Dell 企業伺服器更新
如要聯絡支援部門,請參閱 Dell Data Security 國際支援電話號碼。
請前往 TechDirect,以線上產生技術支援要求。
如需更多深入見解與資源,請加入 Dell 安全性社群論壇。