Dell Data Protection Virtual Edition 无法更新并显示 SSL 错误
Summary: 出现错误,并显示消息“WGET error:代码 5,说明:SSL 验证失败“,尝试更新 Dell Data Protection |Virtual Edition。
Symptoms
受影响的产品:
- Dell Data Protection | Virtual Edition
受影响的版本:
- v9.10 及更低版本

图 1:(仅限英文)WGET 错误:代码 5
由于证书处理变更、行业弃用 SHA1 证书,戴尔需要在托管 Dell Data Protection | 的服务器上更新为 SHA256 证书Virtual Edition 更新。这些证书由这些新颁发机构签署,但未被位于 Dell Data Protection | 下方的操作系统识别Virtual Edition。必须更新保存经过验证和信任的根颁发机构的本地证书存储区,以支持这些新的签名颁发机构。
对底层操作系统的程序包更新存储库的其他更改还要求在更新本地证书存储之前更新这些存储库。
Cause
不适用
Resolution
要更新证书存储区:
- 登录到 Dell Enterprise Server Virtual 管理控制台。

图 2:(仅限英文)登录到管理控制台
- Dell Data Protection Enterprise Server Virtual Edition 的默认凭据为:
- Username:
ddpuser - 密码:
ddpuser
- Username:
- 管理员可以更改产品的虚拟设备菜单中的默认密码。
有关启用 SSH 的信息,请参阅 如何在 Dell Security Management Server Virtual / Dell Data Protection Virtual Edition 中启用 SSH 。
- 在主菜单中,选择 Launch Shell,然后按 Enter 键。

图 3:(仅限英文)启动 Shell
- 键入
su ddpsupport然后按 Enter。

图 4:(仅限英文)类型 su ddpsupport
- 键入的密码
ddpsupport然后按 Enter。

图 5:(仅限英文)键入的密码 ddpsupport
- Dell Data Protection Enterprise Server Virtual Edition 的默认凭据为:
- Username:
ddpsupport - 密码:
ddpsupport
- Username:
- 管理员可以更改产品的虚拟设备菜单中的默认密码。
- 通过运行 以下命令重命名现有源文件:
sudo mv /etc/apt/sources.list /etc/apt/sources.list.bak
- 生成新的 sources.list 文件,然后使用以下命令将其打开:
sudo nano /etc/apt/sources.list
- 将下面的存储库复制并粘贴到新文件中:
deb http://old-releases.ubuntu.com/ubuntu precise main restricted universe multiverse
deb-src http://old-releases.ubuntu.com/ubuntu precise main restricted universe multiverse
deb http://old-releases.ubuntu.com/ubuntu precise-updates main restricted universe multiverse
deb-src http://old-releases.ubuntu.com/ubuntu precise-updates main restricted universe multiverse
- 生成的输出应如下所示:

图 6:(仅限英文)添加存储库的结果输出
- 通过按住左 CTRL 并按 X 键保存并关闭文件。
- 此时将显示确认更改的提示,按 Y 以确认。

图 7:(仅限英文)保存并关闭文件
- 按 Enter 键确认文件名。

图 8:(仅限英文)确认文件名
- 通过键入运行以下命令,更新操作系统并确保存在最新的证书。
sudo apt-get update && sudo apt-get upgrade -y && sudo apt-get install --only-upgrade ca-certificates -y

图 9:(仅限英文)类型 sudo apt-get update && sudo apt-get upgrade -y && sudo apt-get install --only-upgrade ca-certificates -y
sudo apt-get update然后按 Enter。sudo apt-get install --only-upgrade ca-certificates and then press Enter
- 显示多行数据,直至 完成后, 显示两次,上下文显示为
ddpsupport再次显示。
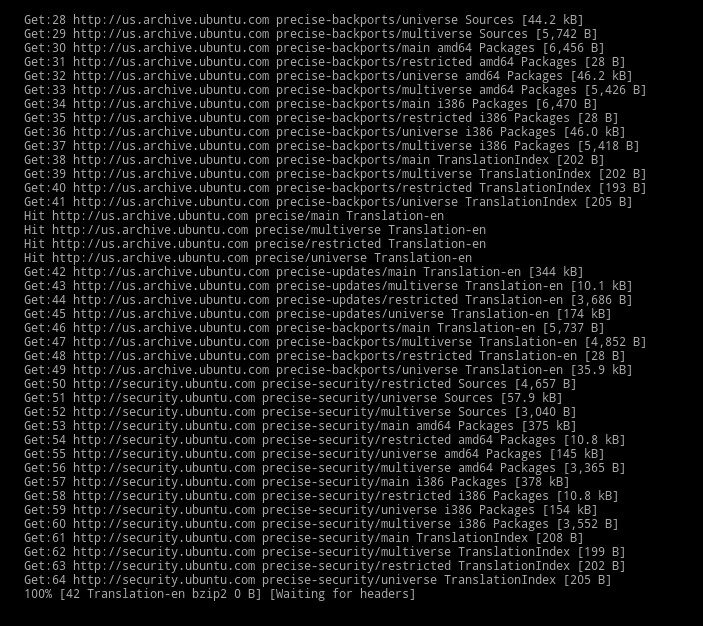
图 10:(仅限英文)出现多行数据
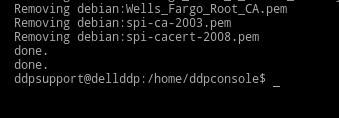
图 11:(仅限英文)等待完成两次
- 键入
exit然后按 Enter 键以注销ddpsupport。

图 12:(仅限英文)键入 exit
- 键入
exit然后按 Enter 键以从 shell 注销到 UI。

图 13:(仅限英文)键入 exit
- 更新现在已成功运行。

图 14:(仅限英文)Dell Enterprise Server 更新
要联系支持部门,请参阅 Dell Data Security 国际支持电话号码。
转至 TechDirect,在线生成技术支持请求。
要获得更多见解和资源,请加入戴尔安全社区论坛。