Connectrix B-series: LDAP configureren op Brocade-switches
Summary: Lightweight Directory Access Protocol (LDAP) configureren op een Brocade-switch met een voorbeeld van het configureren van LDAP op een Brocade FC-switch.
This article applies to
This article does not apply to
This article is not tied to any specific product.
Not all product versions are identified in this article.
Instructions
- Controleer of configureer DNS op de FC-switch.
Command: #dnsconfig

switch#dnsconfig
1 Display Domain Name Service (DNS) configuration
2 Set DNS configuration
3 Remove DNS configuration
4 Quit
Select an item: (1..4) [4] 2

Key in the DNS Server details if not set.
- Voeg LDAP-servergegevens toe op de switch.
Command: #aaaconfig --add <LDAP server FQDN> -conf ldap -d <domain name>

Example:
 #aaaconfig --add server1.dell.com    -conf ldap -d dell.com
 #aaaconfig --add server2.dell.com    -conf ldap -d dell.com
- Stel LDAP in als uw primaire authenticatie en de lokale database als secundair:
#aaaconfig --authspec "ldap;local"
- Maak een AD-groep op de LDAP-server.
- Wijs de AD-groep die is gemaakt toe aan de Brocade Local Admin-gebruiker.
#ldapcfg --maprole "SAN Admins" admin
Gebruik het onderstaande voor de VF ingeschakelde switch:
#ldapcfg -- mapattr "SAN Admins" -l "admin=1-128" -h 128 -c admin
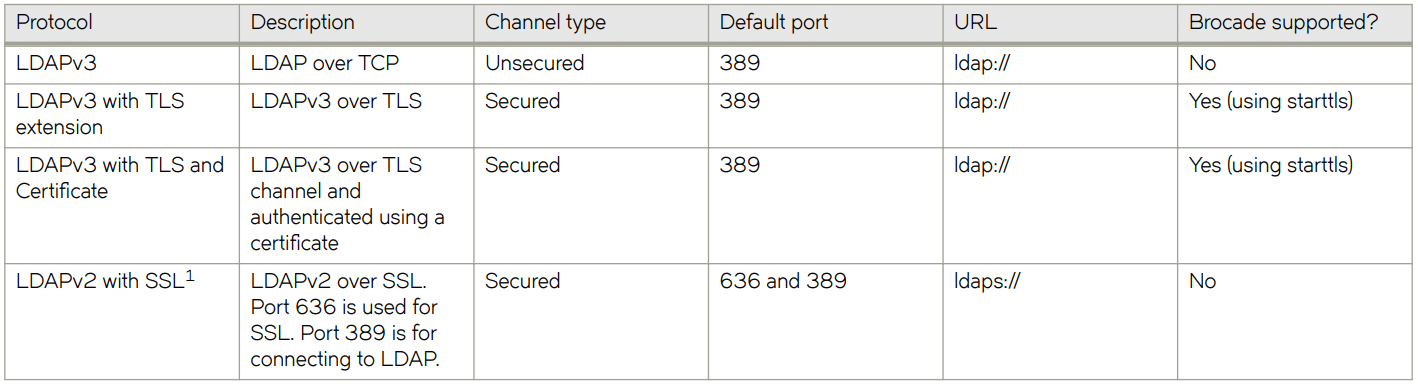
Hier zijn de verschillende LDAP-protocollen.
Affected Products
Brocade, Connectrix, Connectrix B-Series HardwareArticle Properties
Article Number: 000203755
Article Type: How To
Last Modified: 11 Jun 2025
Version: 2
Find answers to your questions from other Dell users
Support Services
Check if your device is covered by Support Services.