How to Configure RAID with AMD RAIDXpert2
Summary: This article provides more information about how to configure RAID disks using AMD RAIDxpert2 on a Dell computer.
This article applies to
This article does not apply to
This article is not tied to any specific product.
Not all product versions are identified in this article.
Instructions
Affected Platforms:
- Precision Workstations
- Dell Pro Max Desktops
- Dell Pro Max Laptops
Note: Configuring RAID correctly is important to ensure that the computer can identify the hard drives in the RAID pool and boot into the operating system.
Table of Contents:
- Creating the RAID volume
- Downloading the RAID driver
- Installing an Operating system to the RAID array
- Deleting the RAID volume
Creating the RAID volume
- When your computer boots up, press F2 to enter the BIOS Setup menu.
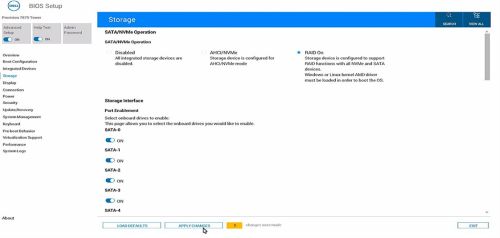
- Click Storage in the main menu.
- In the SATA Operation section, select the RAID On mode.
- Click APPLY CHANGES to save the settings, then click EXIT.
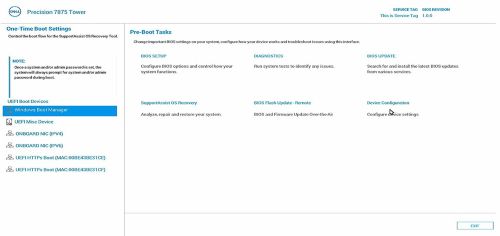
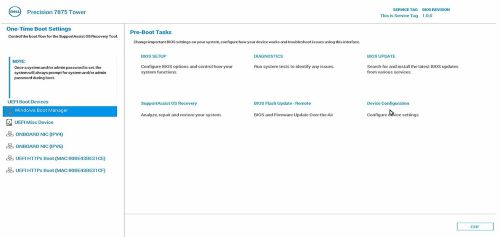
- When your computer reboots, press the F12 key to enter the One-Time Boot Settings menu.
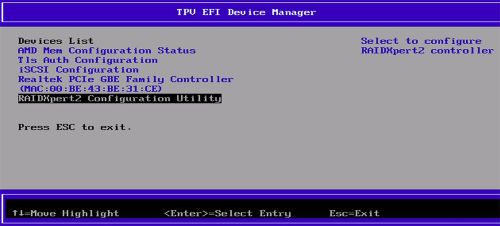
- In the Pre-Boot Tasks menu, select Device Configuration.
The TPV EFI Device Manager appears.
- From the Devices List, select RAIDXpert2 Configuration Utility.

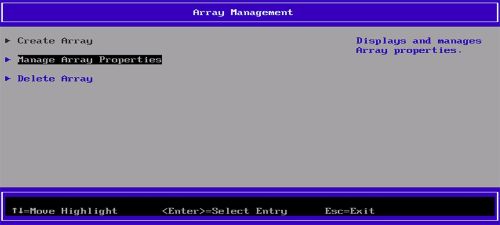
- On the Array Management panel, select Manage Array Properties.

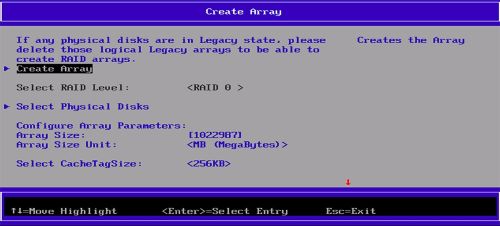
- Select Create Array.

- On the Create Array pane, select Physical Disks to create the RAID mode. The list of RAID types is displayed.
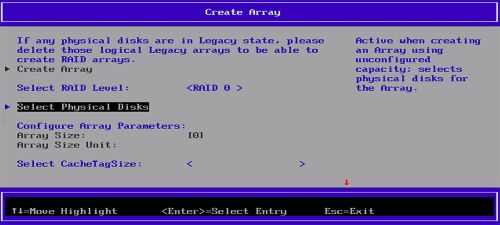
- From the list, select the desired RAID type.
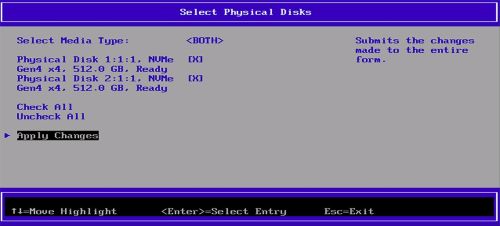
- In the Select Media Type section, select the disk.
Ensure that [X] is selected next to the disk. - Select Apply Changes to save the settings.
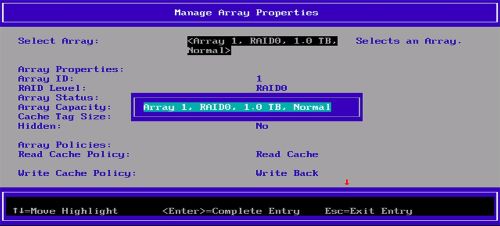
Note: To check if the RAID array is created, on the Create Array pane, click Create Array. On the Array Management pane, click Manage Array Properties to view the RAID volume that is created.
Downloading the RAID driver
Note: These steps are to be performed only if you want to change or reinstall the operating system.
- Go to Dell Support Site and search for your product.
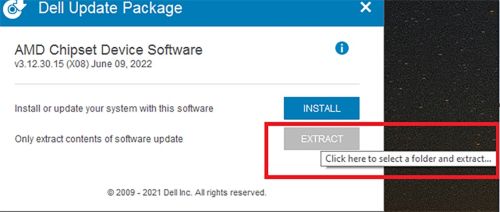
- Click Drivers & Downloads and download the AMD Chipset Device Software.
- Double-click the .exe file of the downloaded chipset driver.
- Select Extract and save the package to your computer.
Installing an Operating system to the RAID array
Note: You must configure the RAID volume before installing the operating system to the RAID array.
- Create the RAID array as per the configuration supported by the computer.
- Create Windows bootable USB.
Note: If you are using a Dell USB media shipped for OSRI, go to step 6.
- Copy the Windows binaries to USB.
- Create a folder
$WinpeDriver$on the USB drive. - Copy all the RAID drives to
$WinpeDriver$folder. - Connect the USB to the computer and begin the installation process.
Note: Complete the operating system installation by following the instructions that are displayed on the screen.
- Ensure that the RAID drives are loaded properly in order as follows:
rcbottom>rcraid>rccfg.Note:$WinpeDriver$and Dell USB Media autoloads all the necessary drivers at time of installation and no manual intervention is needed. - Select Array1 (Disk0) to proceed with installation of the operating system.
Note: You can verify if the RAID driver installation is complete by checking in the Device Manager. The installation of the operating system is supported only on the first RAID volume.
- Reboot the operating system and install the AMD RAIDXpert2 application from the AMD Chipset Device Software that was downloaded previously.
- Open the AMD RAIDXpert2 app from the Windows Start icon.
- From the menu, select Disk > Properties.
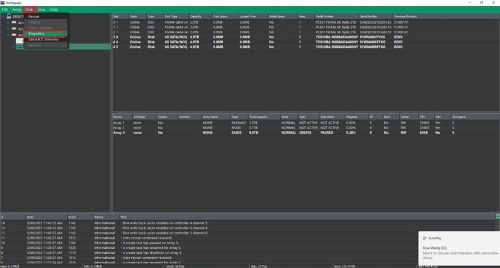
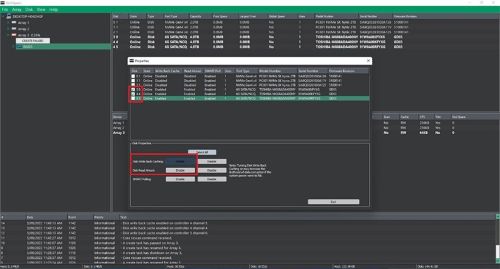
- Select the required Disk.
The Disk properties are displayed.Note: If the Disk Write Back Caching and Disk Read Ahead are already enabled, skip steps 11 and 12. - In the Disk Write Back Caching, select Enable.
- In the Disk Read Ahead, select Enable.
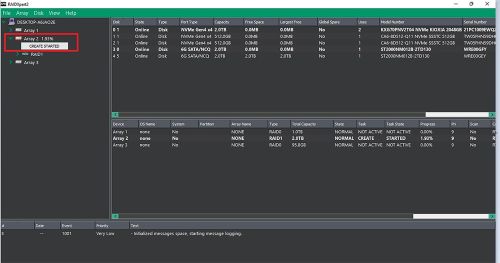
Note: You must not use Shingled Magnetic Recording (SMR) Hard Disk Drives (HDDs). For redundant arrays, the Create process starts after the operating system and RAID drivers are installed and the computer is booted to the operating system. However, the arrays are immediately available for use as a boot array or data array. You must confirm that the RAID Create process is completed for redundancy to be active.
Deleting the RAID volume
- Press the
F12key to enter the One-Time Boot Settings menu. - Select Device Configuration.
The TPV EFI Device Manager pane appears. - From the Devices List, select RAIDXpert2 Configuration Utility.
- On the Array Management panel, select Manage Array Properties.
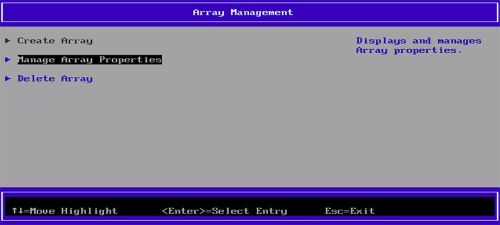
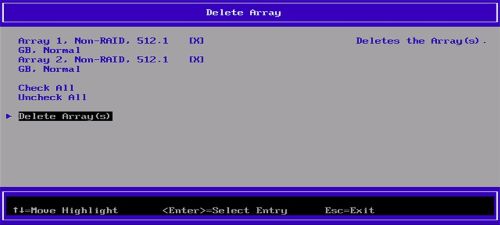
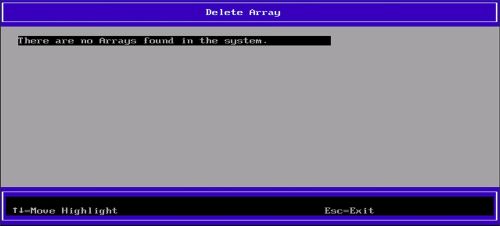
- Select Delete Array.

- Select Check All.
- Select Delete Array(s).
- Select YES.
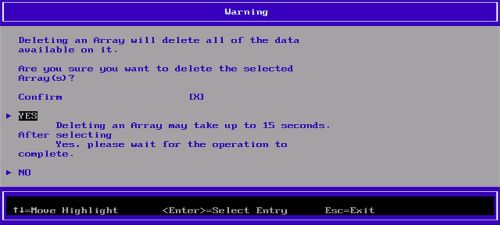
Once the process has completed, the message There are no Arrays found in the system is displayed.
Affected Products
Dell Pro Max Micro, Dell Pro Max Slim, Dell Pro Max Tower, Dell Pro Max, Fixed WorkstationsArticle Properties
Article Number: 000443715
Article Type: How To
Last Modified: 24 May 2026
Version: 3
Find answers to your questions from other Dell users
Support Services
Check if your device is covered by Support Services.