Ubuntu 伺服器:如何在 Ubuntu 虛擬機器上使用獨立裝置指派 (DDA) 設定 GPU
Summary: 本文示範如何在執行 Hyper-V 的 Ubuntu 伺服器版本 1804 虛擬機器 (VM) 上,使用獨立裝置指派 (DDA) 設定 GPU。
Instructions
目標
DDA 可用來將整個 PCIe 裝置 (在此案例中為 GPU) 傳遞至虛擬機器。這允許對設備進行高性能訪問並能夠利用其本機驅動程式。
此範例中的環境
伺服器:執行 Windows Server 2019
GPU 的 PowerEdge R740xd:NVIDIA Tesla P100
VM:4 個 vCPU、32 GB RAM,執行 Ubuntu ®18.04 LTS
步驟
-
在主機上安裝 Windows Server 2019 並更新作業系統。安裝最新的裝置驅動程式,例如晶片組和 GPU 驅動程式。
-
安裝 Hyper-V 角色。
-
創建第 2 代 VM。在虛擬機器的設定中停用安全開機,然後在其上安裝 Ubuntu ®18.04 LTS。
-
套用 Ubuntu 更新。若要這樣做,請執行下列命令:
$ sudo apt-get update
$ sudo apt-get upgrade
-
關閉虛擬機器。
-
在主機上開啟裝置管理員,展開 顯示卡,然後選取要呈現給虛擬機器的 GPU。
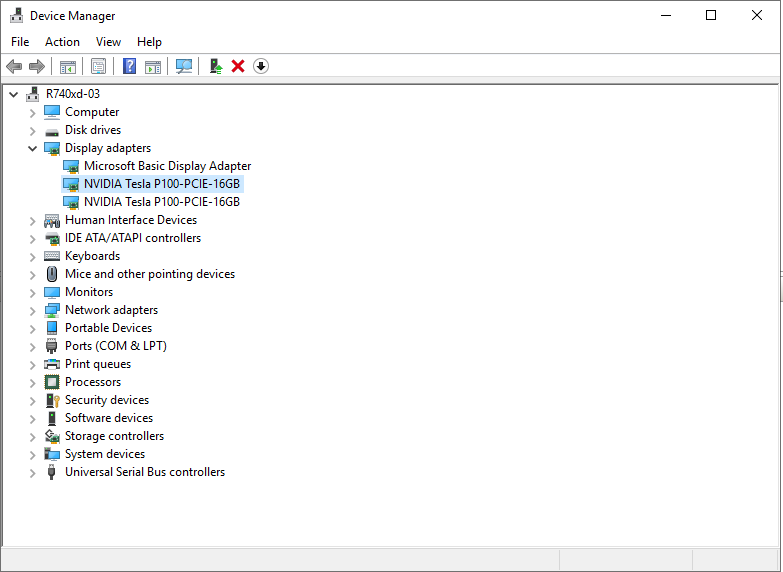
圖 1:選取 GPU 的裝置管理員 -
以滑鼠右鍵按一下要在虛擬機器中使用的 GPU,然後選取內容。在詳細資訊選項卡中,從位置路徑下拉清單中選擇屬性。將 PCIROOT 開頭的值複製到記事本。

圖 2:裝置管理員裝置屬性 - 位置路徑 -
在裝置管理員中以滑鼠右鍵按一下 GPU 並將其停用。
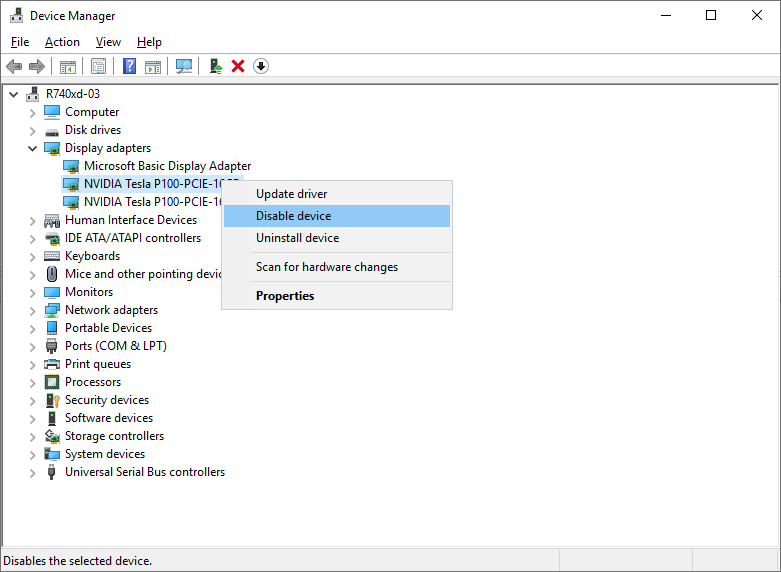
圖 3:在裝置管理員中停用 GPU -
使用 PowerShell 設定 VM 以執行 DDA。以系統管理員身分開啟 PowerShell,並執行下列命令:
# Configure the "Automatic Stop Action" of a VM to TurnOff. Set-VM -Name VMName -AutomaticStopAction TurnOff # Enable Write-Combining on the CPU. Set-VM -VMName VMName -GuestControlledCacheTypes $true # Configure the 32-bit MMIO space. Set-VM -VMName VMName -LowMemoryMappedIoSpace 128Mb # Configure greater than 32-bit MMIO space. Set-VM -VMName VMame -HighMemoryMappedIoSpace 18000Mb # Dismount the device. Dismount-VMHostAssignableDevice -force -LocationPath "step 7 location path goes here" # Assign the device to the VM. Add-VMAssignableDevice -VMName VMName -LocationPath "step 7 location path goes here" -
啟動虛擬機器。
-
在虛擬機器內執行下列命令,以確認已識別 GPU:
$ lspci
$ sudo lshw -C Display
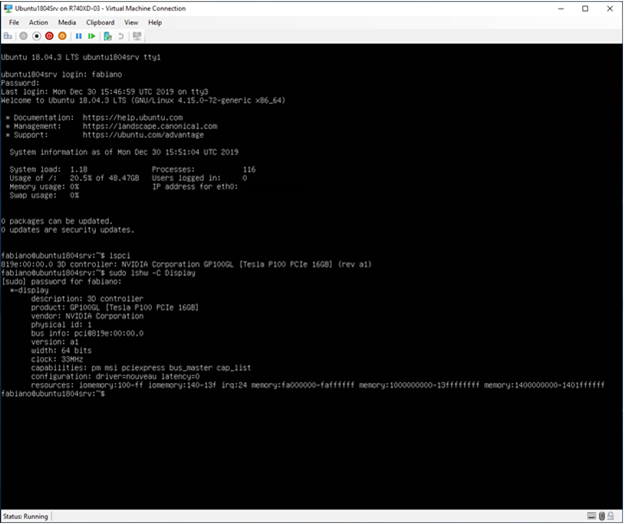
圖 4:的輸出lspci和lshw命令 -
如果輸出
sudo lshw -C Display步驟 11 中的命令表示已安裝 Nouveau 驅動程式(請參閱上面圖 4 中的 配置 ),必須禁用它。Nouveau 是由獨立軟體工程師編寫的適用於 NVIDIA 顯卡的免費開源驅動程式。此驅動程式為預設安裝,必須停用才能安裝 NVIDIA 驅動程式。執行下列命令以停用新驅動程式。# Create a file at /etc/modprobe.d/blacklist-nouveau.conf. $ sudo nano /etc/modprobe.d/blacklist-nouveau.conf # Add the following to the newly created file, then save the file. blacklist nouveau options nouveau modeset=0 # Regenerate the kernel initramfs, then reboot. $ sudo update-initramfs -u $ reboot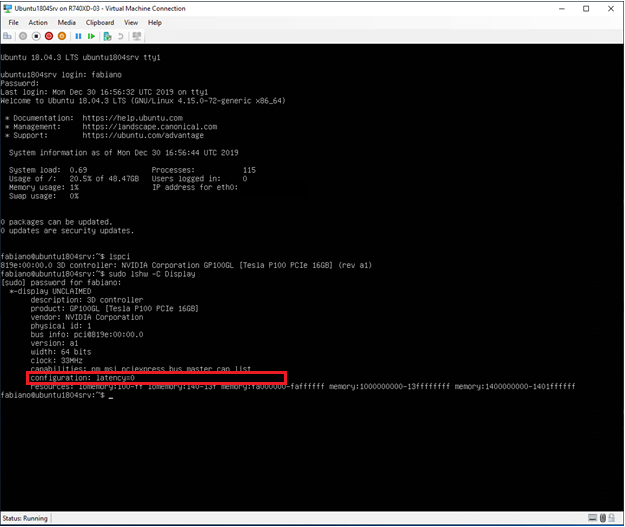
圖 5:的輸出lspci和lshw關閉新驅動程式後的命令 -
下載 NVIDIA 驅動程式
,然後將其安裝在 Ubuntu 虛擬機器上。
# Run these commands after the file has been copied to the VM. $ sudo dpkg -i nvidia-driver-local-repo-ubuntu1804-440.33.01_1.0-1_amd64.deb $ sudo apt-key add /var/nvidia-driver-local-repo-440.33.01/7fa2af80.pub $ sudo apt-get update $ sudo apt-get install cuda-drivers {Install all the dependencies $ sudo reboot -
若要確認驅動程式已正確安裝,請執行下列命令:
$ lspci
$ sudo lshw -C Display
$ nvidia-smi
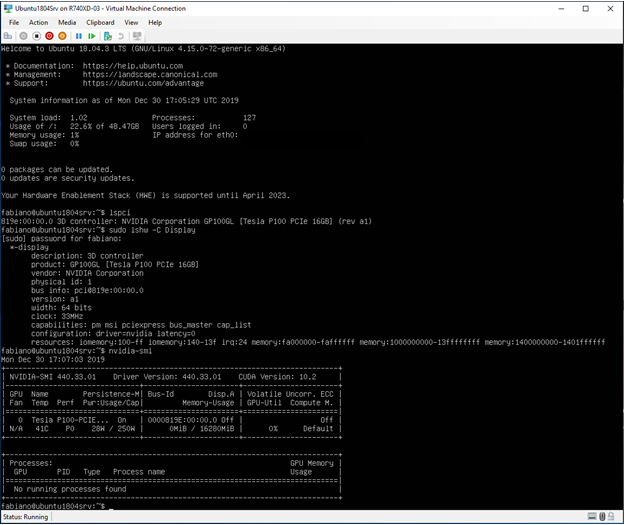
圖 6:的輸出lspci,lshw和nvidia-smi安裝 NVIDIA 驅動程式後的命令
Additional Information
如何更換 PowerEdge R760 的 GPU
持續時間:00:03:10 (小時:分鐘:秒)
當可用時,您可以使用此影像播放器上的 CC 圖示來選擇隱藏式輔助字幕 (字幕) 語言設定。