How to Create a Bootable WinPE USB for Dell Encryption Enterprise or Dell Encryption Personal
Summary: Learn how to create a Dell Data Security WinPE bootable USB for Dell Encryption Enterprise or Dell Encryption Personal by following these instructions.
This article applies to
This article does not apply to
This article is not tied to any specific product.
Not all product versions are identified in this article.
Instructions
This article explains how to create a bootable Windows Pre-installation Environment (WinPE) for Dell Encryption Enterprise (formerly Dell Data Protection | Enterprise Edition) or Dell Encryption Personal (formerly Dell Data Protection | Personal Edition) using a USB storage device.
Affected Products:
- Dell Encryption Enterprise
- Dell Data Protection | Enterprise Edition
- Dell Encryption Personal
- Dell Data Protection | Personal Edition
- Dell Data Protection | Server Edition
Affected Operating Systems:
- Windows
A bootable WinPE USB requires:
- A Dell Data Security WinPE image
- For more information, reference How to Download WinPE for Dell Encryption Enterprise or Dell Encryption Personal.
- A USB storage device
- A third-party file compression utility
- Examples of a third-party file compression utility include (but are not limited to):
- 7-Zip
- Universal Extractor
- WinRAR
- Examples of a third-party file compression utility include (but are not limited to):
Warning: The USB storage device is erased during this process. Back up any data from the USB storage device before following these steps to avoid data loss.
Note: Dell does not endorse nor support any listed third-party products. The listed clients are meant to be examples of potential products a customer can use. Contact the product’s manufacturer for information about setup, configuration, and management.
The process differs depending on whether the targeted endpoint is using UEFI or Legacy BIOS boot mode.
Click the appropriate boot mode for more information.
UEFI
- Plug the USB storage device into the computer.
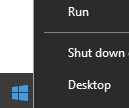
- Right-click the Windows Start menu and then click Run.
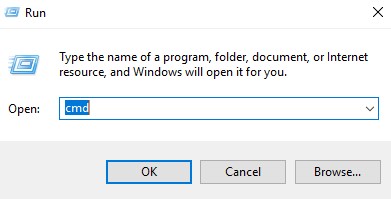
- In the Run UI, type
cmdand then press OK.

- Type
diskpartand then press Enter.
 Note: The computer that is listed will differ in your environment.
 - Type
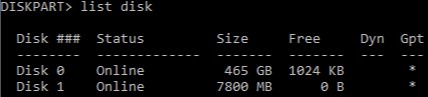
list diskand then press Enter.

- Identify the disk number that is assigned to the USB storage device.
 Note:
Note:- In the example, the disk number 1 is assigned to the USB storage device.
- DiskPart results will differ in your environment.
- Type
select disk [NUMBER]and then press Enter.
 Note: [NUMBER] represents the disk number that is assigned to the USB storage device in Step 6.Warning: Data on the USB storage device must be backed up to another location before completing any further steps to avoid data loss.
 - Type
cleanand then press Enter.

- Type
create partition primaryand then press Enter.

- Type
select partition 1and then press Enter.

- Type
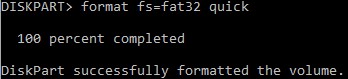
format fs=fat32quick and then press Enter.
- Type
activeand then press Enter.

- Type
assign letter=[LETTER]and then press Enter.
 Note:
Note:[LETTER]represents an unused drive letter that is assigned to the USB storage device. In the example image, the letterFis assigned to the USB storage device. This may differ in your environment. - From the downloaded WinPE image, use a third-party file compression utility to extract it.
 Note:
Note:- UEFI bootable environments and Non-Volatile Memory Express (NVMe) drives require an x64 WinPE image.
- Your third-party file compression utility may differ from the screenshot example.
- Copy the extracted contents to the root of the USB storage device.

Legacy BIOS
- Plug the USB storage device into the computer.
- Right-click the Windows Start menu and then click Run.

- In the Run UI, type
cmdand then press OK.
- Type
diskpartand then press Enter.
 Note: The computer that is listed will differ in your environment.
 - Type
list diskand then press Enter.
- Identify the disk number that is assigned to the USB storage device.
 Note:
Note:- In the example, the disk number 1 is assigned to the USB storage device.
- DiskPart results will differ in your environment.
- Type
select disk [NUMBER]and then press Enter.
 Note: [NUMBER] represents the disk number that is assigned to the USB storage device in Step 6.Warning: Data on the USB storage device must be backed up to another location before completing any further steps to avoid data loss.
 - Type
cleanand then press Enter.

- Type
create partition primaryand then press Enter.

- Type
select partition 1and then press Enter.

- Type
format fs=ntfs quickand then press Enter.
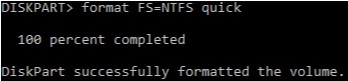
- Type
activeand then press Enter.

- Type
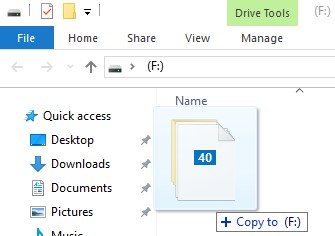
assign letter=[LETTER]and then press Enter.
 Note:
Note:[LETTER]represents an unused drive letter that is assigned to the USB storage device. In the example, the letter F is assigned to the USB storage device. This may differ in your environment. - From the downloaded WinPE image, use a third-party file compression utility to extract it.
 Note:
Note:- Non-Volatile Memory Express (NVMe) drives require an x64 WinPE image.
- Your third-party file compression utility may differ from the screenshot example.
- Copy the extracted contents to the root of the USB storage device.
To contact support, reference Dell Data Security International Support Phone Numbers.
Go to TechDirect to generate a technical support request online.
For additional insights and resources, join the Dell Security Community Forum.
Affected Products
Dell EncryptionArticle Properties
Article Number: 000130809
Article Type: How To
Last Modified: 01 Nov 2024
Version: 10
Find answers to your questions from other Dell users
Support Services
Check if your device is covered by Support Services.