How to Implement PXE Booting from USB-C and Thunderbolt Ethernet Adapters
Summary: Information about facilitating the Pre-Boot Execution (PXE) boot process when using a USB-C or Thunderbolt Ethernet adapter.
This article applies to
This article does not apply to
This article is not tied to any specific product.
Not all product versions are identified in this article.
Instructions
PXE Booting
When PXE booting, several options may be required to be enabled in the BIOS (Figure 1).
Note: The following screenshots (Figure 1 and 2) are examples of the required options. The BIOS options for your computer may be different.
- Set the Fastboot option to Thorough to enable UEFI PXE boot.
- Windows 10 and 11: Legacy Option ROMs should be off. Secure Boot may be enabled if wanted.

Figure 1: Dell BIOS Advanced Boot Options
- If you are using a USB-C adapter, enable Thunderbolt Boot support in the BIOS: (check all boxes) (Figure 2.)

Figure 2: Enabling Thunderbolt Boot Support
- The server must support UEFI PXE Boot (Windows Server 2012 is required usually).
- Exit the BIOS, select UEFI PXE Boot IPv4.
WDS configuration for UEFI must contain x86 and x64 boot images (Figure 3).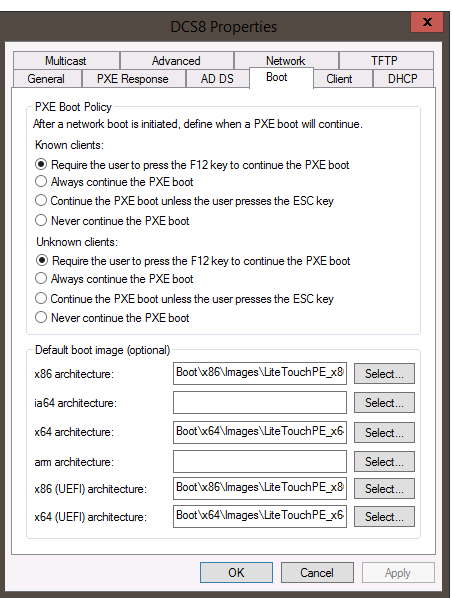
Figure 3: Windows Deployment Services PXE Boot Policy
Note: You need the Realtek USB FE Family Controller driver (version 10.9.504.2016 has been verified to work, newer versions can be used, but have not been verified) in your Windows 10 PE image for MAC pass-thru to work properly.
Affected Products
Alienware, Inspiron, Legacy Desktop Models, OptiPlex, Vostro, XPS, G Series, G Series, Alienware, Inspiron, Latitude, Vostro, XPS, Legacy Laptop Models, Fixed Workstations, Mobile WorkstationsArticle Properties
Article Number: 000150882
Article Type: How To
Last Modified: 22 Jul 2025
Version: 10
Find answers to your questions from other Dell users
Support Services
Check if your device is covered by Support Services.