Avamar: How to Create Modify or Verify Oracle ZFS NDMP User and Settings
Summary:
Log in to Oracle ZFS Browser UI (BUI) at https://:215 as root, go to BUI > Configuration > Data Services > Network Data Management Protocol (NDMP). Clear Ignored metadata‑only
changes, add Target restore pools, enable token‑based backup, set ZFS rollback to On Data Migration Appliance (DMA) request, keep direct‑access recovery checked, apply, set DMA tape mode to BSD, and verify NDMP shows a green enabled icon.
...
This article applies to
This article does not apply to
This article is not tied to any specific product.
Not all product versions are identified in this article.
Instructions
- Open a web browser and navigate to the BUI URL, then log in as root:
https://[ORACLE_ZFS_IP]:215

- In the BUI, select Configuration → Data Services → NDMP.
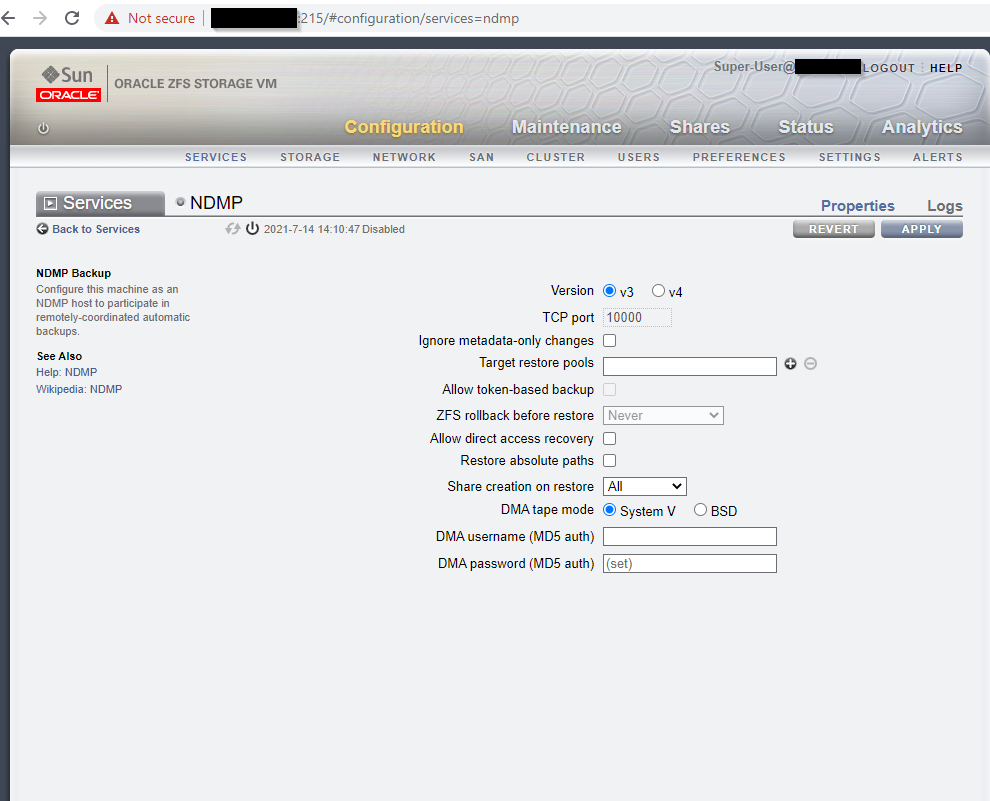
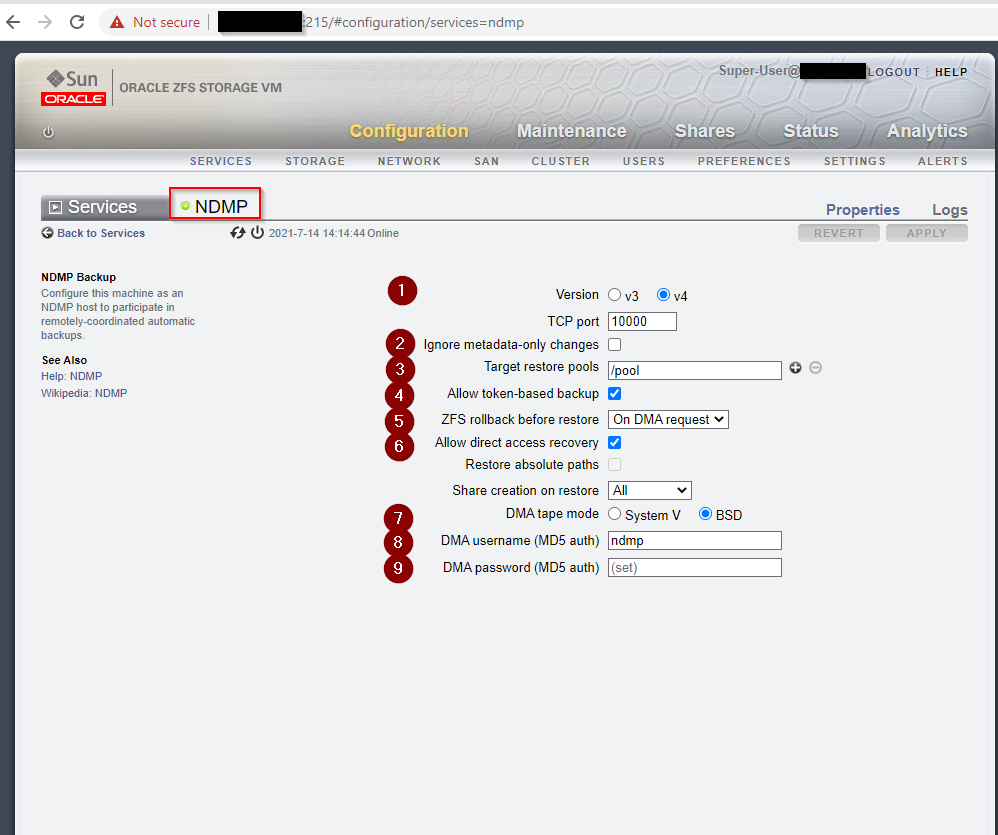
- Configure the NDMP settings as follows:
- Clear the Ignored metadata‑only changes checkbox.
- Add one or more Target restore pools (required for the NDMP service to start). Example path:
/pools- replace with your environment’s pool name. - Enable the Allow token‑based backup checkbox.
- Set ZFS rollback before restore to On DMA request.
- Leave the Allow direct‑access recovery checkbox selected.
- Click Apply to save changes.
- Set the DMA tape mode to BSD.
- Verify that the NDMP service is enabled. A green indicator icon confirms the enabled status.
Affected Products
Avamar, Avamar Plug-in for NDMPArticle Properties
Article Number: 000189647
Article Type: How To
Last Modified: 11 Nov 2025
Version: 4
Find answers to your questions from other Dell users
Support Services
Check if your device is covered by Support Services.