How to Uninstall Dell Data Guardian
Summary: Dell Data Guardian can be uninstalled by following these instructions for Windows or Mac.
This article applies to
This article does not apply to
This article is not tied to any specific product.
Not all product versions are identified in this article.
Instructions
Note:
- As of December 2019, Dell Data Guardian has reached End of Support. This product and its articles are no longer updated by Dell. For more information, reference Product Life Cycle (End of Support and End of Life) Policy for Dell Data Security. If you have any questions on alternative articles, either reach out to your sales team or contact endpointsecurity@dell.com.
- Reference Endpoint Security for additional information about current products.
Dell Data Guardian may require uninstallation to:
- Meet environment requirements.
- Troubleshoot the product.
- Address operating system incompatibility.
This article covers the steps to uninstall the product.
Affected Products:
- Dell Data Guardian
Affected Versions:
- v1.2.0 and later
Affected Operating Systems:
- Windows
- Mac
For steps on uninstalling Dell Data Guardian, click Windows or Mac.
Windows
Windows versions of Dell Data Guardian can be uninstalled through the user interface (UI) or command-line interface (CLI). Click the appropriate method for more information.
UI
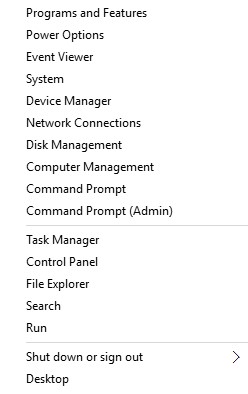
- Right-click the Windows Start Menu and then select Programs and Features.
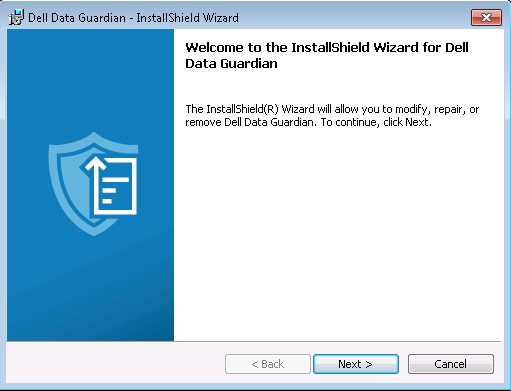
- In the Programs and Features menu, select Dell Data Guardian and then click Change.

- Click Next.
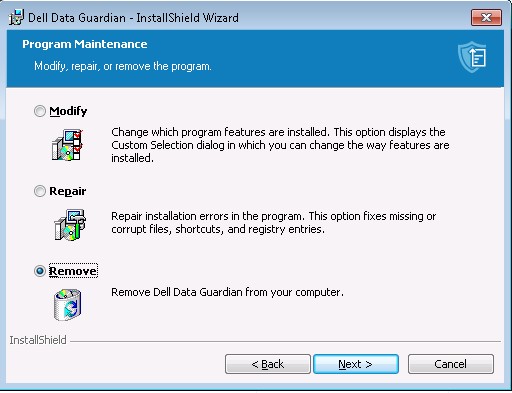
- Select Remove and then click Next.
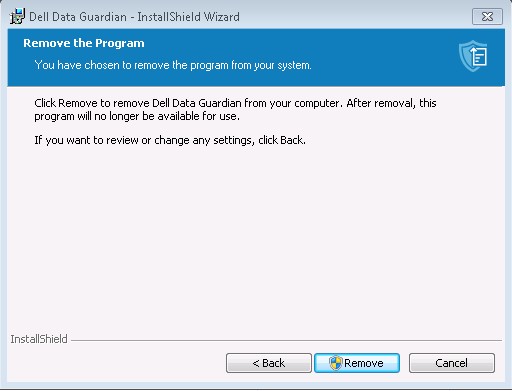
- Click Remove.
- On successful uninstall, click Finish.
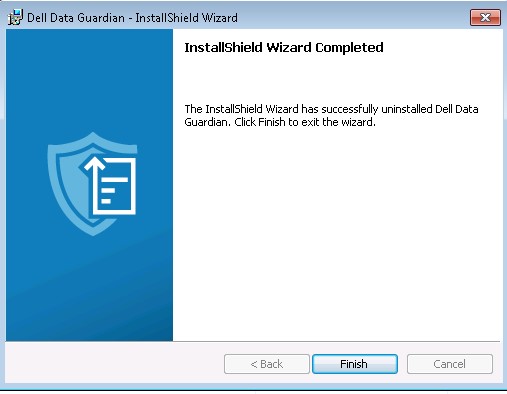
- Click Yes to reboot the computer immediately.

CLI
Dell Data Guardian allows flexibility in command-line installation options through the usage of switches.
Note: Command-line switches are not case-sensitive.
| Switch | >Meaning |
|---|---|
/V |
Passes variables to the .msi inside the executable. The content must always be enclosed in plain-text quotes. |
/S |
Silent Mode |
/X |
Uninstall Mode |
/L*V |
Logging verbose output. The content must always be enclosed in plain-text quotes. |
/QB |
User interface with Cancel button. Prompts for device reboot on installation completion. |
/QB- |
Installation UI with Cancel button. Reboots device automatically on installation completion. |
/QB! |
User interface without Cancel button. Prompts for device reboot on installation completion. |
/QB!- |
Installation UI without Cancel button. Reboots device automatically on installation completion. |
/QN |
No user interface. |
CLI Installation Examples:
Example #1:
Setup.exe /x /s /v" /l*v C:\Dell\DDGUninstall.log /qn"
Example #1 contains:
- Installer = Setup.exe
- Silent install = Yes
- Reboot post uninstall = No
- Uninstall log = C:\Dell\DDGUninstall.log
Example #2:
Setup.exe /x /s /v" /qb!-"
Example #2 contains:
- Installer = Setup.exe
- Silent install = Yes
- Reboot post uninstall = Yes
- Uninstall log = No
Mac
For more information about how to uninstall Dell Data Guardian on Mac, click Mac below.
- Open Finder or press the Command+N keys to open a new finder window.
- Choose Applications.
- Locate the Dell Data Guardian icon in your Applications list.
- Drag the Dell Data Guardian icon to the Trash icon.
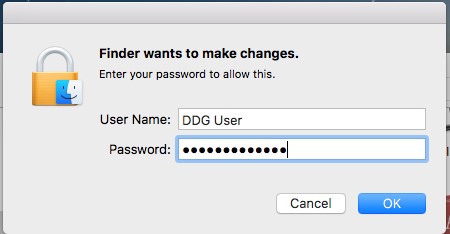
- Populate an administrative User Name and Password and then click OK.
To contact support, reference Dell Data Security International Support Phone Numbers.
Go to TechDirect to generate a technical support request online.
For additional insights and resources, join the Dell Security Community Forum.
Affected Products
Dell Data GuardianArticle Properties
Article Number: 000145355
Article Type: How To
Last Modified: 10 Sept 2025
Version: 14
Find answers to your questions from other Dell users
Support Services
Check if your device is covered by Support Services.