NetWorker:如何為 Linux NetWorker 伺服器產生 AUTHC Java 執行緒和堆積傾印
Summary: 此程序可讓 NetWorker 備份管理員在 NetWorker 支援要求 Java 執行緒和堆積傾印時,啟用 Java 虛擬機器 (JVM) 監控。這在對身份驗證相關問題進行高級診斷時可能很有用。
Instructions
先決條件:
- NetWorker 驗證 (
authc) 伺服器安裝在 Linux 平台上。 - 此程序需要重新啟動 NetWorker 服務,因此必須據此規劃伺服器停機時間。
- 用於監視 NetWorker 伺服器的 Windows 方塊需要安裝 VisualVM 工具:https://visualvm.github.io/download.html
- Oracle Java Development Kit (JDK) 必須安裝在用於啟動 VisualVM 的 Windows 方塊上,NetWorker Runtime Environment (NRE) 不支援 VisualVM。
設定 NetWorker 伺服器以在 VisualVM 中顯示資訊:
1.透過 SSH 連線至 NetWorker 伺服器,然後切換至根:
sudo su -
ifconfig -a

     nslookup NETWORKER_SERVERNAME
netstat -apno | grep 9094
4.製作
authservice 組態檔案:
cp /opt/nsr/authc-server/bin/authservice /opt/nsr/authc-server/bin/authservice_`date -I`
5.開啟 authcservice 檔案,並新增以下行:
vi /opt/nsr/authc-server/bin/authservice
-Djava.security.properties=${AUTHCCONF}/java.security \
-Dauthc.server.banner.location=${AUTHCCONF} \
-Djava.locale.providers=COMPAT \
-Dcom.sun.management.jmxremote \
-Dcom.sun.management.jmxremote.port=9094 \  # <--- Replace this another port if port 9094 is in use by another application
-Dcom.sun.management.jmxremote.rmi.port=9094 \  # <--- Replace this another port if port 9094 is in use by another application
-Djava.rmi.server.hostname=10.xxx.xxx.xxx \  # <--- Replace this with NW server IP address
-Dcom.sun.management.jmxremote.local.only=false \
-Dcom.sun.management.jmxremote.authenticate=false \
-Dcom.sun.management.jmxremote.ssl=false \
-XX:+IgnoreUnrecognizedVMOptions \
org.apache.catalina.startup.Bootstrap
6.重新啟動 NetWorker 服務:
systemctl restart networker
7.服務重新啟動後,請確認 authservice 檔案正在偵聽:
netstat -apno | grep 9094
The NetWorker authc 伺服器現在已設定為在 VisualVM 中顯示資訊。
使用 VisuaVM 為 NetWorker 認證伺服器建立執行緒和堆積傾印:
1.確認 Windows 系統可以連線至 NetWorker 伺服器上的連接埠 9094:
Powershell: tnc HOSTNAME -port 9094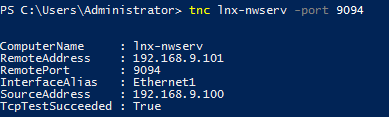
2.啟動 VisualVM。
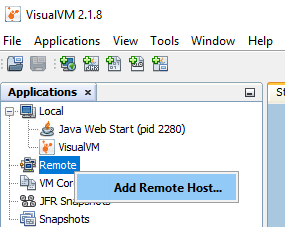
3.以滑鼠右鍵按一下遠端,然後選取新增遠端主機:
4.輸入 NetWorker 伺服器主機名稱,按一下進階設定,並新增連接埠 9094。
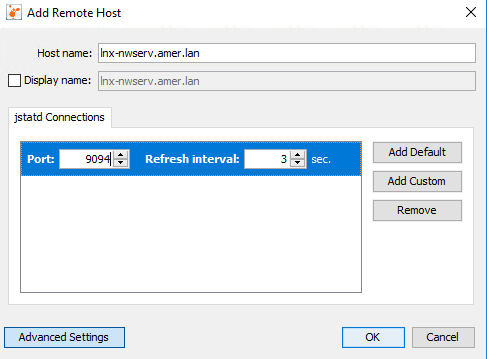
5.按一下確定。
6.以滑鼠右鍵按一下 NetWorker 伺服器項目,然後選取新增 JMX 連線。

7.在 連線欄位中, 輸入 NetWorker 伺服器主機名稱,後跟 :9094。
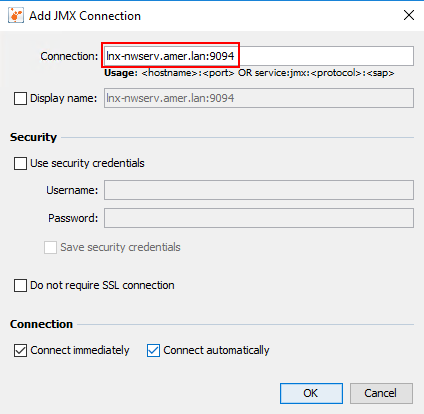
8.按一下確定。
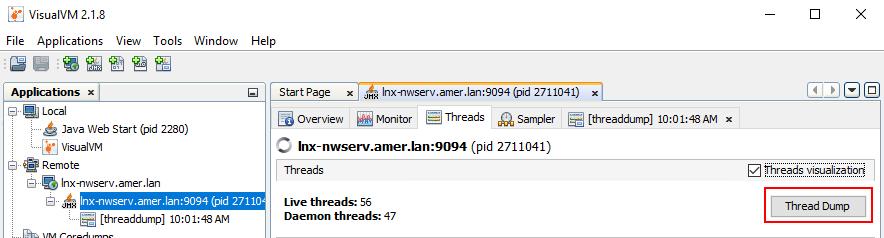
9 按兩下左側功能表中的 JMX 條目,然後選擇「線程」選項卡:

要生成線程轉儲,請按兩下線程轉儲,該轉儲在 JMX 連接下生成線程轉儲:
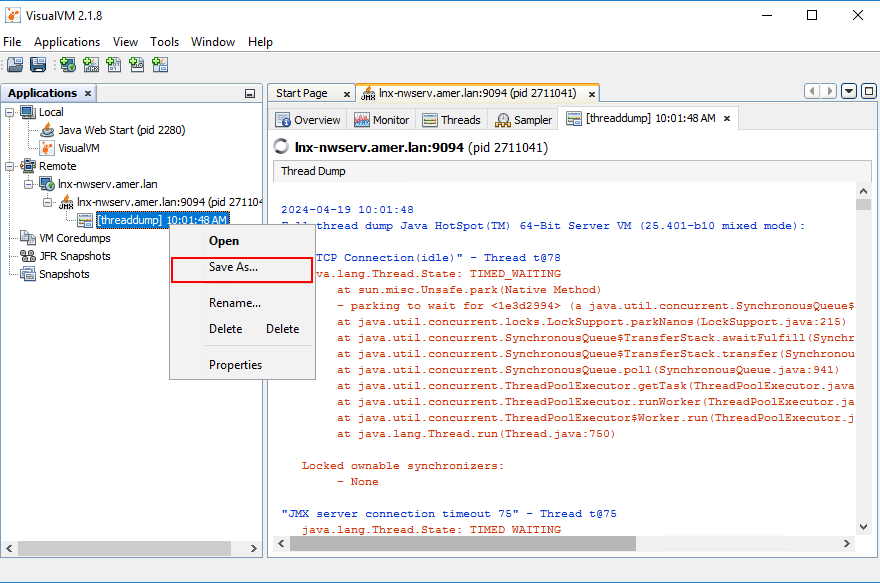
要保存線程轉儲,請右鍵按下轉儲,然後按下另存為:
要生成頭轉儲,請右鍵按下 JMX 連接,然後按兩下堆轉儲:
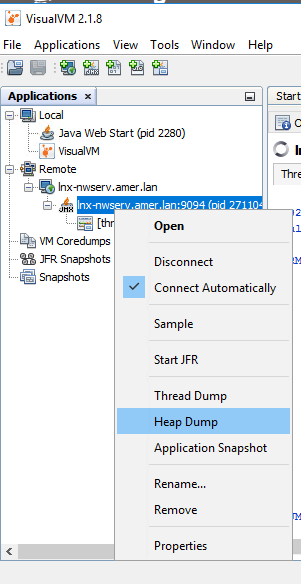
系統會提示您將堆積傾印儲存在 NetWorker 伺服器的 /tmp 目錄下:

10.完成生成線程和堆轉儲后。從 VisualVM 手動儲存並壓縮 (壓縮) 執行緒傾印。
11.將 NetWorker 伺服器上的堆積傾印連同 authc 記錄手動壓縮 (壓縮):
tar cvzf /tmp/`hostname`_`date -I`.tgz /tmp/heap* /proc/cpuinfo /proc/meminfo /nsr/authc/logs
此命令會在 NetWorker 伺服器的 /tmp 目錄中建立套裝,其中包含 NetWorker 伺服器主機名稱和日期。使用 SCP 工具複製:
NetWorker (Linux):如何將檔案複製到 Linux NetWorker 伺服器/從 Linux NetWorker 伺服器複製檔案。